Stow cutter 3 ce saw — inspection – Multiquip CS8CE20H20 User Manual
Page 17
STOW CUTTER 3 CE SAW — PARTS & OPERATION MANUAL — REV. #5 (09/22/06) — PAGE 17
STOW CUTTER 3 CE SAW — INSPECTION
Engine Oil Check
1. To check the engine oil level, place the saw on secure level
ground with the engine stopped, and the diamond blade
removed.
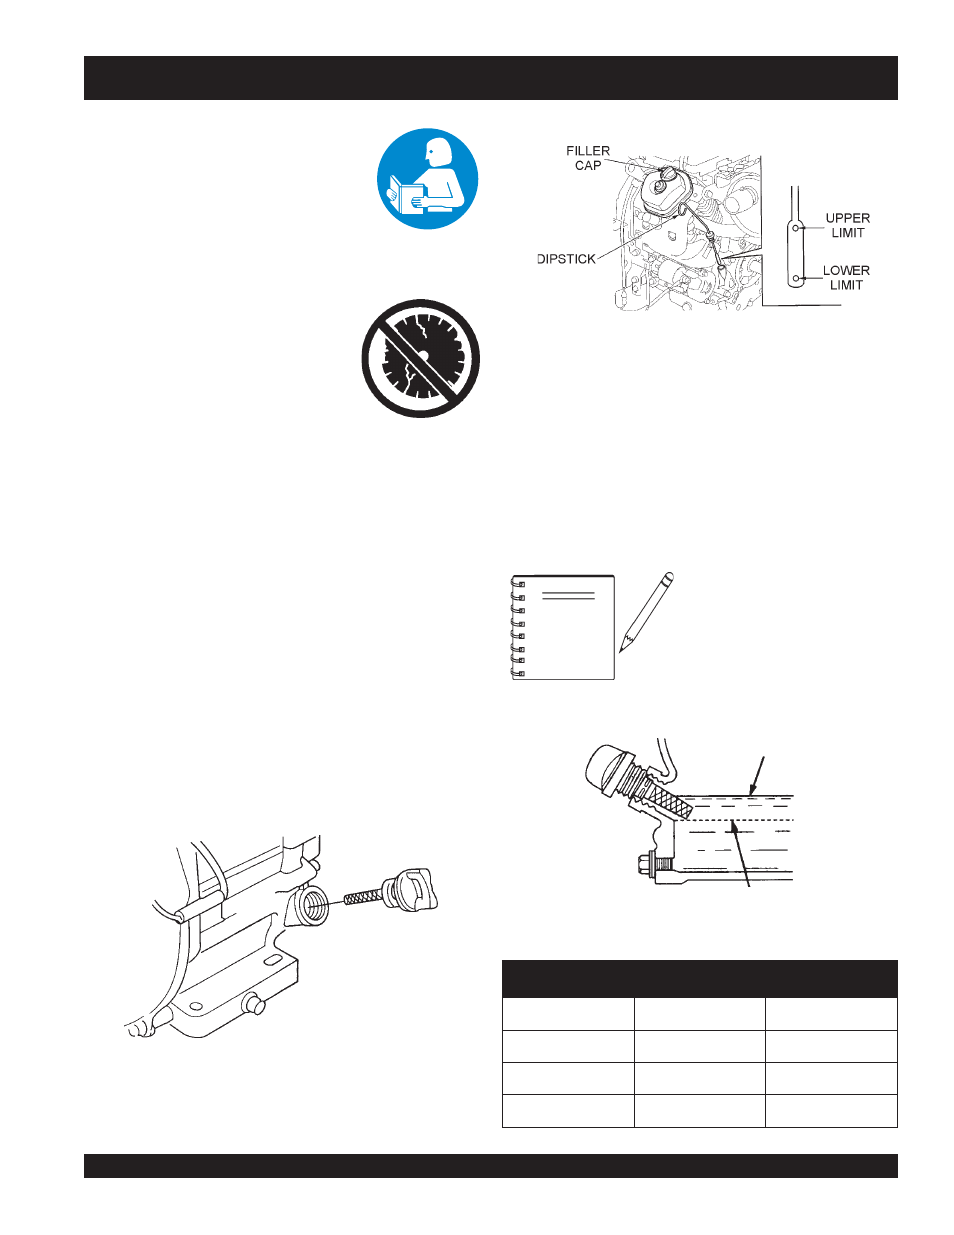
2. Remove the
filler cap/dipstick
from the engine oil filler hole
(Figure 6) and wipe it clean.
3. Insert and remove the dipstick without screwing it into the filler
neck. Check the oil level shown on the dipstick.
4. If the oil level is low (Figures 6 and 7), fill to the edge of the
oil filler hole with the recommended oil type (Table 4).
Maximum oil capacity for the Honda GX390 engine is 2.32
pints (1.1 liters) and for the Honda GX620 engine it is 3.18
pints (1.50 liters).
Figure 6A. Engine Oil Dipstick (Removal)
Reference manufacturer engine
manual for specific servicing
instructions.
Figure 7. Engine Oil Dipstick (Oil Level)
e
p
y
T
li
O
.
4
e
l
b
a
T
n
o
s
a
e
S
e
r
u
t
a
r
e
p
m
e
T
e
p
y
T
li
O
r
e
m
m
u
S
r
e
h
g
i
H
r
o
C
°
5
2
0
3
-
W
0
1
E
A
S
ll
a
F
/
g
n
i
r
p
S
C
°
0
1
~
C
°
5
2
0
2
/
0
3
-
W
0
1
E
A
S
r
e
t
n
i
W
r
e
w
o
L
r
o
C
°
0
0
1
-
W
0
1
E
A
S
HONDA 13 HP engine shown.
NOTE
Honda GX390 engine shown
Honda GX620 engine shown
PREPARATION / PRE-INSPECTION
1. Read and fully understand this manual,
the safety intructions in particular, and
the engine manufacturer's manual
supplied with the saw.
2. Select the correct blade for each application. Refer to the
Blades and Blade Placement sections on pages 17 through
19 for further information.
3. Check blade for wear or damage.
Handle all blades with care and
ALWAYS replace a damaged blade.
4. Clean the saw, removing dirt and dust,
particularly the engine cooling air inlet,
carburetor and air cleaner.
5.
Check the air filter for dirt and dust. Replace the air filter if it
is found to be dirty.
6. Check carburetor for external dirt and dust. Clean with dry
compressed air.
7.
Check fastening nuts and bolts for tightness.
8. Ensure a suitable water supply is available, hooked up, and
used. (connected via garden hose or with a water tank supply
system).
Figure 6. Engine Oil Dipstick (Removal)