Engine components – Multiquip J36S60 User Manual
Page 16
page 16 — J36S60 WaLK-BeHIND TROWeL • OpeRaTION aND paRTS maNUaL — Rev. #1 (01/23/13)
enGine cOMpOnents
INITIaL SeRvICINg
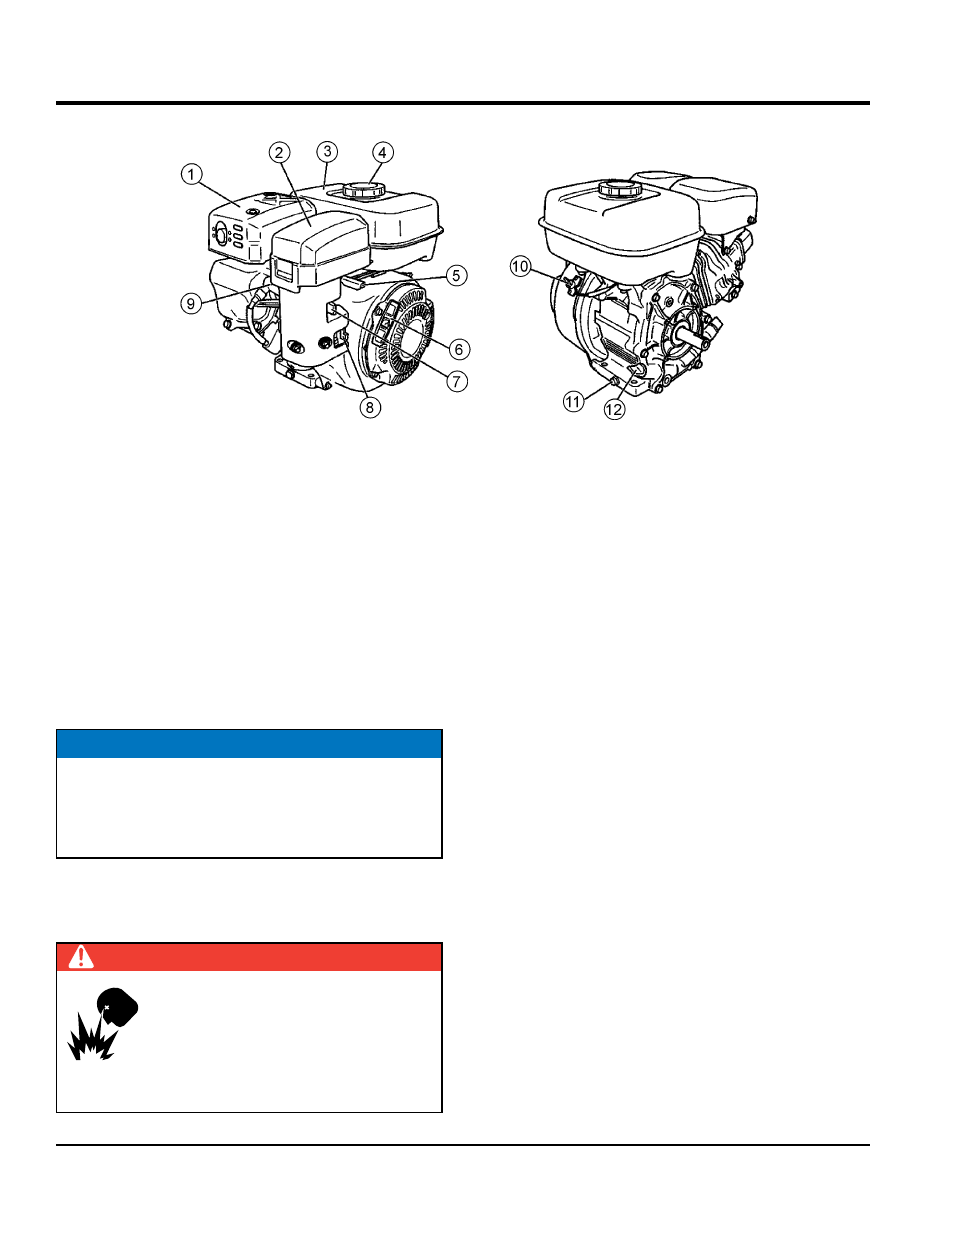
The engine Figure 3) must be checked for proper
lubrication and filled with fuel prior to operation. Refer to the
manufacturer's engine manual for instructions and details
of operation and servicing.
1.
muffler – Used to reduce noise and emissions. NeveR
touch when
hot!
2.
air Cleaner – Prevents dirt and other debris from
entering the fuel system. Remove wing-nut on top of
air filter canister to gain access to filter element.
3.
Fuel Tank – Fill with unleaded gasoline. Reference
Table 3 for fuel tank capacity. For additional information
refer to Honda engine owner's manual.
NOTICE
Operating the engine without an air filter, with a
damaged air filter, or a filter in need of replacement
will allow dirt to enter the engine, causing rapid engine
wear.
DaNgeR
Add fuel to the tank only when the engine
is stopped and has had an opportunity to
cool down. In the event of a fuel spill,
DO
NOT attempt to start the engine until the
fuel residue has been completely wiped up
and the area surrounding the engine is dry.
4.
Fuel Filler Cap – Remove this cap to add unleaded
gasoline to the fuel tank. Make sure cap is tightened
securely.
DO NOT over fill.
5.
Throttle Lever – Used to adjust engine RPM speed.
This lever is connect to the throttle lever cable located
on the handle bars. Reference throttle cable installation
procedure in this manual.
6.
Recoil Starter (pull rope) – Manual-starting method.
Pull the starter grip until resistance is felt, then pull
briskly and smoothly.
7.
Choke Lever – Used in the starting of a cold engine,
or in cold weather conditions. The choke enriches the
fuel mixture.
8.
Fuel valve Lever – OpeN to let fuel flow, CLOSe to
stop the flow of fuel.
9.
Spark plug – Provides spark to the ignition system.
Set spark plug gap according to engine manufacturer's
instructions. Clean spark plug once a week.
10.
engine ON/OFF Switch – ON position permits engine
starting,
OFF position stops engine operation.
11.
Oil Drain plug – Remove this plug to remove oil from
the engine's crankcase.
12.
Dipstick/Oil Filler Cap – Remove this cap to determine
if the engine oil is low. Add oil through this filler port as
recommended in Table 4.
Figure 3. Engine Components and Controls