Htn/hto-31v — maintenance – Multiquip HTO_31V User Manual
Page 34
PAGE 34 — HTN 31V
HTN/HTO-31V • RIDE-ON POWER TROWEL — OPERATION AND PARTS MANUAL — REV. #6 (07/09/07) — PAGE 34
HTN/HTO-31V — MAINTENANCE
Often times, if the blades are incorrectly adjusted, they will
not be able to pitch flat. This occurs when the adjusting
bolts have been raised too high. Conversely, sometimes the
adjusting bolts are too low and the blades cannot be pitched
high enough for finishing operations.
Matching Blade Pitch for Both Sets of Blades
The HTN/HTO trowels are equipped with Twin Pitch
TM
controls and may need to have blade pitch between the two
sets of blades "
syncronized". If the blades need to be
syncronized this is easily accomplished by performing the
following. Refer to Figure 31.
1.
Lift the pitch adjustment handle on either side. Once
lifted, that side is now disconnected from the Twin
Pitch
TM
system.
2.
Adjust to match the opposite side.
3.
When adjusted, lower the handle to Twin Pitch
TM
operating positio
n
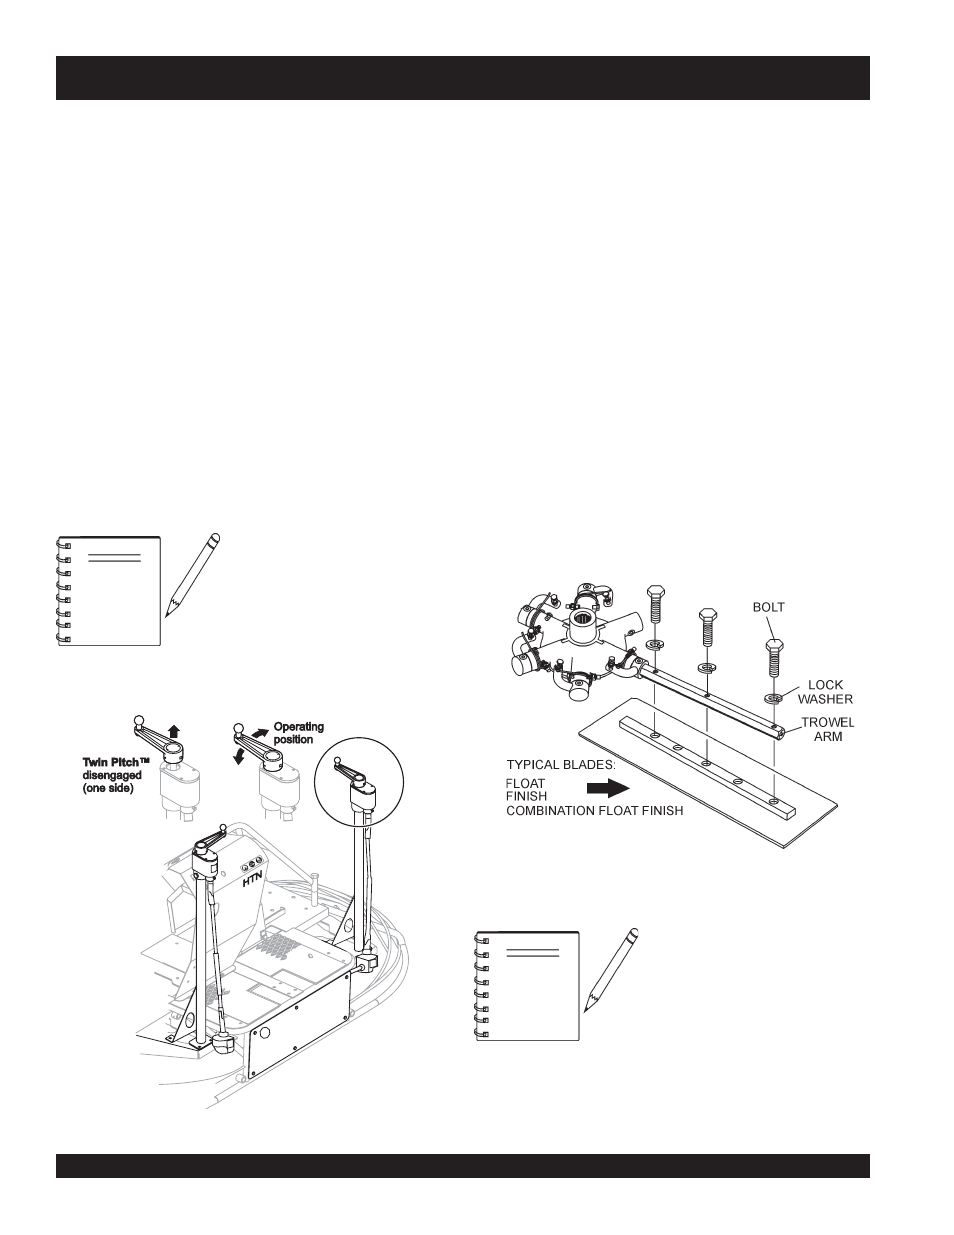
Figure 31. Pitch Towers
On a Twin Pitch
™
™
™
™
™ trowel, the
operator must lift up on one of
the pitch control handles,
disengaging the linkage between
the towers. Once this is done, a
pitch control crank can be turned
to adjust the difference. Make sure to lock the linkage back
in place when finished with the adjustments.
NOTE
Changing a Blade
It is recommended that all blades on the trowel be changed
at the
same time. If only one or some of the blades are
changed at one time, the machine will not finish concrete
consistently and the machine may wobble or bounce.
1.
Place the machine on a flat, level surface. Adjust the
blade pitch control to make the blades as flat as
possible. Note the blade orientation on the trowel arm.
This is important for ride-on trowels as the two sets of
blades counter-rotate. Lift the machine up, placing
blocks under the main guard ring to support it.
2.
Remove the bolts and lock washers on the trowel arm,
(Figure 32) and then remove the blade.
3.
Scrape all concrete and debris from the trowel arm.
This is important to properly seat the new blade.
4.
Install the new blade, maintaining the proper orientation
for direction of rotation.
5.
Affix the bolts and lock washers.
6.
Repeat steps 2-5 for all remaining blades.
NEVER allow concrete to
harden on the trowel or blades.
Immediately after each use
wash any concrete off the
trowel or blades with water, be
careful not to spray the water.
An old paint brush or broom
may help loosen any concrete
that has started to harden.
NOTE
Figure 32. Changing Blades