Cauti, Cauti caution, Warning – Multiquip SDW225SS User Manual
Page 24
PAGE 24 —SDW-225SS WELDER/GENERATOR— OPERATION & PARTS MANUAL — REV. # 2 (10/07/05)
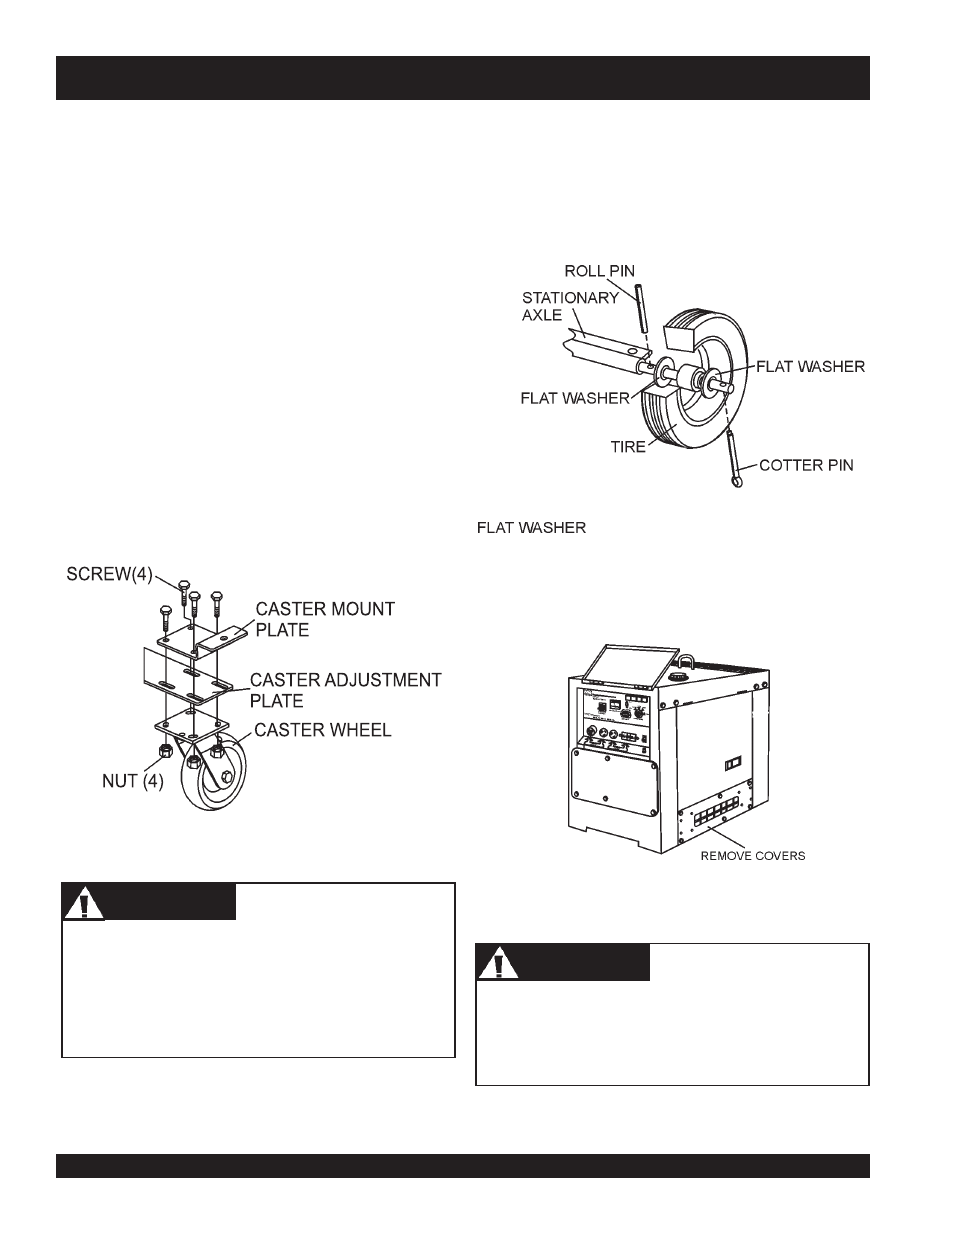
3. Remove side covers to provide access to the interior of
the cabinet. (Figure 10).
Figure 10. Removing Access Covers
Two people might be required to perform this installation
procedure safely. One person should support the axle
for another person to prevent the axle from dropping.
CAUTI
CAUTI
CAUTI
CAUTI
CAUTION
Tools:
■
■
■
■
■ Flashlight
■
■
■
■
■ Ratchet Set with 3/4", 9/16" sockets
■
■
■
■
■ Adjustable Wrench or 3/4", 9/16", 10mm open
end wrenches
■
■
■
■
■ Lifting Device of adequate capacity
2. Assemble the stationary axle (Figure 9) - Push the roll
pin through the inner axle hole. Slide a flat washer onto
the axle shaft, then put the wheel on the axle. Push the
wheel flat against the washer and roll pin and slide a flat
washer against the wheel. Then insert the cotter pin
through the outer axle hole to secure the wheel on the
axle.
Figure 9. Stationary Axle Assembly
Procedure:
1. Assemble the Caster wheels (Figure 8) - Place the Caster
mount plate on the adjustment plate so the bolt holes
line up. Insert screws through the holes in the two plates
and push the caster wheel onto the screws. Loosely
secure the caster wheel to the adjustment plate using
the provided nuts to allow for adjustment when attaching
the caster wheels to the cabinet. Repeat for the other
side of the caster wheel assembly.
Figure 8. Caster Wheel Assembly
SDW-225SS — WKT225A WHEEL KIT ASSEMBLY
The SDW-225SS welder/generator can be mounted on a
WKT225A Wheel Kit. .
Below are assembly Instructions for the WKT225 Wheek Kit.
DO NOT attempt to manually lift your generator/welder.
Use a lifting device that is rated to handle the full weight
of the equipment. DO NOT stand under the machine
while it is suspended in air.
WARNING
WARNING
WARNING
WARNING
WARNING