Metal Sales DECRA User Manual
Page 5
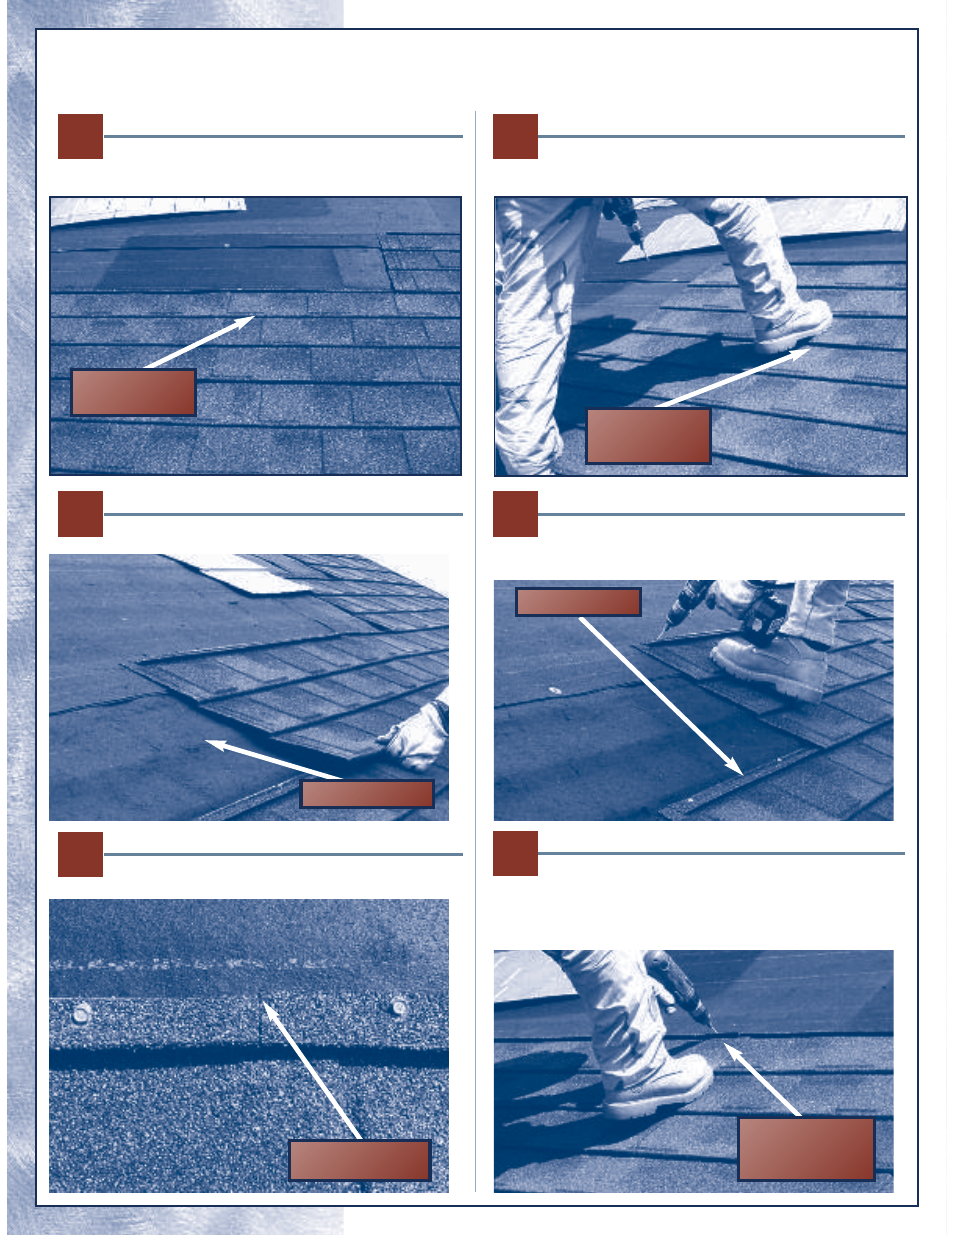
Step One
Using the recommended offset, the center of each field panel
will be placed directly above the overlap of the panels on the
previous course.
Step Two
Position the next panel into the top Clip-Lock of the panels on
the course below.
Step Three
Make sure the top Clip-Locks of each panel are flush. The
maximum allowable gap should be 3/16”.
1
2
3
Overlap of
prior course
Step Four
Once the panel is in position, firmly push (by hand or foot) on the
panel in the area that overlaps the joint of the two panels below.
This will help position the panel for fastener placement.
Step Five
After positioning the panel, firmly push (by hand or foot) on the
left side of the panel until it is locked firmly into the Clip-Lock of
the panel on the course below.
Install a fastener in the upper left
corner straight down through the panel.
Step Six
Firmly push (by hand or foot) on the right side of the panel and
make sure it is locked into the previously installed panel. Install a
fastener in the upper right portion of the panel. Placing this
fastener at a 45° angle will help draw the Shingle panel into the
proper locking position. Complete the installation with 2
additional fasteners.
Center of
panel; first
course
Clip-Lock
Screw in at
a 45
°
angle
Top Clip-Lock
Top Clip-Locks
are flush
DECRA
Shingle Field Panel Installation Helpful Hints
4
5
6