Labnet Spectrafuge 16M Microcentrifuge User Manual User Manual
Page 9
3.4 Removing the rotor
Using an adjustable or 1/4 inch wrench (some units are supplied
with a wrench) loosen the screw and remove the rotor retaining
screw/washer assembly by turning it counterclockwise. Lift the
rotor directly upward in a straight vertical motion.
Caution: Be sure to secure the rotor screw and tighten with
a wrench before further operation.
3.5 Overloading rotors
The maximum load of the rotor and the maximum speed have
been established by the manufacturer. Do not attempt to exceed
these values. The maximum speed of the rotor has been mea-
sured for liquids having a homogeneous density of 1.2g/ml or
less. In order to centrifuge liquids with a higher density it is
necessary to reduce the speed. Failure to reduce the speed
may result in damage to the rotor and centrifuge. The
revised maximum speed can be calculated with the following
formula:
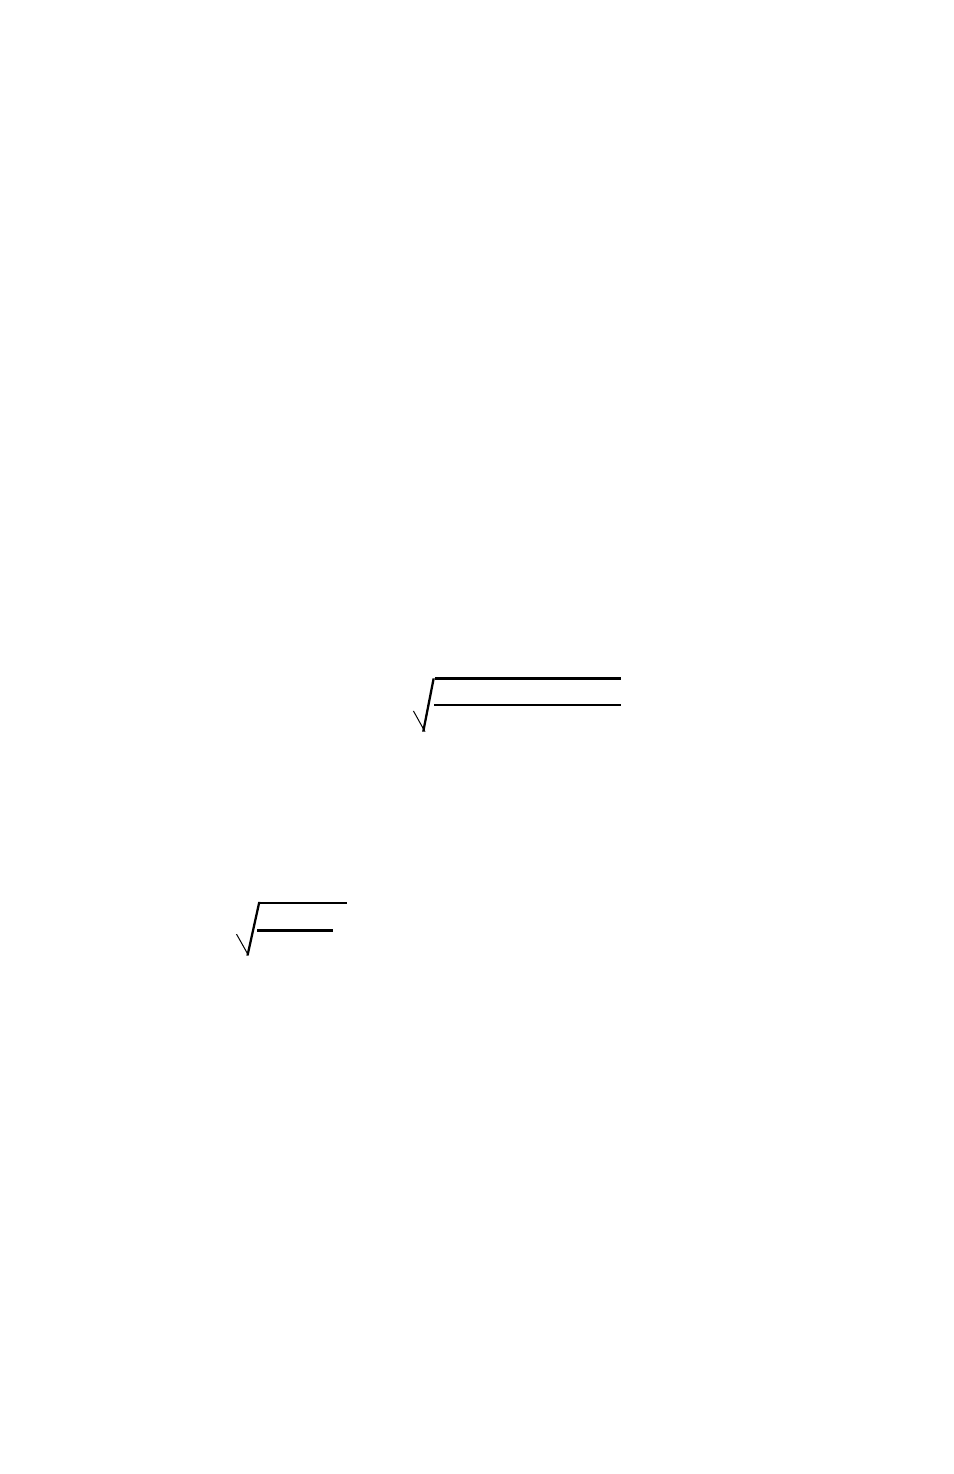
Reduced speed (n
red
) =
x max speed (n
max
)
Example:
Where the density of the liquid is 1.7, the new maximum speed
would be calculated as follows:
n
red
=
x 14,000 = 9,882 rpm
If in doubt concerning maximum speeds, please contact the
manufacturer for assistance.
4. Operation
ATTENTION: Never attempt to operate the centrifuge with
rotors or adapters that show signs of corrosion or mechanical
damage. Never centrifuge strongly corrosive materials that may
damage the rotors or accessories.
4.1 Closing the lid
After the rotor has been properly secured and loaded, close the
centrifuge lid, making sure that the interlock has been engaged.
1.2
higher density value
1.2
1.7
6