Trailer hitch for gl 1800, Installation – Kuryakyn 7641 TRAILER HITCH FOR GL1800 User Manual
Page 2
STRICTLY OBSERVE THE FOLLOWING GUIDELINES IN ORDER TO USE THE
PRODUCT PROPERLY AND AVOID POTENTIALLY DANGEROUS ACCIDENTS.
STEP 1
Read and understand all steps in the instructions before starting the installation.
Park the motorcycle on a hard, level surface and turn off the ignition. Let cool.
NO MOTORCYCLE MANUFACTURER HAS APPROVED OR
ENDORSED KÜRYAKYN TRAILER HITCHES. USE OF A TRAILER
OR TRAILER HITCH ON ANY MOTORCYCLE MAY VOID YOUR
WARRANTY AND MAY INCREASE YOUR CHANCES OF INJURY
OR ACCIDENT SITUATION.
TOWING A TRAILER BEHIND A MOTORCYCLE INCREASES THE
LIKELIHOOD OF INJURY OR DEATH TO BOTH OPERATOR AND
PASSENGER.
IF THE TRAILER FAILS TO HANDLE IN A SAFE AND
PREDICTABLE MANNER, STOP THE MOTORCYCLE AND DO
NOT OPERATE WITH THE TRAILER UNTIL YOU HAVE
DETERMINED AND CORRECTED THE PROBLEM.
YOU WILL BE WORKING AROUND THE ENGINE AND EXHAUST
SYSTEM DURING INSTALLATION. ENSURE THAT THE ENGINE
AND EXHAUST SYSTEM HAVE FULLY COOLED TO PREVENT
INJURY.
Inspect all fasteners and components before every use.
Küryakyn is not aware of any current state or federal guidelines for
pulling a trailer with a motorcycle. We suggest that you do not
exceed the motorcycle manufacturers Gross Vehicle Weight limits
when pulling a loaded trailer.
STEP 2
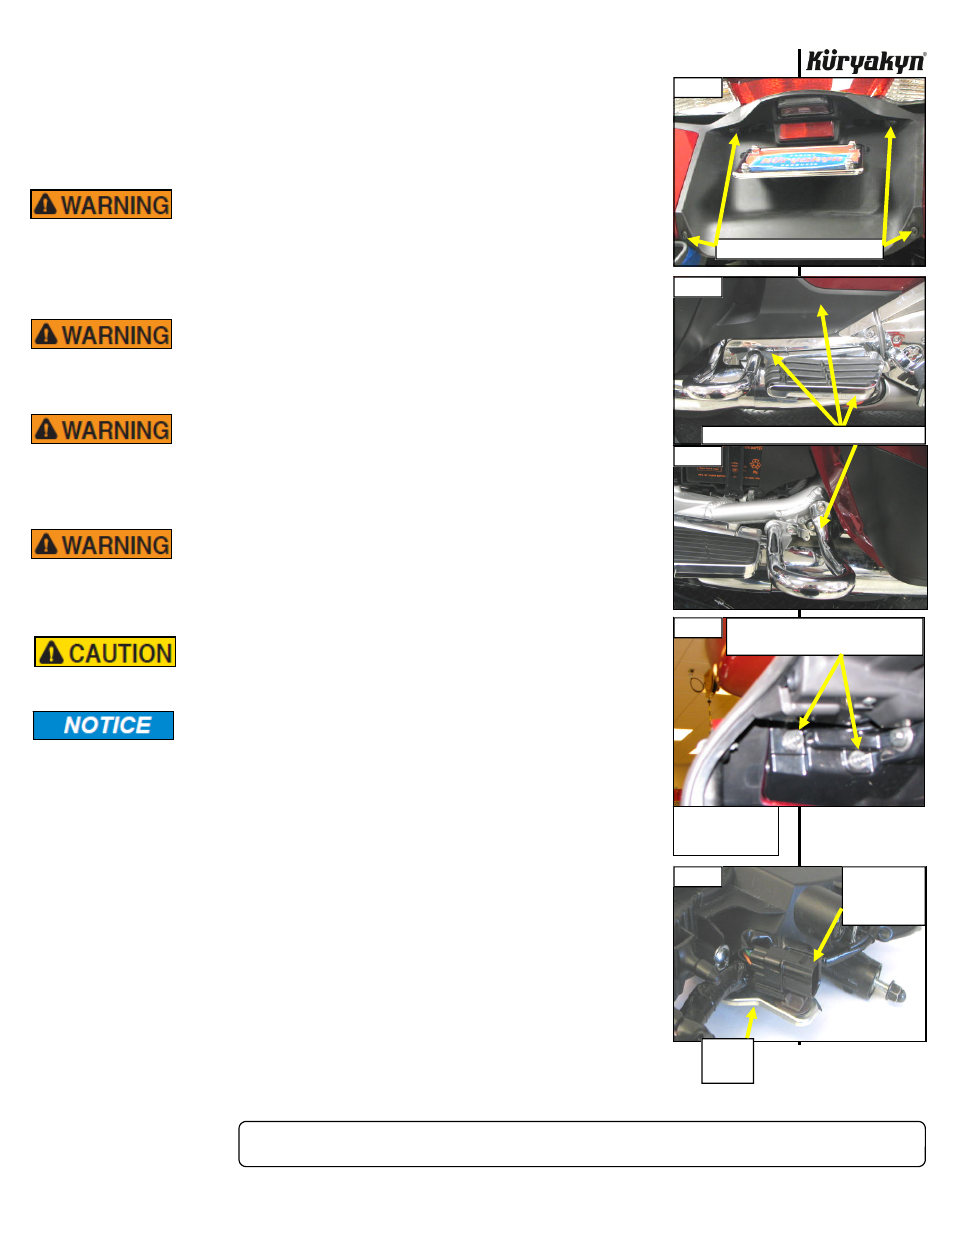
Place the bike on its center stand, if equipped. Using a hex wrench remove the
four button socket cap screws that hold the rear fender panel in place. PIC 1
STEP 3
Remove the floorboard, floorboard cover, side cover (PIC 2) and the rear guards
(PIC 3) from each side of the bike.
STEP 4
Remove the rear turn signal housing from the motorcycle. There are two acorn
nuts inside the rear of each saddlebag that secure the housing to the motorcycle.
PIC 4
PAGE
2
TRAILER HITCH for GL 1800
INSTALLATION
-cont.-
PIC 1
REMOVE THESE FOUR SCREWS
PIC 3
REMOVE THESE PARTS FROM BOTH SIDES
PIC 2
PIC 5
PIC 4
REMOVE THESE ACORN NUTS IN BOTH
SADDLEBAGS TO REMOVE HOUSING
REMOVE THIS
CONNECTOR
FROM THE
MOUNT
REMOVE
THIS
MOUNT
INSIDE REAR OF
RIGHT SADDLEBAG
SHOWN