Buffalo Technology WLI-CB-G54A User Manual
Page 2
1
2
54 Mbps* Wireless Notebook Adapter-g
Windows XP
Installation & Configuration
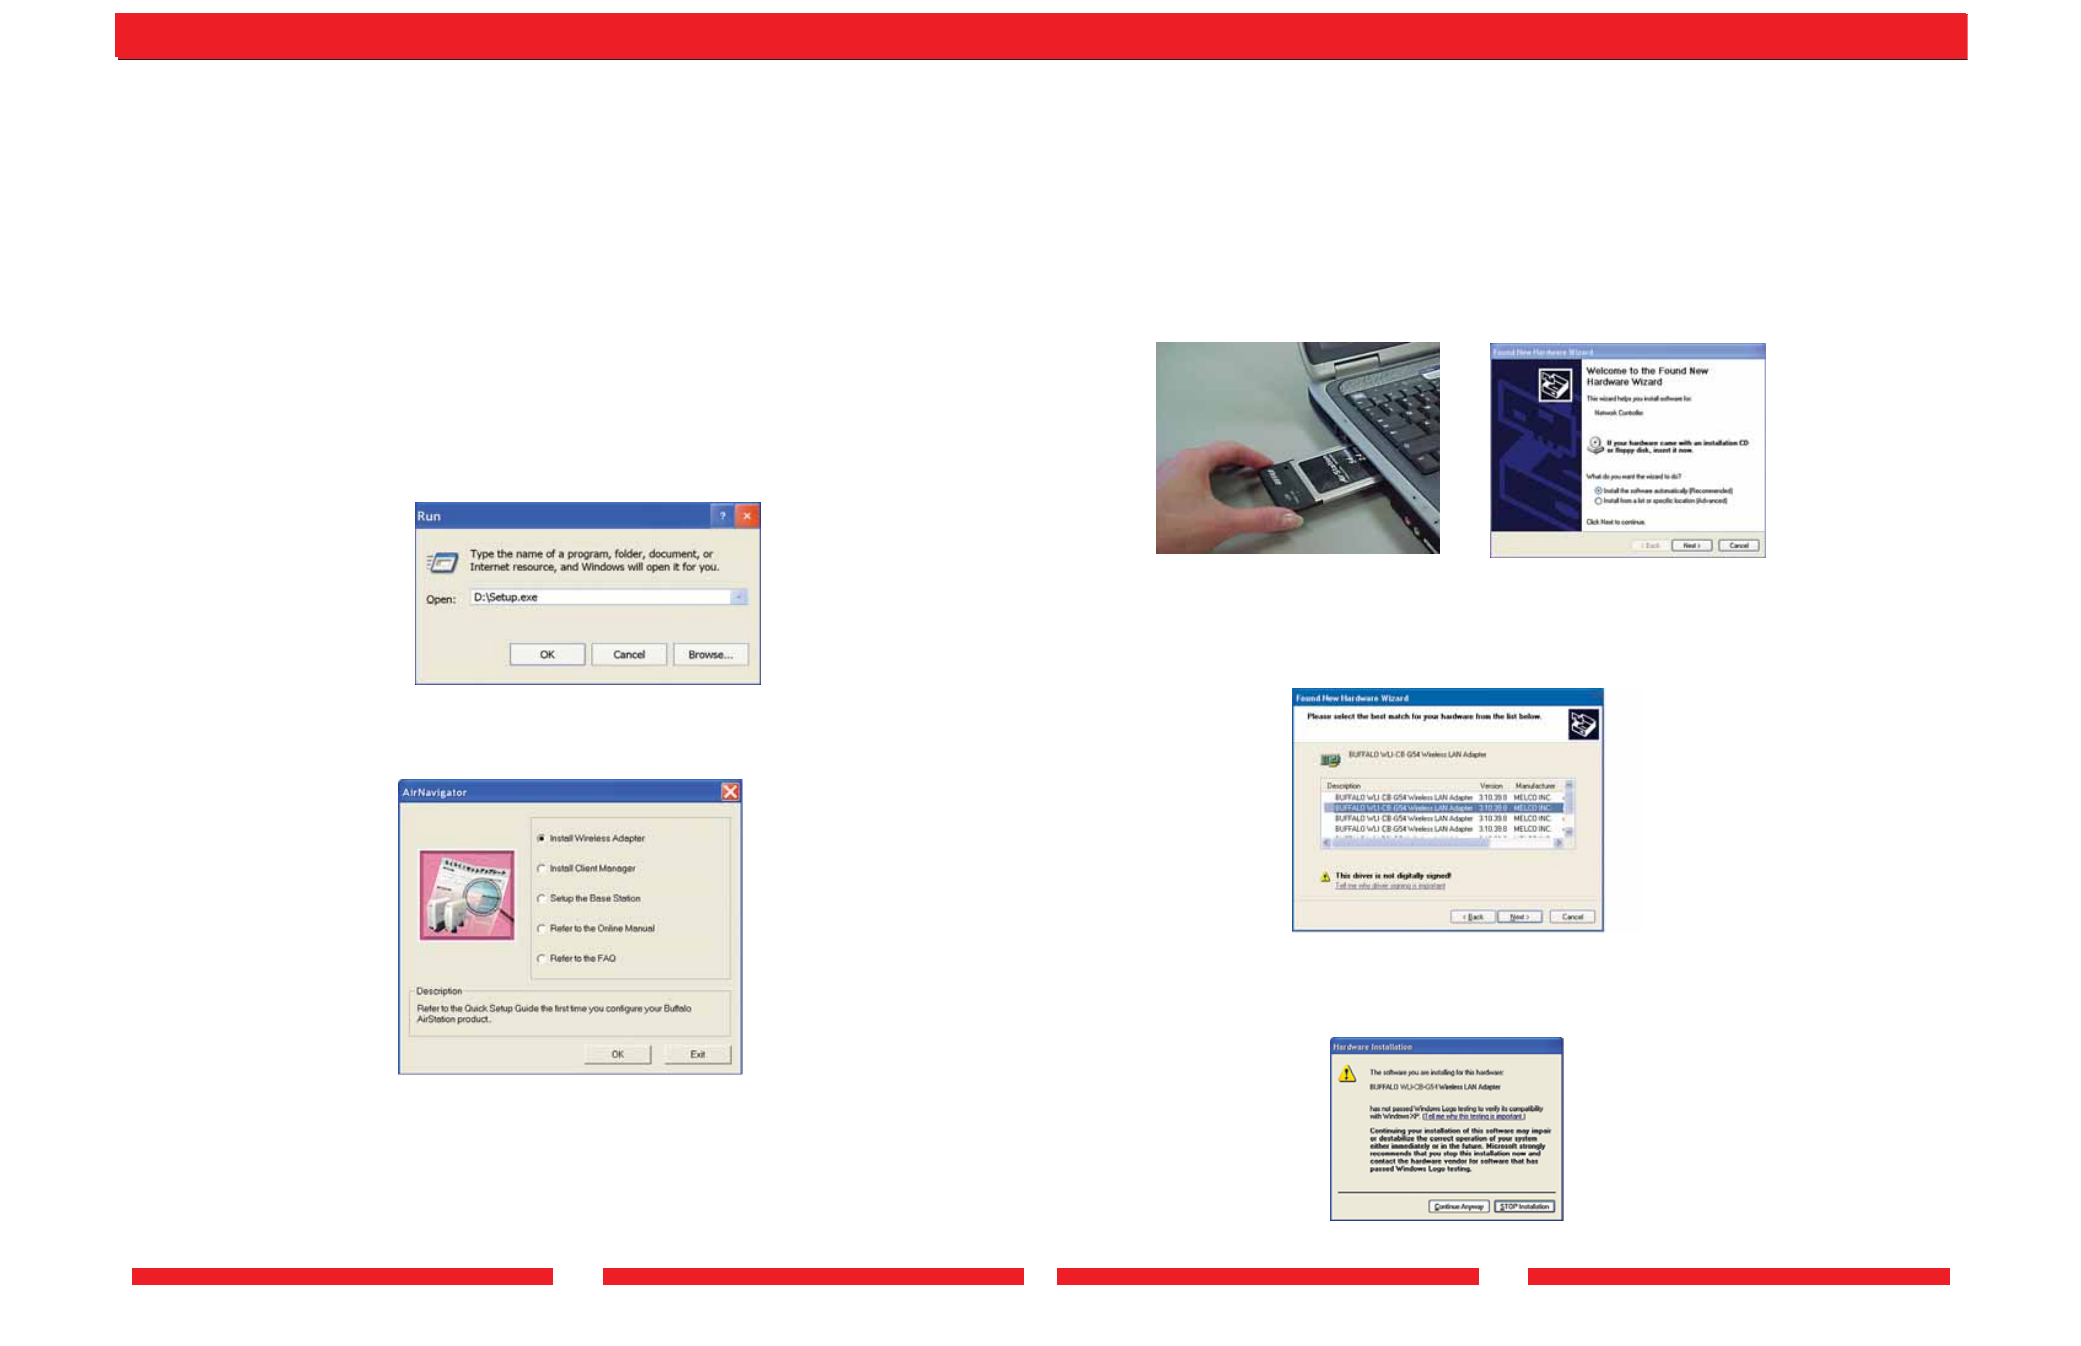
1. Installing the Wireless Notebook Adapter-g Drivers:
a. Insert the
AirNavigator CD into the CD-ROM drive of the notebook. The Air
Navigator Setup Wizard launches automatically. If the Air Navigator Setup Wizard
does not launch automatically, launch the wizard manually by selecting
Start>>Run
to open the
Run dialog box. Enter D:\Setup.exe in the Open field. D:
represents the letter assigned to the CD-ROM drive. If another letter is assigned
to the CD-ROM drive, your command should refelect that difference. Click the
OK button to launch the wizard.
b. Select
Install Wireles Adapter. Click the OK button to begin the installation
process.
c. Review the
Software License Agreement. Click the Yes button to confirm your
agreement with the terms and continue installing the Wireless Notebook Adapter
drivers. Click the
No button to abort the installation process.
2. Installing the Wireless Notebook Adapter-g:
a. Insert the Wireless Notebook Adapter, with the Buffalo logo facing up, into an
available CardBus slot. CardBus slots are usually located on the left or right side of
the notebook. Once the Wireless Notebook Adapter is installed correctly, the
Found New Hardware Wizard will launch automatically. If the Found New
Hardware Wizard does not launch, remove the Wireless Notebook Adapter and
restart the notebook. Re-insert the Wireless Notebook Adapter once the
notebook has rebooted.
b. Select
Install the software automatically. Click the Next button.
c. Select the driver you want to install. If multiple drivers are listed, select the most
recent driver version. Click the
Next button.
d. If a window opens, stating that your driver does not pass Windows Logo testing,
click the
Continue Anyway button. When the Wireless Notebook Adapter is
successfully installed, click the
Finish button. Restart your notebook if prompted.