Wall works guide, Apply, Installation – Georgia-Pacific DensArmor Plus Interior Panels User Manual
Page 2: Orange, Densarmor plus, 9 (12.7 mm) or, 9 (15.9 mm) densarmor plus panels may be applied, Materials • densarmor plus, 2 of 8
W
ALL
WORKS
GUIDE
®
ORANGE
Apply
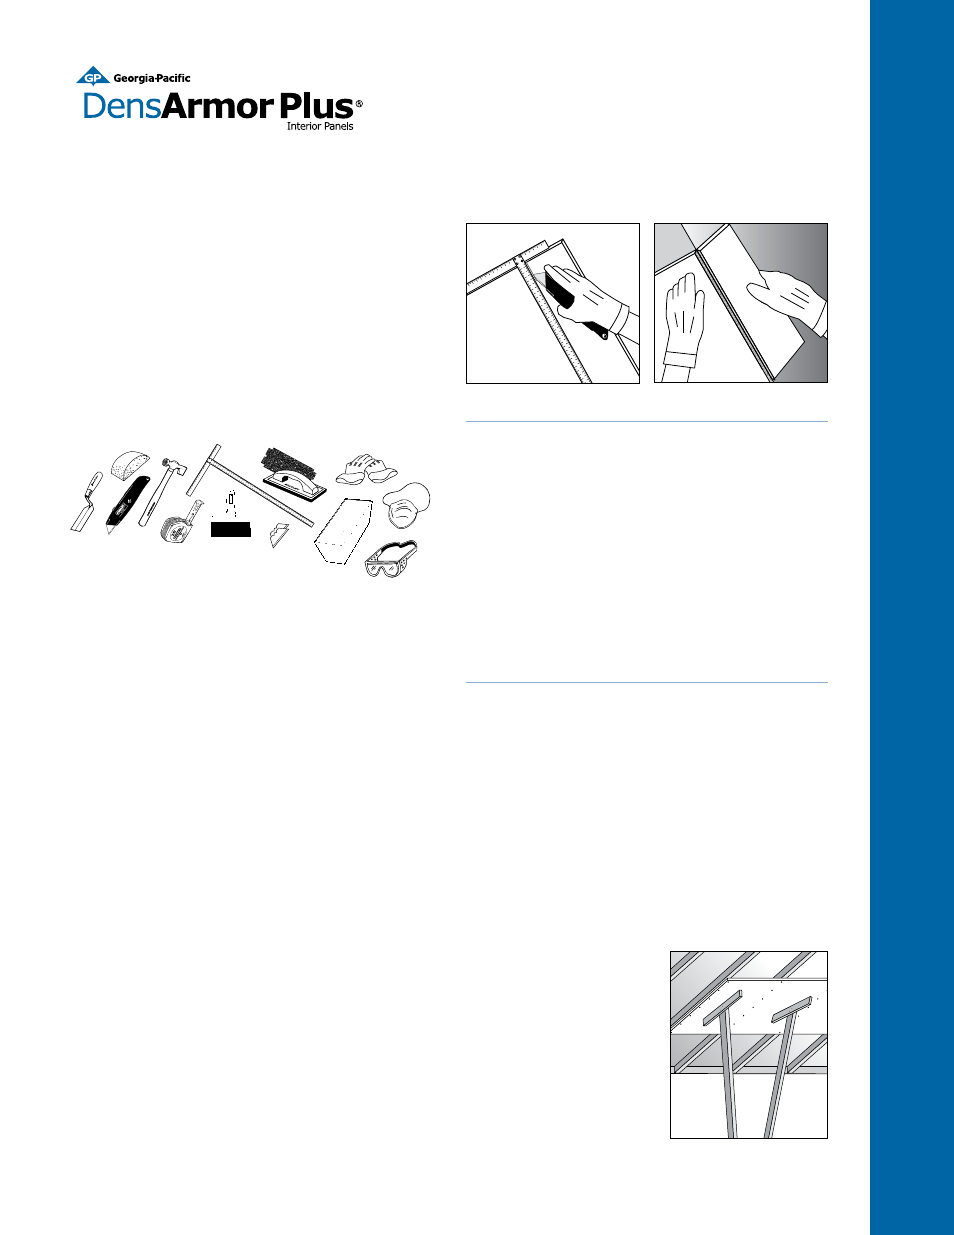
Cut
Using your T-square or straightedge and drywall knife, score
the gypsum panel completely through the facer. Then
use firm, even pressure to snap the board along the cut.
Fold back the board, and use the knife to cut the back
facer. Smooth rough edges.
Receptacle Openings, Etc.
Carefully measure openings for receptacles, switches, etc.
from the edge and end of the board, and mark guidelines
on the face. Use a keyhole saw to cut the openings. Make
sure your measurements and cuts are accurate, or the
cover plate you install later on will not conceal the hole.
Installation
DensArmor Plus
panels are installed in a similar manner
to traditional paper-faced drywall. DensArmor Plus panels
should be installed according to the most current versions
of Gypsum Association Publication GA-216 “Application
and Finishing of Gypsum Panel Products” and ASTM C
840–“Standard Specification for Application and Finishing
of Gypsum Board for Non-Fire Rated Construction.” For
best results, abut DensArmor Plus panels against regular
paper-faced wallboard only at inside or outside corners to
eliminate transitions in the field of a wall or ceiling. Adjust
fastening tools to insure that the fasteners are not over-
driven through the face of the board. Nails and screws
should be driven with the heads slightly below the surface
of the panel.
Ceilings
For ceilings, always use nails
or screws (mechanical attach-
ment). Nails should be spaced
at 79 (178 mm) intervals and
screws at 129 (305 mm) inter-
vals, around the edges (about
3
⁄
8
9 [9.5 mm] from the edge),
and through the center of the
boards. Make sure you hit the
center of the ceiling joists. For
joists that are 169 (406 mm) o.c.,
1
⁄
2
9 (12.7 mm) or
5
⁄
8
9 (15.9 mm) DensArmor Plus panels may be applied.
15
14
13
12
11
10
9
8
7
6
5
4
3
2
2
3
4
5
6
7
8
9
10
11
12
13
14
15
16
17
18
19
20
21
22
23
24
25
26
27
28
29
30
31
1
2
3
4
5
6
32
33
34
35
36
37
38
39
40
41
42
43
44
45
46
47
2
3
4
5
6
7
8
9
10
11
12
13
14
15
16
17
18
19
20
21
22
23
24
25
26
27
28
29
30
31
32
33
34
35
36
37
38
39
40
41
42
43
44
45
46
47
Materials
• DensArmor Plus
®
Interior Panels
Use our online calculator to estimate the number
of pieces you’ll need for your project. Go to
www.densarmorplus.com, choose a product
and click the Installation tab.
• Fasteners
• Cornerbeads (if needed)
• Joint compound
• Paper or fiberglass tape for the joints
• Primer and paint or other wall covering
Tools
The basic tools you’ll need are:
1. Drywall knife with heavy-duty blade
2. Drywall hammer or regular crown-headed
carpenter’s claw hammer
3. 48 T-square or steel straightedge
4. Steel tape measure
5. Keyhole or utility saw
6. Joint finishing knives— 59 (127 mm) and
109 (254 mm) blades
7. Plastic pan for joint compound
8. Sandpaper, medium texture (80 to 100 grit) and
sanding block for joint finishing
9. Damp sponge
10. Pencil
11. Safety glasses
12. Dust mask
13. Protective gloves
Follow these standard work practices: Wear a loose-fitting,
long-sleeved shirt and long pants, protective gloves and
eye protection (goggles or safety glasses with side shields).
Wear a dust mask or NIOSH/MSHA approved respirator
as appropriate when sanding. Additional protection may
be needed when very dusty. For additional product
safety and use information, including MSDS, go to
www.buildgp.com/safetyinfo.
Caution: When working with tools, always
wear approved safety glasses.
PAGE
2 of 8