Assembly, Helpful hints – Gardman Gothic Arch User Manual
Page 2
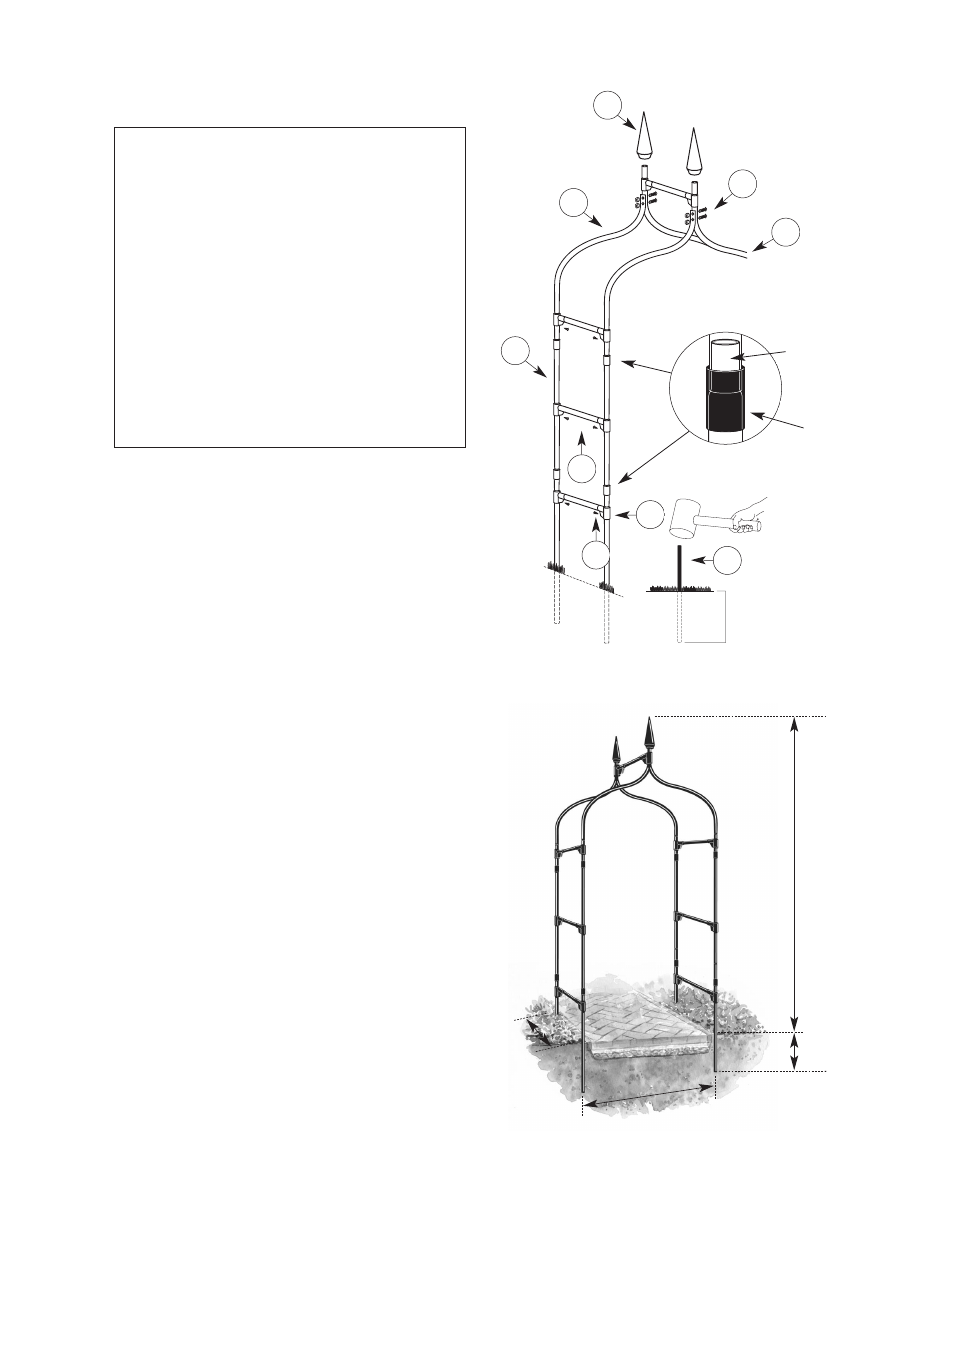
1. Slide the "T" joints (B) over the straight
tubes (A) and fit moisture protection
sleeves (C) as illustrated to assemble the
eight straight tubes (A). Slide the
moisture protection sleeve half way onto
the female (upper) joint before pushing
the male (lower) joint into it. Do not
secure 'T' joints with screws until you
have carried out section 6 below to allow
for final adjustments.
2. Fit the top curved tubes (D, E) in a similar
way and join the tops with the nuts and
bolts (J) provided. Fit the top 'T' joints.
3. Connect both halves of the arch with the
struts (F) by pushing the struts into the
lateral (vacant) slots of "T' joints.
4. Fit the finials (H).
5. Place arch in desired location and mark
leg positions on the ground. Remove
arch and drive ground hole maker (G) to
0.38m deep (1' 3"). Remove hole maker
and repeat for remaining legs. Insert legs
into holes and push home. Firm earth
around legs.
6. Carry out final adjustments to strut
positions and secure 'T' joints to tubes
using assembly screws (I).
Helpful hints:
You may find it easier to assemble your
arch horizontally on its side and then
carefully stand it upright to install.
Soaking the moisture protection sleeves
in warm water for a few minutes prior to
fitting will make them more malleable
and will aid fitting.
Please note: “T” joints (B) should be
positioned either above or below the
straight tube connection points: do not
attempt to use the “T” joints (B) to
connect the straight tubes (A) together.
Assembly
0.38m
H
D
G
J
A
E
B
F
I
Joint
Moisture
Protection
Sleeve
C
1.4m
(4'7")
0.47m
(1'6
1
/
2
")
2.57m
(8'5")
0.38m
(1'3")
All sizes approx.
BELOW GROUND
HEIGHT ABOVE
GROUND
WIDTH
DEPTH
TO
TAL HEIGHT BEFORE FITTIN
G:
2.95m
(9'8")