Assembly, Helpful hints – Gardman Easy Obelisk User Manual
Page 2
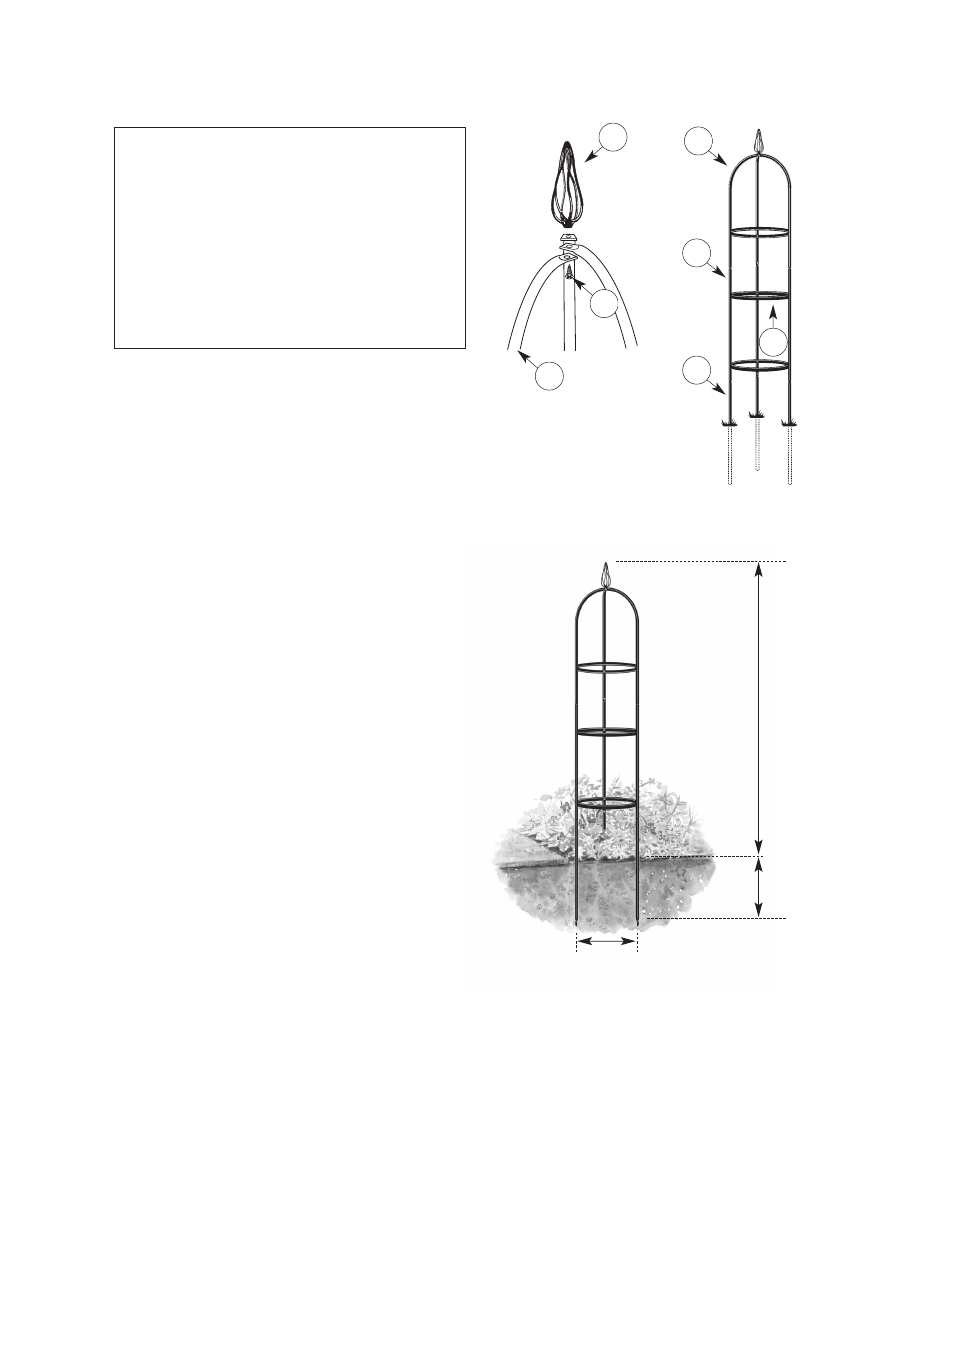
1. Assemble the three sides as shown
(A, B and C).
2. Fit the finial (E) with the retaining
screw (G).
3. Attach the three rings (D) with
the assembly screws (F).
4. Place assembled obelisk in desired
location. If the ground is soft the
obelisk can be pushed into the ground.
Where the ground is particularly hard
fitting can be aided by either watering
the ground or pushing a suitable rod or
spike in first. A depth of approximately
0.30m (1') is recommended.
Helpful hints:
You may find it easier to assemble your
obelisk horizontally on its side and then
carefully stand it upright to install.
If the screw holes on the poles are
covered with a thin layer of the
protective coating, carefully remove this
by pushing a small nail through the
coating.
Assembly
0.33m
(1'1")
1.63m
(5'4")
0.30m
(1')
All sizes approx.
BELOW GROUND
HEIGHT ABOVE
GROUND
WIDTH
TO
TAL HEIGHT BEFORE FITTIN
G:
1
.93m
(6
'4
")
A
B
C
E
D
G
E