Gardman 1-Tier Heavy Duty Staging User Manual
Page 2
Section 4 (Fig C)
t Bolt the two long horizontal struts (K3-2)
between the legs (K1-2) at the front and
back of the staging.
t Bolt the two short struts (K3-1) between
the legs (K1-2) at both ends of the staging
.
t Add the four long braces (K5-2) between
the legs (K1-2) and the slat supports
(K2-2) at the font and back of the staging
.
t Add the four short braces (K5-1) between
the legs (K1-2) and the short struts (K3-1)
at both ends of the staging .
t Ensure all screws and nuts are tightened.
Customer Helpline: 01406 372227
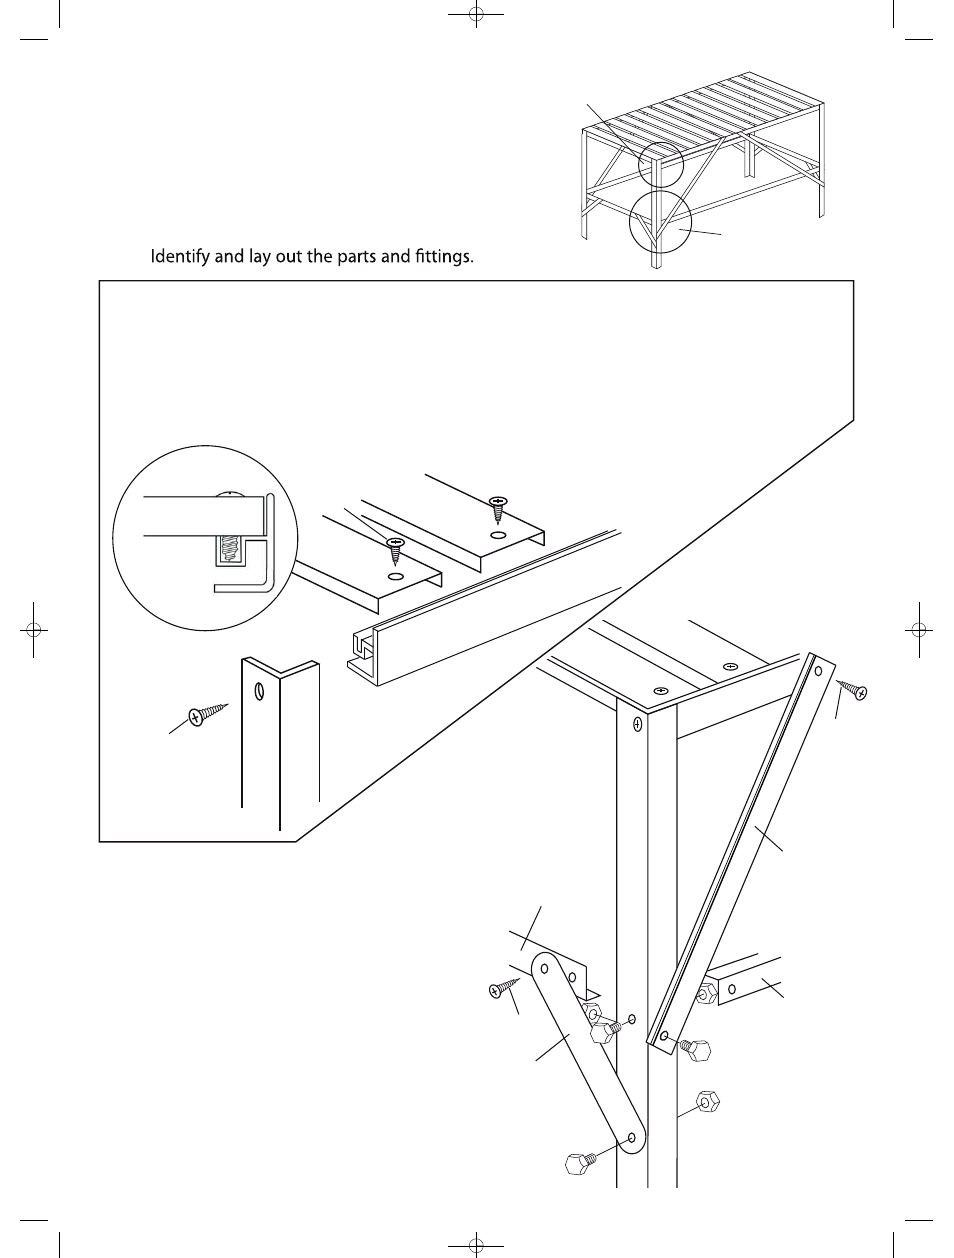
Section 1
Tools:
Flat and crosshead screwdrivers
10mm Spanner
Section 2
Before you start:
Section 3
Assembly:
t Screw the slats (K4-3) to the supports (K2-2) using the self-tapping screws (619),
t
spacing evenly (32mm approx), or as required.
t Screw the legs (K1-2) to the ends of the slat supports (K2-2) using the self-tapping
t
screws (616).
Fig B
K4-3
Fig A
619
K2-2
K1-2
616
Fig C
K2-2
K1-2
K3-3
K5-1
K3-2
66
K3-1
66
Fig. C
Figs.
A & B
08862
08862_1T_HDStaging_Instructions 20/10/05 1:20 am
Page 2