Applications – Behringer M IC 2200 User Manual
Page 15
15
ULTRAGAIN PRO MIC2200
5. APPLICATIONS
This section describes some typical applications of the BEHRINGER ULTRAGAIN PRO. Starting from the
following basic settings you can use it to solve the majority of audio problems.
Please take your time to study the application examples, so as to be able to fully exploit the ULTRAGAIN PRO
and its variety of features.
Basically, the ULTRAGAIN PRO can be used in five areas of application:
1.
Using the ULTRAGAIN PRO as a high-quality microphone preamp.
2.
Using the ULTRAGAIN PRO to convert home recording to studio levels, and vice versa.
3.
Using the ULTRAGAIN PRO to balance unbalanced signals (DI box).
4.
Using the ULTRAGAIN PRO as a parametric equalizer specifically tweaking the frequency response.
5.
Using the ULTRAGAIN PRO to enhance the sound of the program material by adding tube warmth.
5.1 The ULTRAGAIN PRO as a microphone preamplifier
Before you can use the BEHRINGER ULTRAGAIN PRO as a preamp, we recommend that you study the
various functions of the device. The high gain factors provided by the microphone preamp can produce extreme
levels on the output side, which may damage subsequent devices. So, you should start with the following basic
setting:
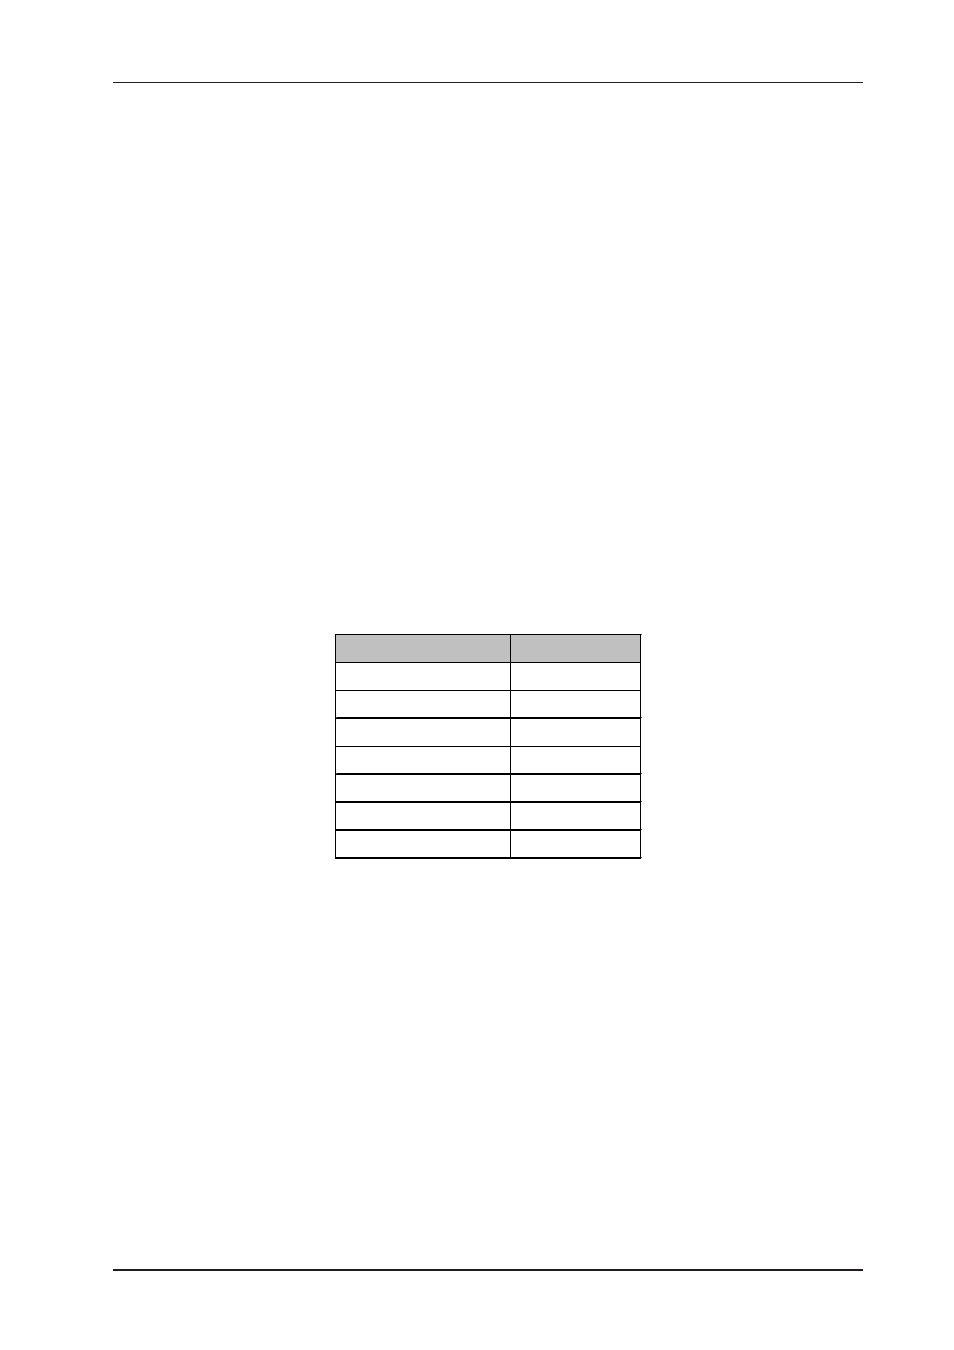
5.1.1 Basic setting
Control elements
position
+48 V switch
OUT
MIC GAIN control
10 dB
MIC/LINE switch
LINE
PHASE REV. Control
OUT
LO CUT switch
OUT
EQ IN/OUT switch
OUT
OUTPUT control
0 dB
Tab. 5.1: Basic setting of the ULTRAGAIN PRO
Reduce the volume level of the subsequent audio system to a minimum, and connect a microphone to the XLR
input connector on the BEHRINGER ULTRAGAIN PRO. Use either the jack or XLR output connectors to
connect the audio system. Owing to its output-side servo balancing circuit, the ULTRAGAIN PRO detects
whether you use a balanced or unbalanced configuration and adjusts the level internally.
Now, power up the entire equipment and press the MIC/LINE switch to activate the microphone preamp. If you
wish to use a condenser mic requiring +48 V phantom power, please press the +48 V switch (to avoid electrical
damage, please read chapter 5.1.5 +48 V switch below).
5.1.2 MIC GAIN control
Configure the equipment according to the application on hand, speak into the microphone and turn the GAIN
control clockwise until the 0 dB LED lights up. If your DAT recorder, mixing console or other subsequent
devices have high-precision level meters, you can use these to verify the correct level setting.
The maximum output level depends on the device that follows next in the audio chain, and must therefore be
set specifically. The high-precision level meter on the ULTRAGAIN PRO indicates the current operating level.
The CLIP LED lights up at a level of +18 dBu signaling that you have an additional headroom of 5 dB available,
5. APPLICATIONS