Installing the hood and acoustic pad, Figure 3 : installing the hood and pad, Restore power to the dimmer rack – ETC Sensor SR24-48 Sssh User Manual
Page 2
Sensor Sssh option
2
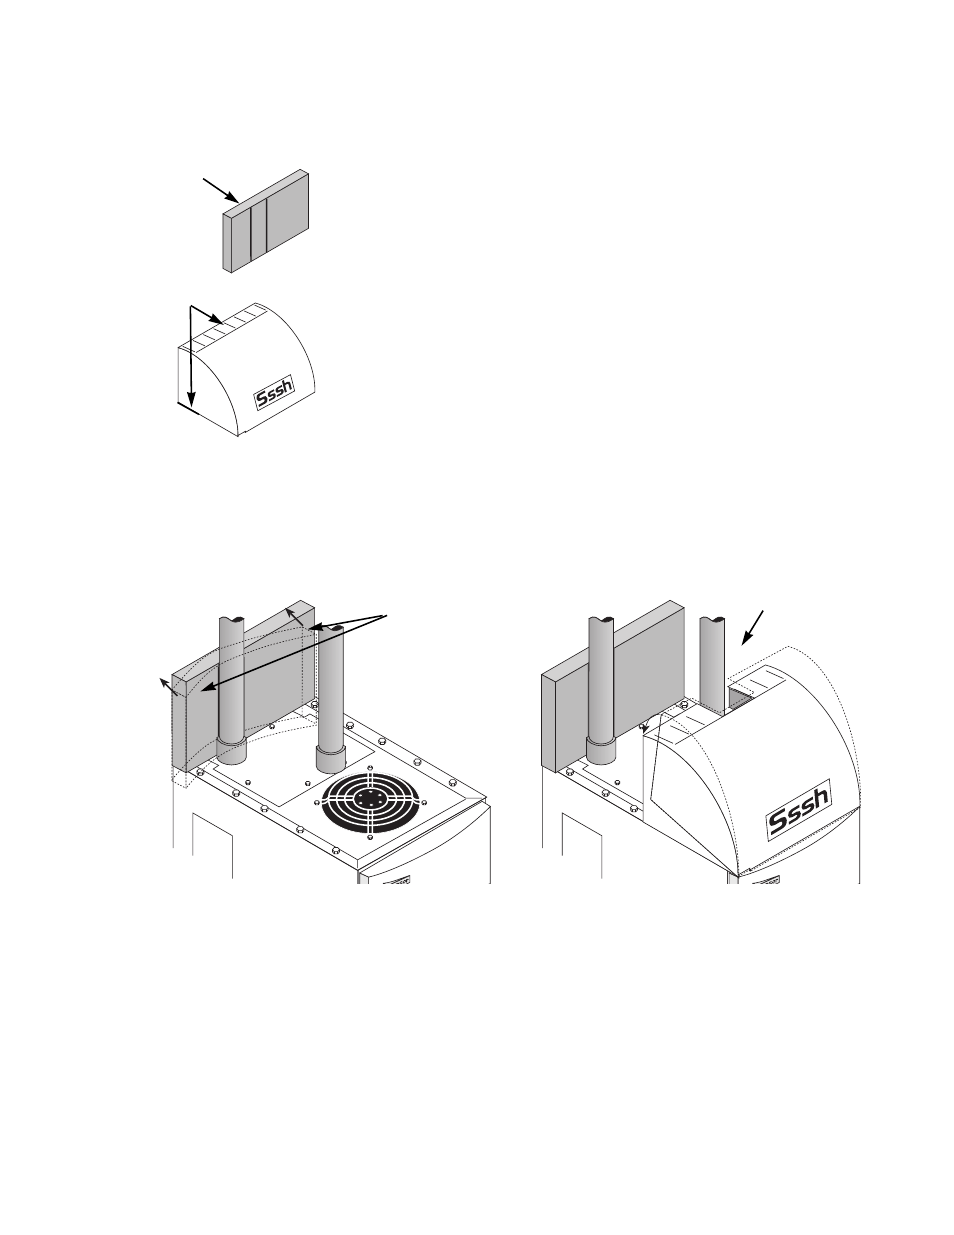
Installing the hood and acoustic pad
Note:
After exposing the adhesive, handle the hood or pad by the sides to
avoid touching the adhesive.
1.
Expose the adhesive strips on the back of the hood, except in the marked
areas where conduit interferes with installation
2.
Bend the ends of the pad forward so the exposed adhesive doesn’t touch
the wall and slide the pad into place behind the conduit. Press firmly.
3.
Trim off any sections of the velcro strip on the bottom of the hood that
would press against a rack splice (joined racks only).
4.
Remove the covers to expose the adhesive strips on the bottom of the
hood.
5.
Position the front edge of the hood against the top bolts in the front of the
dimmer cabinet and tilt the back down until it is in position. Press firmly.
Note:
The front edge of the hood will be slightly ahead of front edge of the
dimmer cabinet when positioned properly. This gives clearance for the
front cabinet top securing bolts, allowing the hood to sit flat on the top
of the dimmer rack.
6.
Installation is complete. Allow the hood and pad to stay in place for 30
minutes to completely set the adhesive. After the adhesive has set, the
hood can be removed when necessary by separating the Velcro strips
securing it to the top of the dimmer cabinet.
Figure 3: Installing the hood and pad
7.
Restore power to the dimmer rack.
Remove any marked
out sections so the
hood will fit properly
Leave the adhesive
covering on the
marked out sections
of the acoustic pad so
it will slide into place
behind the conduit
Hold the edges of the pad out
from the wall to position it
behind conduit or other
obstructions
After exposing the adhesive,
position the front edge of the
hood, then tilt it down to
secure the back