Installing the hood, Figure 2 : exposing the adhesive, Figure 3 : installing the hood – ETC Sensor SR6-12 Sssh User Manual
Page 2
Sensor Sssh option
2
Installing the hood
1.
Remove the covers to expose the adhesive strips on the bottom of the
hood.
Note:
After exposing the adhesive, handle the hood by the sides to avoid
touching the adhesive.
2.
Position the front edge of the hood flush with the front of the dimmer
cabinet and lower it into position.
3.
Verify the hood is in position and press down firmly over the adhesive
strips.
4.
Installation is complete. Allow the hood to stay in place for 30 minutes to
completely set the adhesive. After the adhesive has set, the hood can be
removed when necessary by separating the Velcro strips securing it to the
top of the dimmer cabinet.
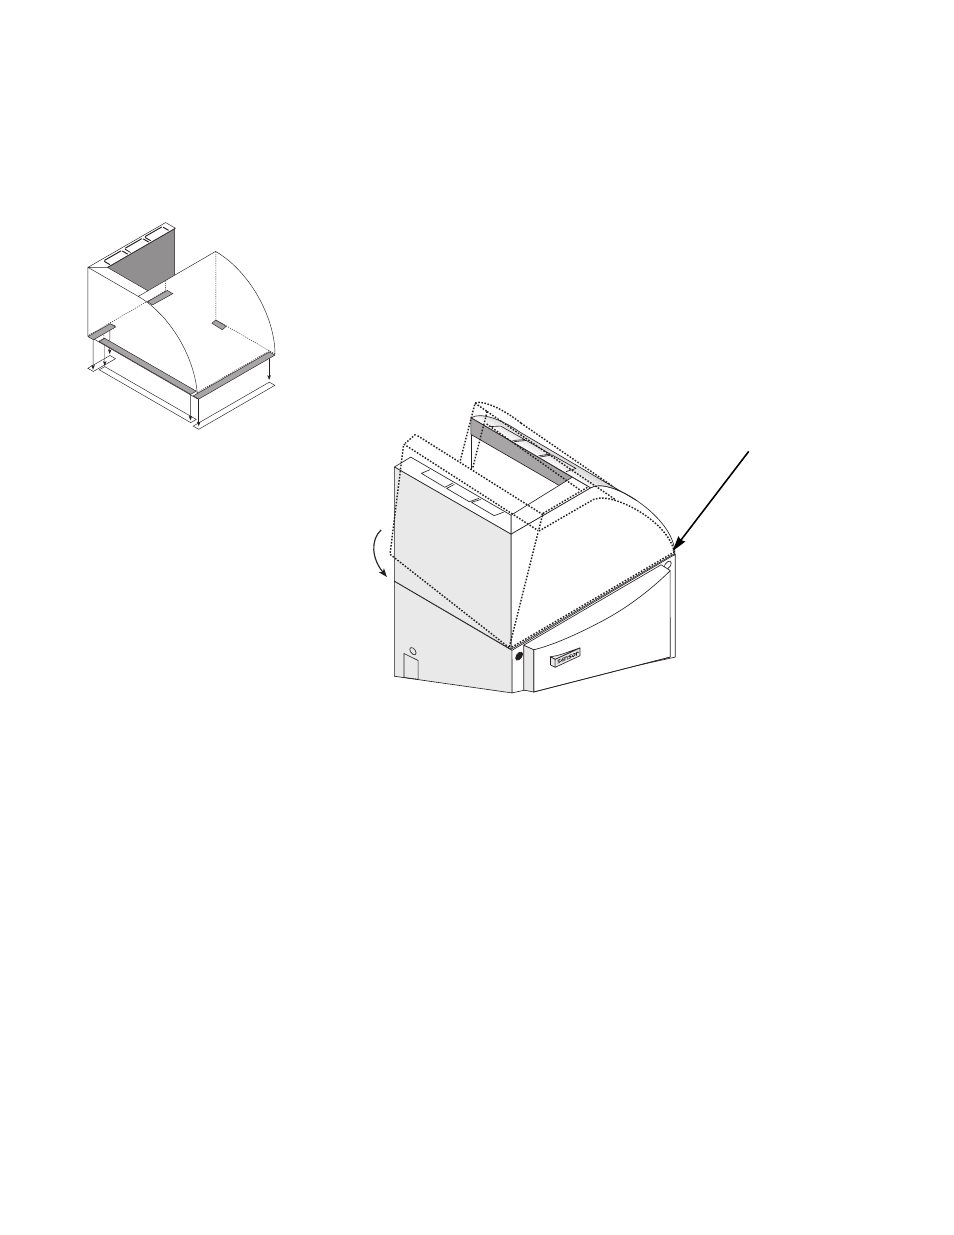
Figure 3: Installing the hood
Figure 2: Exposing the adhesive
Remove the adhesive strip covers on
the bottom of the hood before
installing it permanently.
After exposing the adhesive,
position the front edge of the
hood first, then tilt it down to
secure the entire hood.
When the hood is in place,
press down firmly on the entire
hood and allow the adhesive to
set for 30 minutes.