Unload pellets, Rear sight adjustment – Daisy AVANTI Triumph 747 User Manual
Page 4
Step 7. TAKE “OFF SAFE”
Take trigger safety “OFF SAFE” by pushing from
right to left so that red is showing. (Take final
sighting at this point - Fig. 4)
Step 8. FIRE
The gun can be safely fired after properly
completing the operating steps.
IMPORTANT: Do not leave the gun in a pumped
up condition for more than one hour or the air
release valve may be damaged and cause a
permanent leak.
WARNING: If a pellet does not fire after
completing the operating steps, the gun is
jammed. This is a dangerous condition. Open the bolt at once, then repeat all operations
except step 4 (DO NOT LOAD A PELLET).
IF A PELLET STILL DOES NOT FIRE, FOLLOW THESE STEPS CAREFULLY:
Step 1. Open bolt.
Step 2. Put trigger safety “ON SAFE”
Step 3. Clear the barrel by running a size .177 cleaning rod through the barrel from
the muzzle end. Be careful not to damage the bolt tip by pushing the rod
through too hard.
Step 4. Repeat the operating steps. Make sure a pellet is fed into the firing
position. If after following the firing procedure the pellet is not fired, return
your gun to the Avanti Service Department. (See “REPAIR OF GUN” section).
UNLOAD PELLETS
The bolt does not extract a pellet. Point the gun in a safe direction and fire, or open the
bolt and insert a .177 cleaning rod in the muzzle end of the barrel and push the pellet out.
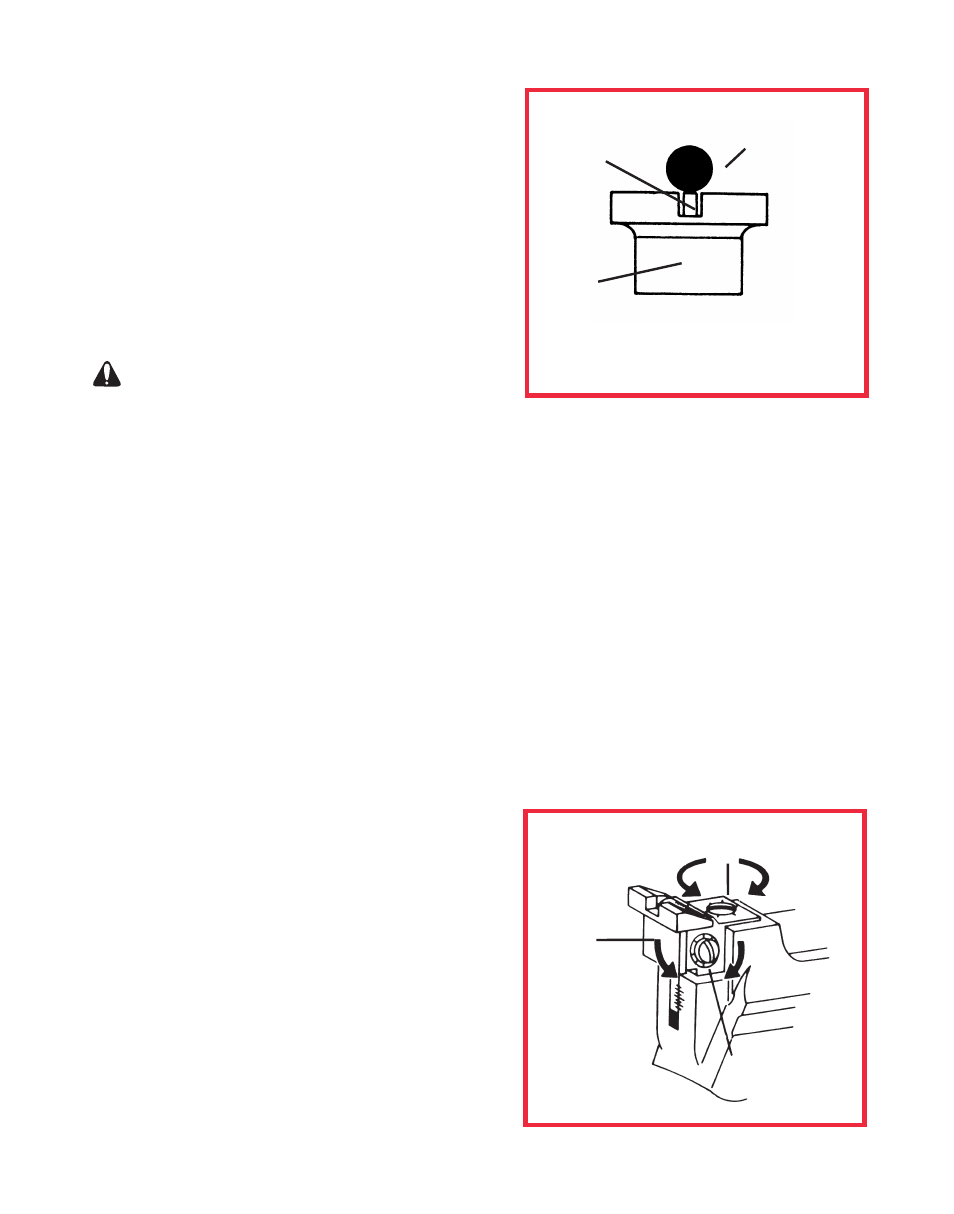
REAR SIGHT ADJUSTMENT
ELEVATION: (Fig. 5) (Up or down) To move
the point of impact up, raise the sight by turning
the elevation screw “A” counterclockwise. To
lower the point of impact, lower the sight by
turning the elevation screw “A” clockwise. At a
range of 10 meters, one click will move the point
of impact .077 inch.
WINDAGE: (Fig. 5) (Right or left) To move the
point of impact left, move the sight left by turning
screw “B” counterclockwise. To move the sight
to the right, turn screw “B” clockwise. At a range
of 10 meters, one click will move the point of
impact .054 inch.
4
FIG. 4
FRONT
SIGHT
REAR
SIGHT
Use the correct sight picture
each time you fire the gun
REAR
SIGHT
SCREW
“A”
RAISE LOWER
LEFT RIGHT
FIG. 5