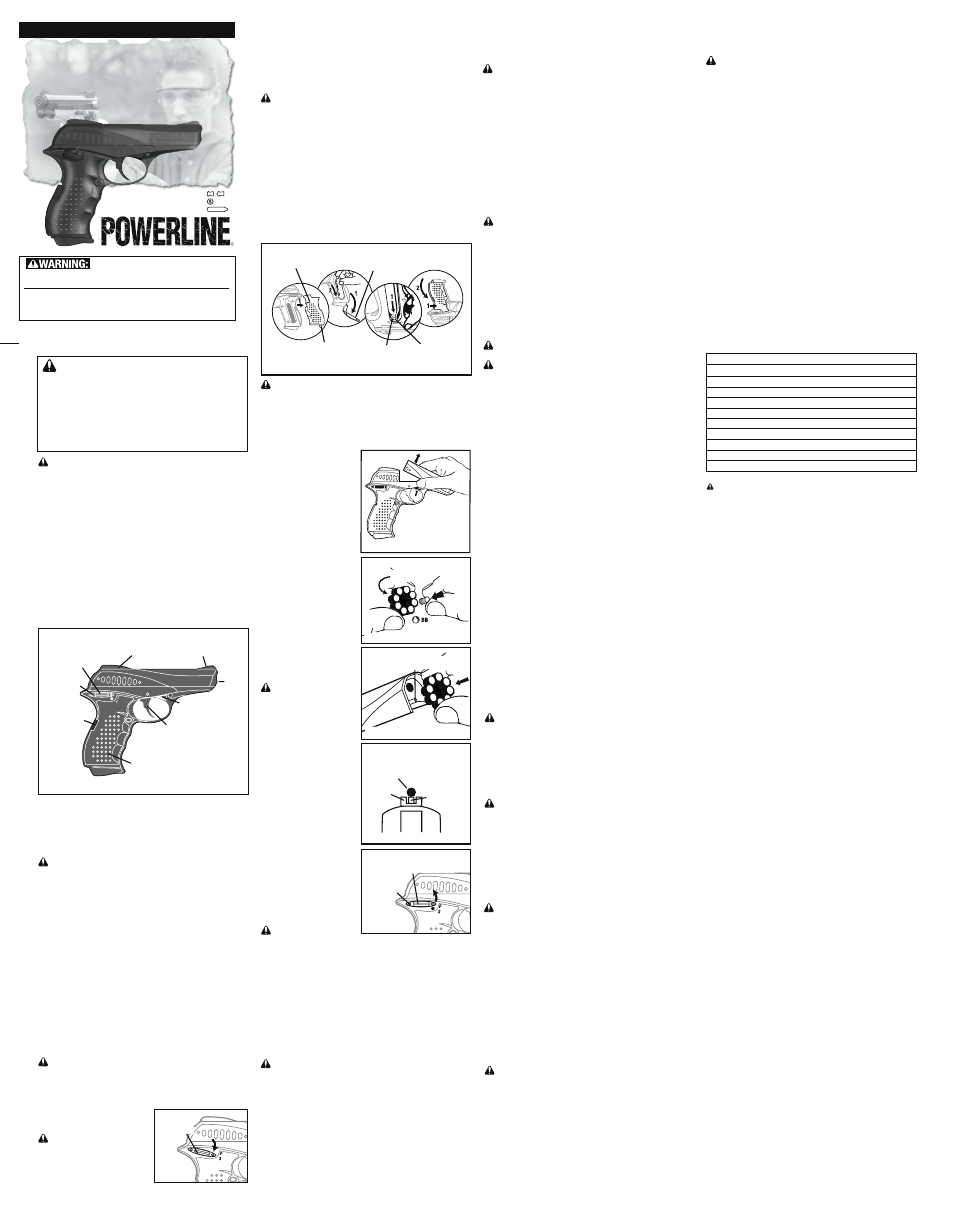
Daisy PowerLine 008 User Manual
Model 008
only do its job when you do yours. With the index finger out of the trigger area,
position the safety lever to the “ON SAFE” (S) position - NO RED SHOWING (see
Fig. 2). REMEMBER, THE BEST SAFETY IS GOOD GUN HANDLING.
STEP 2. INSERT CO2 CYLINDER
WARNING: Use only CO2 cylinders which are the 12 gram type. Any
attempt to use other sizes and/or cylinders containing other types of gas could
be extremely dangerous. The use of gases other than CO2 could result in an
explosion or could rupture the gun, causing serious injury.
1. Put safety “ON SAFE” (S) - red dot covered (Fig. 2).
2. Remove left grip cover by lifting the grip cover tab (Fig. 3A).
3. Open puncture lever until there is enough room to insert a CO2 cylinder.
Insert the large end of the CO2 cylinder into the lower portion of the grip (Fig.
3B).
4. Hold the gun in an inverted position with the grip pointing up and the
muzzle pointing away from you. Position the small end of the CO2 cylinder
inside the retainer so that the CO2 cylinder touches the puncture pin (Fig. 3C).
5. While continuing to hold gun in an inverted position, replace the left grip
cover, point the muzzle in a safe direction and close the puncture lever firmly
to puncture the CO2 cylinder (Fig. 3D).
WARNING: Be sure the muzzle is pointed in a safe direction when punc-
turing CO2 cylinder. In the event that a seal temporarily leaks while the CO2 is
being punctured, the CO2 gas may escape through the barrel. If ammunition
is jammed in the barrel from prior shooting, this could result in a projectile
being shot.
STEP 3. INSERT A LOADED ROTARY CLIP INTO THE GUN
Always point gun in a safe
direction. Insure that the gun is on
safe “S” - NO RED SHOWING (Fig. 2)
LOADING THE ROTARY CLIP
1. Open breech of pistol by depres-
sing the barrel housing latch. Rotate
the barrel housing downward at the
muzzle end to open the breech
(Fig.4).
2. Remove rotary clip and insert a
total of eight projectiles into the
rotary clip from the solid side of the
clip. (.177 cal. pellets and/or BBs only)
(Fig. 5).
3. Insert the loaded clip fully into
breech of barrel so that hole in center
of clip seats onto breech pin (Fig. 6).
Close barrel housing.
STEP 4. AIM AT A SAFE TARGET
To be a consistent marksman, use
the correct sight picture each time
you fire the pistol (Fig. 7).
CAUTION: Due to the power of
this CO2 pistol, use extra caution in
selecting a safe target and proper
backstop based on the ammunition
you’re shooting. Never shoot BBs
into a steel trap designed for pellets
and never shoot pellets at a
target/backstop designed for BBs.
Pick targets and backstops that will
not cause a ricochet or allow the
ammo to penetrate the backstop.
Never shoot at a flat hard surface or
at the surface of water.
STEP 5. PUT SAFETY IN THE
“F” FIRE POSITION -
RED SHOWING
When you are certain that the
target, back stop and surrounding
area are safe, take the gun “OFF SAFE”
(F) by sliding the safety release
button toward the rear and rotate the
safety lever toward the “OFF SAFE” (F)
position (Fig. 7).
WARNING: Use extreme caution
in operating the gun because it is now ready to fire when the trigger is pulled.
STEP 6. FIRE
The pistol can be safely fired after properly completing the operating steps
mentioned above. After making sure the gun is pointed in a safe direction, gently
but firmly, squeeze the trigger. If you desire to continue shooting, the operation
steps can be repeated until the CO2 cylinder requires replacement.
STEP 7. PUT SAFETY ON “S” SAFE POSITION - NO RED SHOWING
After firing, position the safety lever to cover the red dot. (FIG. 2).
BB DOES NOT FIRE
WARNING: If a BB or pellet does not fire after completing the operation
steps, do not assume that the gun is unloaded. Keep the gun pointed in a safe
direction.
CHECK THE FOLLOWING IF A BB DOES NOT FIRE
1. Did the Rotary Clip contain Daisy® or similar quality BBs or Pellets? If not, refill
the rotary Clip with BBs or Pellets and repeat the operation steps.
2. Was the safety in the “F” FIRE position - RED SHOWING when the trigger was
pulled? If not, repeat the operation steps.
3. Was a CO2 cylinder installed properly? If not, put safety in the “S” SAFE position
- NO RED SHOWING and insert a new CO2 cylinder. Repeat the operation steps
after new cylinder is installed.
FIG. 4
This safety alert symbol indicates important safety messages in this
manual. When you see this symbol, be alert to the possibility of personal injury
and carefully read the message that follows.
The Model 008 CO
2
PowerLine® Pistol shoots with much more muzzle energy
than the traditional spring air BB gun. More power means greater chance of
serious injury. Use extreme caution when operating this gun.
Although your new PowerLine® Pistol is not a firearm, it has lethal potential
and should be treated with caution and respect due any conventional firearm.
Always remember, the first and most important safety feature of any gun is the
shooter. All safeties are mechanical devices and the shooter is the only part of
the system that can make a gun safe–or unsafe. DON’T DEPEND ON MECHANICAL
SAFETIES–think ahead and avoid situations that might lead to accidents.
Guns differ in their operations and you are never ready to fire any gun until
you are thoroughly familiar with it. Read the following operating instructions
and WITHOUT LOADING A PROJECTILE, proceed through the operating steps (dry
firing your gun with CO
2
only several times at a safe target.) This will enable you
to learn to operate the PowerLine® 008 properly and safely.
PRIOR TO OPERATION
Put “ON” SAFETY–NO RED SHOWING
Position the safety lever to cover the red dot. (Refer to Operation Step 1).
OPERATION STEPS:
WARNING: Be sure gun is always pointed in a safe direction.
Step 1. PUT THE SAFETY ON - NO RED SHOWING, RED DOT COVERED
Step 2. INSERT CO2 CYLINDER
Step 3. INSERT LOADED ROTARY CLIP INTO GUN
Step 4. AIM AT A SAFE TARGET
Step 5. TAKE THE SAFETY OFF - RED SHOWING
Step 6. FIRE
Step 7. PUT THE SAFETY ON - NO RED SHOWING, RED DOT COVERED
The pistol can continue to be shot until the ammunition clip or the CO2 cylinder
need to be replaced. The Model 008 will obtain a minimum of 60 shots per CO2
cylinder. Refer to section on CO2 Characteristics.
NEVER STORE A LOADED GUN
At the end of a shooting session, as a safety precaution, always put the safety in
the “S” safe position - NO RED SHOWING, remove CO2 cylinder, remove the rotary
clip from the gun and remove ammunition from the rotary clip. Store in a safe
place to prevent unauthorized use.
HOW TO OPERATE
WARNING: Be sure gun is always pointed in a safe direction. Never point
the gun at anyone. Always assume and treat the gun as if it were loaded and
ready to fire.
STEP 1. PUT SAFETY ON “S” SAFE POSITION - NO RED SHOWING
Position the safety lever to cover the
red dot. (FIG. 2).
CAUTION: Even when the safety is
on “S” you should continue to handle the
pistol safely. Don’t point the gun at
anything that you don’t intend to shoot.
NOTE: The safety is not automatic. It will
4. Refer to the section on CO2 characteristics.
5. If the pistol still does not fire, refer to warning below.
WARNING: If the pistol still fails to shoot a projectile after checking the five
items noted, there is a malfunction in the pistol. This could represent a dangerous
condition. There could be a BB or pellet in the pistol even though a BB or pellet
did not shoot out. This could cause the user to mistakenly believe the pistol is
unloaded. At no time should you look down the barrel of the gun. Put safety in
the “S” SAFE position - NO RED SHOWING , remove the CO2 cylinder, and send the
pistol directly to DAISY MANUFACTURING SERVICE DEPARTMENT. Refer to section
on REPAIRS OF DAISY GUNS.
HOW TO UNLOAD
After a shooting session is complete, the gun should be unloaded before storing
it. To unload the gun always position the safety in the “S” SAFE position - NO RED
SHOWING, remove the CO2 cylinder (See below). Open the breech and remove
the rotary clip. Look through the breech end of barrel to be certain no
ammunition is left in barrel. Remove all ammunition from the rotary clip.
CAUTION: Even though you have gone through an unloading procedure,
continue to treat the gun as though it were loaded. Don’t point at anything you
don’t intend to shoot. Always put safety in the “S” SAFE position - NO RED SHOW-
ING until you are ready to fire.
REMOVE CO2 CYLINDER
1. Put safety “ON SAFE” (S) - RED DOT COVERED (Fig. 2).
2. Remove the CO2 cylinder from pistol.
3. With the left hand grip cover still in place, slowly open the puncture lever until
any remaining CO2 gas is discharged.
4. Remove left hand grip cover by lifting the grip cover tab and remove the CO2
cylinder.
CAUTION: Never attempt to reuse a cylinder for any purpose.
CAUTION: Do not assume that the gun is empty of ammunition when the
rotary clip is removed from the gun. Even though you have gone through an
unloading procedure, continue to treat the gun as though it were loaded. Don’t
point at anything you don’t intend to shoot. Always put safety in the “S” SAFE
position - NO RED SHOWING (Fig. 2) and always treat the gun as if it were loaded
and ready to fire.
CO2 CHARACTERISTICS
There are occasions when a CO2 pistol may be subjected to abnormal condi-
tions that can produce effects on the pistols performance. These conditions
include operation and/or storage of the pistol at temperatures that are consid-
erably higher or lower than normal outdoor temperatures (60 – 70 degrees F),
as well as conditions of rapid fire.
1. High temperatures can produce pressure in the CO2 cylinder and gun that is
considerably higher than normal operating pressure. Such increased pressure
may prevent the pistol from firing and may result in permanent damage to the
gun. The maximum operating or storage temperatures should not exceed 105
degrees F (40 degrees C ). This temperature can easily be reached if the gun
is left directly in the sun on a bright, sunny day. Therefore the shooter should
not expose the pistol to high temperature conditions or direct sunlight for any
extended period of time.
2. Rapid firing of the gun will cause temperature reduction in the pistol and
CO2 gas. This will result in lower ammunition velocities and may even lower gas
pressure enough so that the pistol will not fire. This condition can be especially
apparent when shooting in cold weather. This condition can be avoided by allow-
ing more time between shots. This permits the gas to increase in temperature
and pressure, and produce normal velocities.
3. During rapid fire, the muzzle velocity of each shot can be expected to de-
crease. This can be detrimental to shooting accuracy. The faster the gun is shot,
the fewer shots you will get per CO2 cylinder.
4. Care should be exercised to ensure that the gun is not shot with a CO2 cylinder
that is low in pressure because a BB may not be expelled from the barrel.
CAUTION: Shooting the gun with low CO2 pressure could result in ammuni-
tion lodging in the barrel.
STORAGE
Store your pistol unloaded. Put “ON” safe , remove CO2 cylinder and remove
all ammunition from the pistol’s rotary clip. Keep pistol away from children
and untrained shooters. Store ammunition, and CO2 cylinders separately from
the pistol to keep them from untrained shooters.
WARNING: A CO2 CYLINDER CONTAINS GAS UNDER PRESSURE, WHETHER
OR NOT IT HAS BEEN INSERTED INTO A GUN. IF EXPOSED TO HIGH TEMPERA-
TURES (SUCH AS INSIDE OF A CLOSED CAR IN DIRECT SUNLIGHT), IT COULD
EXPLODE. BE SURE TO STORE ALL CYLINDERS IN A COOL PLACE.
PROPER CARE
With care and periodic cleaning, your pistol will provide many years of
shooting enjoyment. As is the case with conventional firearms, abuse, neglect,
and continued exposure to the elements will impair the performance of any
airgun. Learn to take care of your pistol and it will serve you well.
CAUTION: Never attempt to clean the pistol until it is “ON” SAFE, the CO2
cylinder has been removed, and the ammunition has been removed from the
gun.
EXTERIOR PARTS
Any plastic parts may be cleaned with a damp rag and mild soap or deter-
gent. Avoid using strong detergent, abrasive cleaning compounds or solvents
that may scratch or otherwise damage surfaces. The exposed metal parts
should occasionally be wiped clean using a soft cloth that is lightly oiled with
clean motor oil.
LUBRICATION
Your CO2 pistol was lubricated when built and should not require any ad-
ditional lubrication.
MODIFICATION
CAUTION: The components of this gun were engineered to deliver
optimum performance. Any modification or tampering with a gun may cause a
malfunction and may make it unsafe to use. Any change in performance (such
as a lowered trigger pull force and shortened trigger travel), indicates pos-
sible modification, tampering and/or wear. Such a gun should be inspected,
replaced or properly repaired by qualified personnel. Any gun that has been
dropped should be checked by qualified personnel to ensure that its function
has not been affected.
REPAIR OF POWERLINE® AIR PISTOLS
WARNING: A PISTOL THAT IS NOT OPERATING PROPERLY MAY BE
DANGEROUS. IT SHOULD BE KEPT SAFELY FROM USE BY ANYONE UNTIL REPAIRED
OR DESTROYED. DO NOT TRY TO TAKE THE GUN APART. IT IS DIFFICULT TO REAS-
SEMBLE, AND IMPROPER REASSEMBLY CAN CAUSE A HAZARDOUS CONDITION.
GUNS IN WARRANTY
LIMITED ONE-YEAR WARRANTY
For one year from date of purchase, Daisy will repair or replace and return this
gun, free of charge, if defective in material or workmanship. Service is avail-
able by returning the gun to Daisy Outdoor Products (refer to important note
that follows). Attach to the gun, your name, street address, and telephone
number, description of problem and proof of date of retail purchase (sales
slip). Package and send transportation prepaid to Daisy Outdoor Products. This
warranty gives you specific legal rights, and you may also have other rights
which may vary from state to state.
IMPORTANT: You can return your inoperative pistol to Daisy Outdoor Products
for repair via United Parcel Service (UPS). Be sure to put “ON safe, remove the
CO2 cylinder and unload all ammunition from the rotary clip before returning
the pistol to Daisy. You must include your street address for Daisy to send your
pistol directly back to you through UPS delivery.
GUNS OUT OF WARRANTY
If your PowerLine® air pistol needs repair, please call 1-800-713-2479 for
repair charges. Daisy will repair the gun or replace it with a reconditioned gun
of the same model, if available; otherwise, with a model of equivalent quality.
Daisy Outdoor Products,
Service Department, 308 West Stribling Drive, Rogers, AR 72756 U.S.A.
MODEL 008 CO
2
PISTOL SPECIFICATIONS
ACTION
CO2 Semiautomatic
CALIBER
.177 cal. (4.5mm) lead pellet or BB
AMMO CAPACITY
8-shot Rotary Clip
MAX. SHOOTING DISTANCE* 260 yds. (238m)
MUZZLE VELOCITY
484 fps (148mps)
BARREL
Rifled steel
SAFETY
Manual rotary hammer block
SIGHTS
Blade and ramp front; fixed open rear
WEIGHT
1 lb. (3.22 kg) empty
OVERALL LENGTH
7.1 in. (18 cm)
POWER SOURCE
Daisy® 12gm CO2 cylinder
*With muzzle pointed upward at optimum angle
CAUTION:
CO2
cylinders may explode at temperatures above 160ºF (71ºC).
LEARN TO SHOOT SAFELY
Daisy Outdoor Products has a rich heritage of teaching young and first time
shooters to shoot safely. In order to effectively implement shooting education
programs nationwide, Daisy has partnered with the following organizations
which teach shooting safety and provide additional shooting safety materials
and information. We encourage you to contact Daisy at 1-800-643-3458 or one
of these organizations to sign up for a shooting safety class in your area.
PROGRAM MATERIALS & EQUIPMENT (U.S. customers only)
Daisy Outdoor Products
800-713-2479
PROGRAM INFORMATION
American Legion Junior
Shooting Sports Program
317-630-1249
NRA Youth Programs
800-672-3888 ext. 1505
4-H Shooting Sports
Contact your County Extension Agent
www.4-h.org
Junior Olympic Shooting Program
719-866-4670
Model 008
CO
2
SEMI-AUTOMATIC
O p e r a t i O n M a n u a l
NOT A TOY. ADULT SUPERVISION REQUIRED. MISUSE
OR CARELESS USE MAY CAUSE SERIOUS INJURY OR DEATH. MAY BE DANGEROUS UP TO
260 YARDS (238 METERS).
THIS IS A HIGH POWER AIRGUN RECOMMENDED FOR USE BY THOSE 16 YEARS OF
AGE OR OLDER. READ ALL INSTRUCTIONS BEFORE USING. THE PURCHASER AND USER
SHOULD CONFORM TO ALL LAWS GOVERNING USE AND OWNERSHIP OF AIRGUNS.
WARNING:
THIS GUN CAN CAUSE SERIOUS INJURY OR DEATH.
READ AND FOLLOW THE INSTRUCTIONS CAREFULLY. DO NOT INSTALL A CLIP
WHICH CONTAINS AMMUNITION INTO THE GUN UNTIL YOU ARE READY TO
SHOOT. IF YOU DO INSTALL A CLIP WHICH CONTAINS AMMUNITION INTO THE
GUN AND THEN DECIDE NOT TO SHOOT, EITHER MANUALLY REMOVE THE CLIP
FROM THE GUN OR SHOOT THE REMAINING AMMUNITION AT A SAFE TARGET.
AN UNCOCKED, UNLOADED GUN IS SAFEST. ACCIDENTS HAPPEN FAST, AND
ACCIDENTALLY INJURING OR KILLING SOMEONE IS A TERRIBLE THING. PLEASE
SHOOT SAFELY.
TRIGGER
GATILLO
DÉTENTE
FRONT SIGHT
MIRA DELANTERA
GUIDON
MUZZLE
BOCA
BOUCHE
REAR SIGHT
ALZA
HAUSSE
BARREL HOUSING LATCH
SEGURO DE LA CAJA DEL CAÑÓN
VERROU DE CANON
FIG. 1
GRIP
PUÑO
CROSSE
Daisy Outdoor Products, Rogers, AR 72757-0220 U
REV. 4/12
PUNCTURE LEVER
PALANQUILLA DE
PERFORACIÓN
LEVIER DE PONCTION
SAFETY LEVER
PALANQUILLA DE
SEGURIDAD
LEVEIR DE SÉCURITÉ
SAFETY RELEASE BUTTON
PALANQUILLA DE DESENGANCHE
DE SEGURIDAD
LEVIER DE DÉCLENCHEMENT
DE SÉCURITÉ
FIG. 2
SAFETY LEVER
SEGURIDAD
LEVIER DE SÉCURITÉ
FIG. 3
B. D.
A. C.
GRIP COVER
CUBIERTA DE LA EMPUÑADURA
GRIP COVER
GRIP COVER TAB
LENGÜETA DE LA CUBIERTA DE LA EMPUÑADURA
GRIP COVER TAB
PUNCTURE LEVER
PALANQUILLA DE PERFORACIÓN
PUNCTURE LEVER
RETAINER
SUJETADOR
RETAINER
PUNCTURE PIN
PASADOR DE PERFORACIøON
PUNCTURE PIN
FIG. 5
HOLE ON BACK
AGUJERO EN LA ESPALDA
TROU AU DOX
FIG. 6
BREECH PIN
PASADOR INMOVILIZADOR DE PALANQUITA DE CIERRE
GOUPILLE DE CULASSE
CORRECT ALIGNMENT
CORRIGE ALINEACION / CORRIGE L’IMAGE
FIG. 6
FRONT SIGHT
MIRA DELANTERA
GUIDON
REAR SIGHT
ALZA
HAUSSE
TARGET
DIANA
POINT DE MIRE
FIG.7
SAFETY LEVER
SEGURIDAD
SÉCURISÉ
SAFETY RELEASE BUTTON
PALANQUILLA DE DESENGANCHE DE SEGURIDAD
LEVIER DE DÉCLENCHEMENT DE SÉCURITÉ
.177cal. (4.5mm) LEAD AIRGUN PELLET
.177 cal BB (4.5 mm) STEEL AIRGUN SHOT
12gm CO
2
cylinder only