Carter-Hoffmann MT23-6 User Manual
Page 9
9
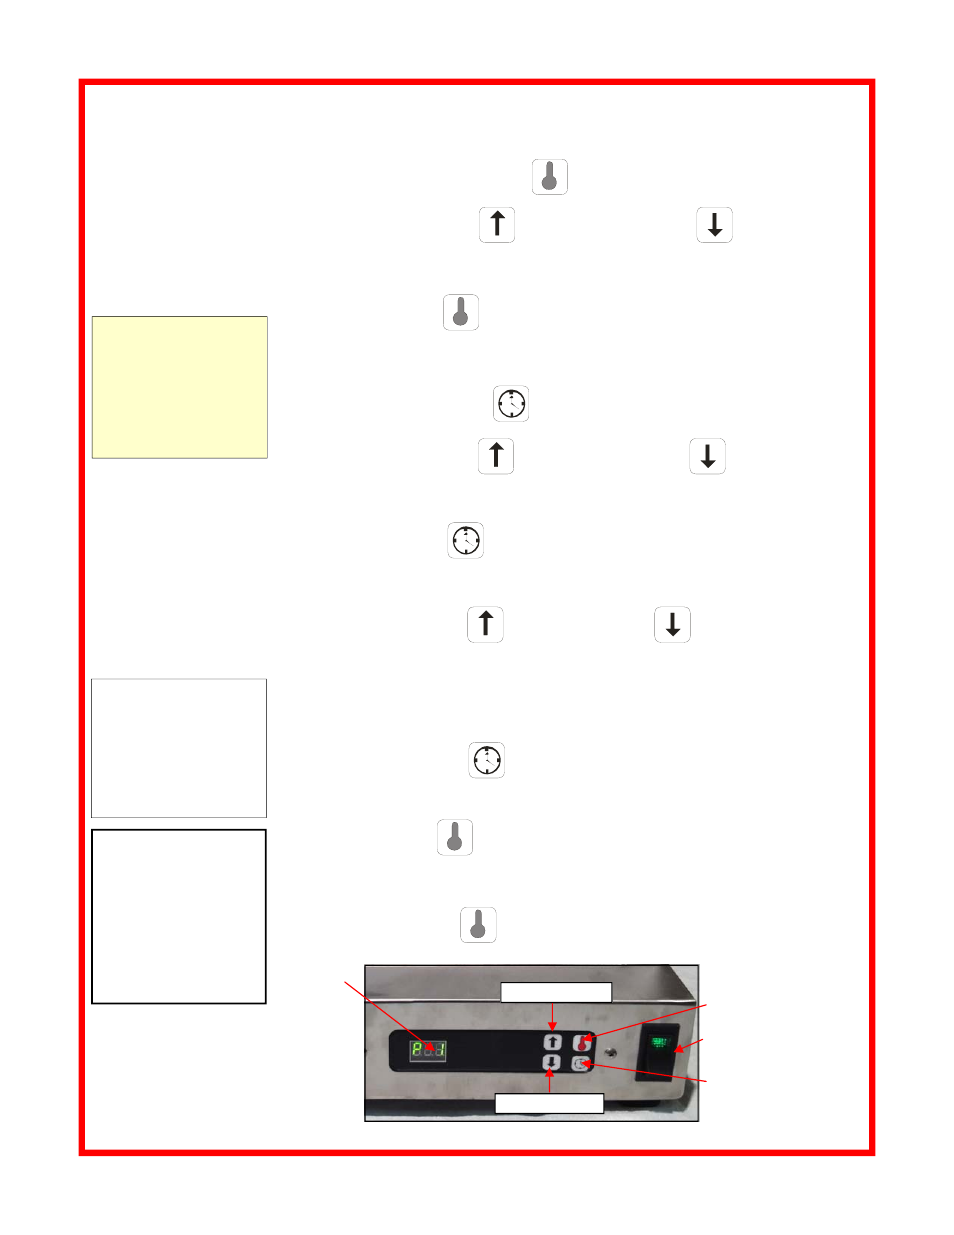
DIGITAL CONTROLLER PROGRAMMING
To enter into program
mode, display must
be in operating mode
and not in a timing
cycle .
NOTE: Each well can
be programmed individ-
ually.
TEMPERATURE
SETPOINT RANGE:
122ºF - 225ºF
(50
°C - 107°C)
“P1” TEMPERATURE
DEFAULT SETPOINT:
200ºF(93
°C)
TIMER RANGE:
1 minute to 9 hours, 59
minutes
NOTE: While in the
program mode, if no
key is pressed for 10
seconds, any changes
will be saved and the
control returns to nor-
mal operation mode.
NOTE:
The technical content of
this manual, including any
wiring diagrams, sche-
matics, parts breakdown
illustrations and/or adjust-
ment procedures, is
intended for use ONLY
by qualified technical
personnel.
PROGRAM TEMPERATURE SETPOINT
1. Press and hold the TEMP KEY until display flashes.
2. Press INCREASE KEY or the DECREASE KEY to raise or lower
temperature or time set-point. Each time the key is pressed, set-point is
changed by 1º.
3. Press TEMP KEY to save changes
PROGRAM TIMERS (P1 through P6)
1. Press and hold TIME KEY until display flashes.
2. Press INCREASE KEY or the DECREASE KEY to raise or lower
time set-point. Each time the key is pressed, set-point is changed by one
minute. Hold the key to scroll faster.
3. Press the TIME KEY to save changes and return to “P 1”.
4. To program timers “P 2” through “P 6”:
5. Press INCREASE KEY or DECREASE KEY to select desired
timer program number (“P 2” thru “P 6”).
6. Repeat steps 1 through 3 above for each program.
TO CANCEL TIMER
Press and hold TIME KEY for 2 seconds.
TO CHANGE THE TEMPERATURE SCALE
Press the TEMP KEY until the temperature starts flashing. Then, press both
the up and down arrow buttons (together) until ‘F’ (Fahrenheit) is displayed.
Press the up or down arrow keys to toggle between ºC and ºF.
Once selected, press the TEMP KEY to save and exit.
NOTE:
“P1” must be displayed
before temperature
scale can be changed.
If “P1” is not displayed,
press ARROW KEY to
display “P1.”
DIGITAL
READOUT
INCREASE KEY
DECREASE KEY
TEMPERATURE KEY
TIME KEY
POWER SWITCH