Carter-Hoffmann MT23-6 User Manual
Page 8
8
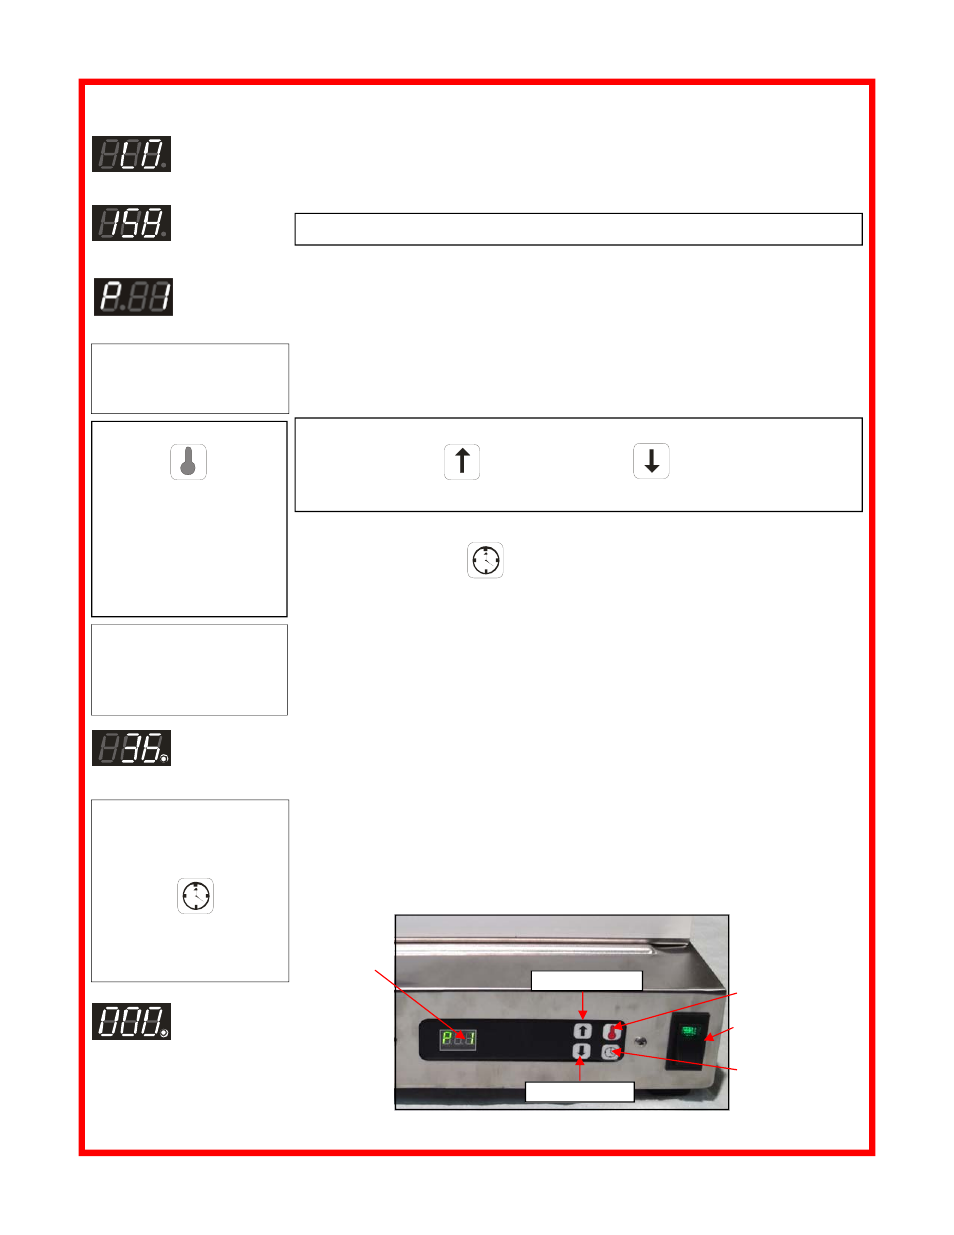
NORMAL OPERATION
NOTE: Timer can be
cancelled at any time
during the cycle by
pressing and holding the
TIME KEY for 2
seconds. Digital readout
will display currently
selected timer (e.g “P 1”).
Tempera-
ture
Typical
Tempera-
ture
Module is
READY
Typical Time
Remaining
Timed Cycle
Completed
NOTE: Program timer
defaults to “P1” each time
the unit is turned OFF then
back ON.
NOTE: Timer cannot be
started until the warmer is
pre-heated.
1. Press the POWER switch, located on the front panel, to ON. Illuminated
portion of the switch will glow, indicating power is ON. Pre-heat the cabinet
for 20 minutes. When first turned on, digital readout will display “LO” until the
cabinet reaches 122
°F (50°C).
Cavity temperature set-point range is between 122
°F (50°C) & 225°F (107°C).
After the cabinet reaches 122
°F (50°C), the digital readout will display the
current temperature, until the temperature reaches the set-point. Once the
cabinet reaches the set-point, the digital readout will display “P 1”. This
indicates the cabinet is ready to hold product.
NOTE: Press and release
the TEMP key to
view of verify a cavity
Set-point. Cavity set-point
will be displayed briefly. If
the cavity set-point needs
to be changed, refer to
Programming Instructions
on page 9.
2. Select the desired timer program by pressing the INCREASE / DECREASE
arrow keys. The cabinet has six programmable timers (“P 1”, “P 2”, “P 3”,
“P 4”, “P 5”, and “P 6”) for each cavity. Different program timers can be used
for different parts of the day (Breakfast, Lunch, Dinner) or alternate products.
NOTE:
To select other timer programs (“P 2” through “P 6”), press the
INCREASE KEY or DECREASE KEY until the digital readout
displays the desired program.
3. After pre-heat, load cooked product into pan(s) and place pan(s) in cavity.
Press the TIME KEY to start the timer. Refer to Programming
Instructions
to change the programmed time
4. The digital readout will count down, displaying the remaining time. The digital
readout is displayed in hours and minutes until the time remaining is less than
one minute. Once the time remaining is less than one minute, the digital
readout counts down in seconds.
5. At the end of the timed cycle, the digital readout will flash “000” and an alarm
will sound until the TIME KEY is pressed.
6. The digital readout will display the currently selected timer (e.g. “P 1”),
indicating that the cabinet is ready to hold product.
8. Remove product pan from cavity. Discard any unused food portions and
wash pan in warm soapy water. Rinse and allow to dry.
9. Follow cleaning instructions for cabinet on page 6.
7. At the end of the day or serving period, press POWER switch to OFF. Allow
warmer
to
cool.
DIGITAL
READOUT
INCREASE KEY
DECREASE KEY
TEMPERATURE KEY
TIME KEY
POWER SWITCH