C.B.S. Scientific PP-048-202-SS User Manual
Page 16
Optimizer PCR Workstation Instructions
3/2013
www.cbsscientific.com
15
SECTION 5
Installation of Replacement Parts
5.1 PCR Workstation
®
Replacement Timer Installation
1. You will need the following:
• 2 Flathead screwdrivers
* Phillips head screwdriver
• 5/16” nut driver or socket wrench
2. Unplug PCR Workstation and carefully remove all bulbs.
3. Remove the timer knob from the outside of the hood using 2 flathead screwdrivers to pry open with equal
pressure on the two sides of the knob.
4. Turn workstation over onto a padded surface (such as a towel) and using Phillips head screwdriver remove
screws that retain ceiling and white shield and stainless steel screw retaining outlet cover. Remove ceiling.
5. Unscrew 2 stainless steel screws in front of aluminum box. You will be able to raise the aluminum cover of the
overturned hood, exposing the wiring inside the aluminum box.
6. The timer, toggle switch, and on-off switches are on the left of the overturned hood. Using 5/16” nut driver
remove 2 nuts attaching timer.
7. There are two wires connected to the timer. One to the light ballast and one to the toggle switch. Note their
positions, then disconnect them.
8. Remove the timer and replace with new one. Reconnect ballast and toggle switch. Replace nuts to hold timer
in place and tighten.
9. Reinstall aluminum cover and ceiling with bulb shield and replace bulbs. Return hood carefully to upright
position.
10. Replace timer knob on the exterior of hood by lining up with timer and pushing into place.
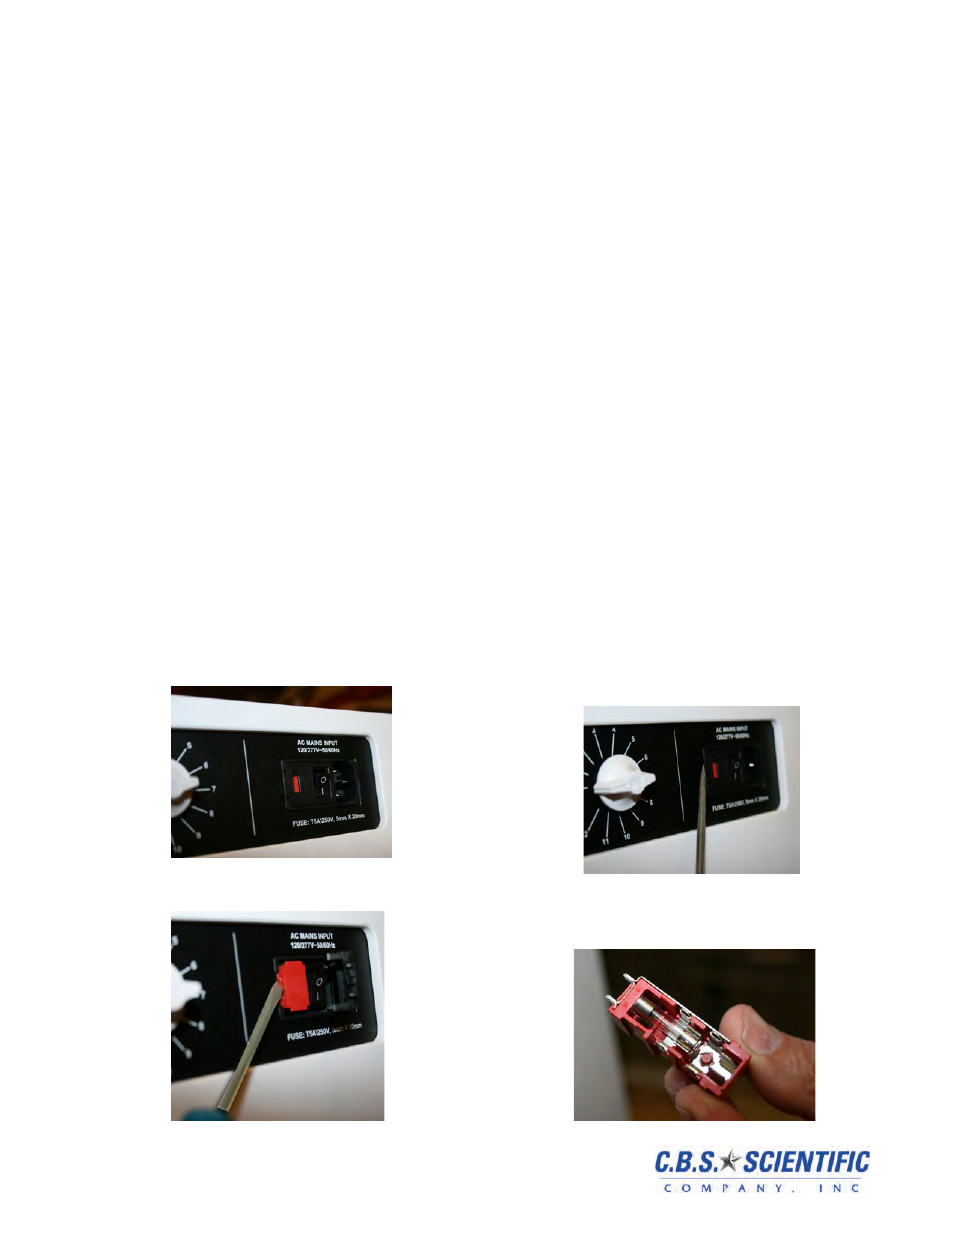
5.2 PCR Workstation
®
Fuse Replacement
1. You will need the following:
• Flathead screwdriver
• Replacement fuse 5A/250V, 5 x 20mm
2. Locate fuse housing to left of AC mains input
4. Use screwdrivier to release fuse holder from housing.
3. Use small screwdriver to pry open fuse access
door
5. Remove red fuse holder from housing. Fuses
5A/250V, 5 x 20mm can now be inspected or
replaced