Food guide, Need help, Care and cleaning – Black & Decker MFP100 User Manual
Page 3
6
Food Guide
FOOD
ATTACHMENT
COMMENTS
APPLES
Disc, Slicing Side
Stack 2 quarters horizontally in chute.
Use moderate pressure.
BANANAS
Disc, Slicing Side
Peel and cut in half; use light pressure.
CABBAGE
Disc, Shredding Side
Cut to fit chute; shred into bowl. Add slaw ingredients
(mayo, vinegar, salt, etc.)
CARROTS
Disc, Slicing Side
Cut into 4” (10.2 cm) lengths and pack in chute,
(Sliced, shredded)
alternating thick and thin ends.
Shredding Side
Position in chute & shred.
CELERY, CHOPPED
Chopping Blade
Up to 1 cup cut into
1
⁄
2
” (1.27 cm) lengths. Pulse to
Chopping Lid
desired texture.
CUCUMBER
Disc, Slicing Side
Cut to fit chute; use light pressure.
CHEESE, PARMESAN
Chopping Blade
Cut into
1
⁄
2
” (1.27 cm) cubes and pulse up to
1
⁄
2
cup
Chopping Lid
at a time.
CHEESE, CHEDDAR
Disc, Shredding Side
Cut chilled cheese to fit chute/shred.
EGGS (HARD COOKED)
Chopping Blade
Quarter up to 3 eggs and pulse to desired texture. Add
Chopping Lid
mayo, salt, and seasoning for egg salad.
NUTS, CHOPPED
Chopping Blade
Add up to 1 cup; pulse to desired fineness.
Chopping Lid
ONIONS
Chopping Blade
Quarter or cut large onions into 8 pieces. Add to bowl.
Chopping Lid
Pulse. For even, coarse results, only chop 2 quarters
at a time.
BREAD
Chopping Blade
Use up to 2 slices/broken into pieces. Pulse speed.
Chopping Lid
PARSLEY, OTHER
Chopping Blade
Add up to 1 cup; pulse to desired fineness.
HERBS
Chopping Lid
PEPPERONI
Disc, Slicing Side
Cut into 4” (10 cm) lengths. Slice 1 piece at a time
using firm pressure.
POTATOES
Disc, Shredding Side
Cut to fit chute. After shredding, place in cold water
to prevent darkening before frying.
SQUASH (SHREDDED)
Disc, Shredding Side
Cut to fit chute; shred, salt and drain. Fries well in
butter or oil.
Need Help?
For service, repair, or any questions regarding your appliance, call the appropriate
“800” number on the cover of this book. Do NOT return the product to the place of
purchase. Do NOT mail the product back to the manufacturer nor bring it to a service
center. You may also want to consult the website listed on the cover of this manual.
5
Chopping Blade
The Chopping Blade speeds up many everyday tasks and is designed to chop, crumb,
grind, mince and mix quickly.
1. Slip the Bowl over the center Post and twist it toward the Base to be sure the Bowl
locks into place.
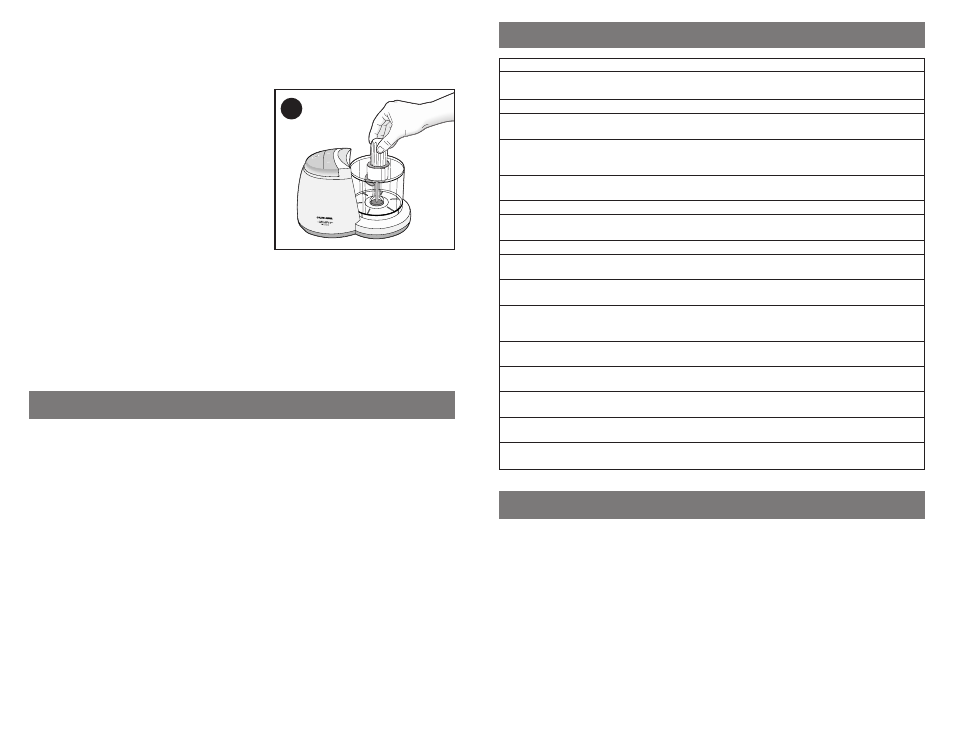
2. Grasp the Chopping Blade by its center hub
and slide it down onto the Post (C).
3. Use the Food Guide to help you prepare food
for chopping/mincing/mixing and crumbing,
then place the food into the Bowl. Place the
Chopping Lid onto the Bowl and twist it toward
the Base until you hear it click into place.
4. Plug the cord into an electrical outlet.
5. Use the continuous On (MFP100), Hi or Low
(MFP200) for longer processing tasks to make
salad dressing, dips, or baby food. Use the
Pulse position for short processing like
chopping nuts or crumbing bread. Hold the
Pulse position for about 2-3 seconds: check results; repeat for desired consistency. It
is better to use several short pulses rather than a single long one unless mixing
ingredients that require longer processing times.
6. After processing food, turn the unit “off” by pressing on the elevated end of the
rocker “lever” so that it will be even with the top of the unit in the “Off” position or
release the Pulse button. Let the Chopping Blade stop spinning before you twist the
Chopping Lid off.
7. Grasp the Chopping Blade by its hub and remove. Unlock the Bowl by twisting it off
the Base. Empty the processed food.
Care and Cleaning
NOTE: Do not attempt to sharpen the cutting edges of the Chopping Blade or the
Reversible Slice/Shred Disc. They are permanently sharpened at the factory and will be
ruined by attempted sharpening.
Cleaning
1. Before cleaning, be sure the unit is Off and unplugged.
2. Rinse parts immediately after processing for easy cleanup. Removable parts can be
washed by hand or in a dishwasher, top rack.
■ If washing by hand, use warm soapy water, rinse, and dry thoroughly. If necessary,
use a small bristle brush to thoroughly clean the Bowl, Cover with Continuous Flow
Chute, Chopping Blade, and Slice/Shred Disc.
■ In a dishwasher, place removable parts on the top rack only — not in or near the
utensil basket.
3. Wipe the Base with a damp sponge or cloth and dry thoroughly. Remove stubborn
spots with a damp cloth and a mild, non-abrasive cleaner. Do not immerse the Base
in liquid.
4. Do not use rough scouring pads, abrasives, or cleansers on any parts.
5. Do not fill the Bowl with boiling water or place any parts in boiling water. Some foods,
such as carrots, may temporarily stain the Bowl. To remove stains, make a paste of 1
tablespoon baking soda and two tablespoons warm water. Apply the paste to the
stains and rub with a cloth. Rinse in sudsy water and dry.
C