Online manual not for resale purposes – BLITZ R-FIT-Fuel Intensity Tracer User Manual
Page 12
11
※Refer to the sensor type at the ECU wiring diagram.
④ Start the engine and start setting at the TACHO MAP or at the 2D・3D
screen.
③ Please choose AF SENSOR at the MAIN MENU.
② Please choose CALIBRATION at the MAIN MENU and carry out the
calibration by keeping the engine running at 3000 RPM or by choosing
the number of cylinders.
※R
efer to the other section for the details in the calibration.
(3) When the easy setup data is not used as above on step (1):
① Please check the connections, turn the IGN-ON and check that the
power at the R-FIT is turned on. After the opening screen has started it
will switch to the easy setup mode then press the LEFT switch to return
to the MAIN MENU.
(2) When powering ON for the second time and henceforth:
① Turn the IGN-ON and start the engine. It displays the last screen
when the ignition was turned OFF after the opening screen is over.
⑤ The TACHO MAP (setting mode) screen is displayed. Start the engine
if changes of the setup are not necessary.
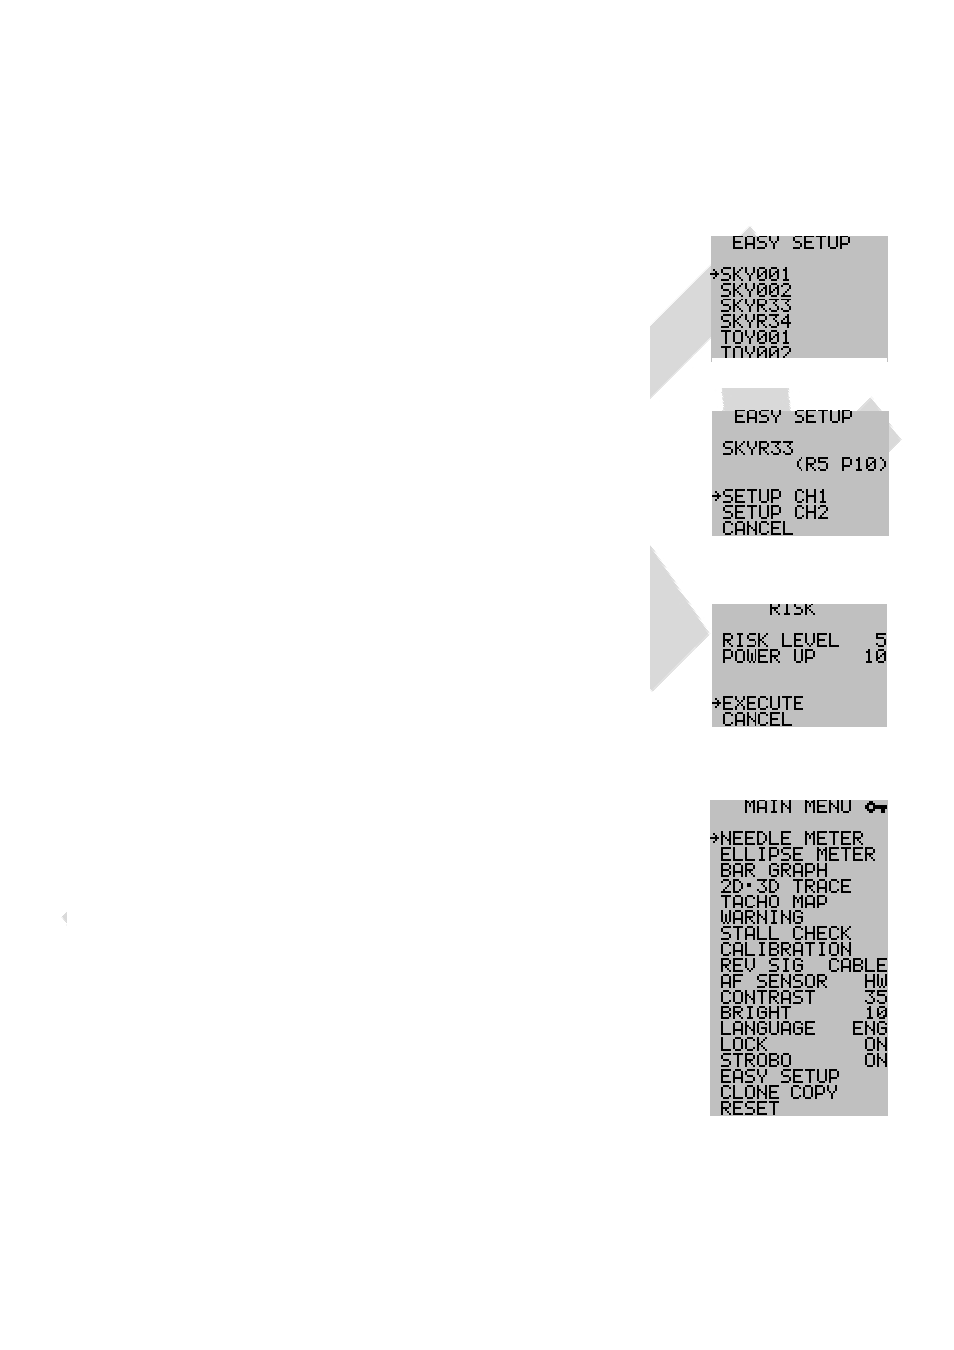
④ The risk level and the degree of power up are expressed with a
numerical value of 0-100 at the risk level screen. If the value is
acceptable, press ENTER or choose CANCEL for a different value.
※Refer to the other section for the details about the risk level.
③ Please choose the channel (CH1or CH2) by pushing the UP/DOWN
switch to select the channel to load the data. If a mistake is made,
press CANCEL and it will return to the MAIN MENU.
5. Initial Setting
In order to use this product, some initial setting is required. Check the
connection of the R-FIT again and please set the initial settings according to the
following procedure.
(1) When powering ON for the first time after purchase or after RESET:
① Please check the connection, turn the IGN-ON and check that the
power at the R-FIT is turned on. After the opening screen has started
it will switch to the easy setup mode.
② Please choose the type of car with the DOWN switch. Press ENTER to
confirm and it will move to the channel selection screen.
Loading Channel
Selection Screen
Easy Set Up Screen
Risk level
Confirmation Screen
MAIN MENU Screen
11
Online Manual Not For Resale Purposes
Online Manual Not For Resale Purposes
Online Manual Not For Resale Purposes
Online Manual Not For Resale Purposes
Online Manual Not For Resale Purposes
Online Manual Not For Resale Purposes
Online Manual Not For Resale Purposes
Online Manual Not For Resale Purposes
Online Manual Not For Resale Purposes
Online Manual Not For Resale Purposes
Online Manual Not For Resale Purposes
Online Manual Not For Resale Purposes
Online Manual Not For Resale Purposes
Online Manual Not For Resale Purposes
Online Manual Not For Resale Purposes
Online Manual Not For Resale Purposes
Online Manual Not For Resale Purposes
Online Manual Not For Resale Purposes
Online Manual Not For Resale Purposes
Online Manual Not For Resale Purposes
Online Manual Not For Resale Purposes
Online Manual Not For Resale Purposes
Online Manual Not For Resale Purposes
Online Manual Not For Resale Purposes