Quick start, Artists – Artograph LED 200 Owners Manual User Manual
Page 7
FOCUS
1. Thoroughly read the Important Safety Information before you proceed.
2. Open boxes and remove all materials.
3. Remove protective film from projector.
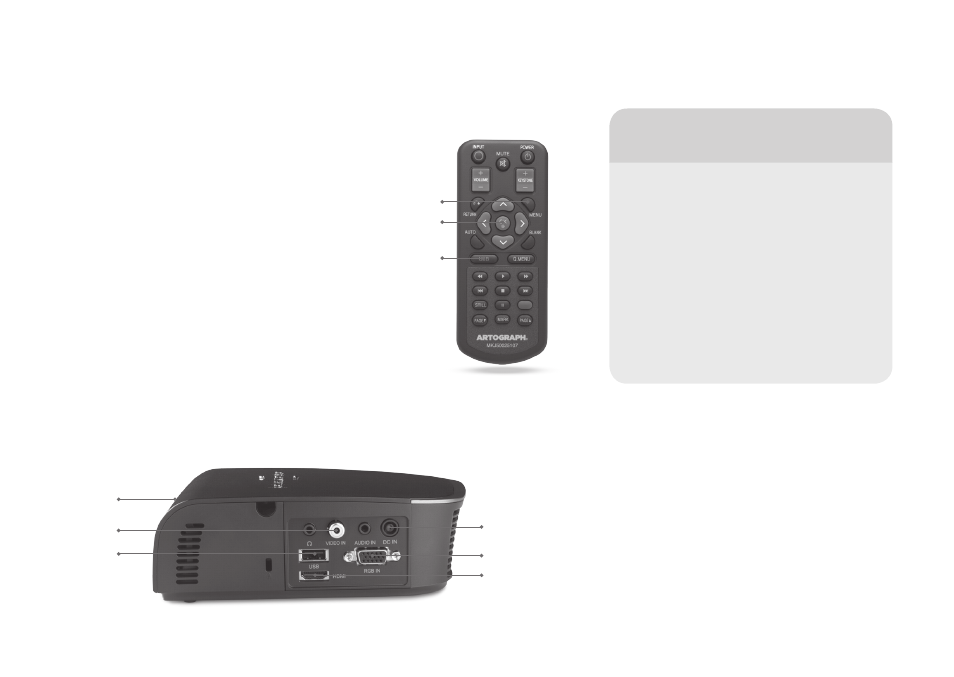
4. Install battery in remote control.
5. Plug in AC/DC power to projector and wall outlet.
6. Press power button on top of projector or on remote.
7. Attach input device of choice
RGB —connect RGB cable (included) from notebook/
computer to projector
USB— install card reader (included) with SD card or use
a USB flash drive.
Video—connect standard definition analog video cable
from camera/VHS/DVD to projector
HDMI—connect high definition digital video source via HDMI
cable (not included) from Blu-ray/HD video source to projector.
8. Call up images on your computer and project via the RGB connection,
or for USB use the USB button on the remote to navigate to image directories.
9. Aim projector at surface. To adjust image size, move the projector closer or further
away from the surface.Focus with dial on side of projector.
Artograph Digital Art Projector LED200 Operation Guide
7
Quick Start
Artists…
Project photographs, digitized drawings,
or sketches directly onto canvas, paper,
wood, or virtually any other surface for
easy composing, layout, and transferring
of images. Project a video and freeze any
frame to capture the perfect moment. Take
all your work with you to a show. Project
your portfolio onto a blank canvas. Rear
screen project your art through a frosted
sheet or velum. Your images will show but
not the projector.
POWER IN
RGB
HDMI
USB
OK
USB
VIDEO IN
MENU