Grid patterns, Interior decorators – Artograph LED 200 Owners Manual User Manual
Page 17
Artograph Digital Art Projector LED200 Operation Guide
17
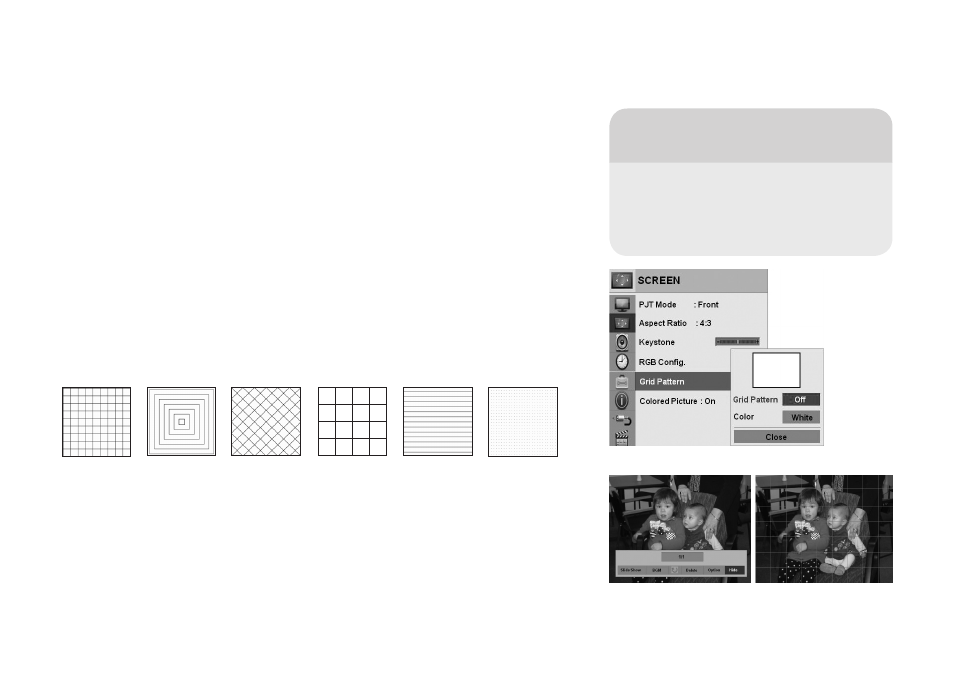
Grid Patterns
USB Input Features
Start by setting the projector into the grid pattern setting.
To turn on the grid pattern: Press
MENU on the remote. Arrow to SCREEN
and press
OK.
Arrow down to
CLOSE and press OK. In the SCREEN menu, arrow down to GRID
PATTERN. Press OK. A popup window opens. Use the right/left arrows to move
through the grid choices.
The grid pattern may also be used alone, without any image input (disconnected RGB
cable). Just turn on the projector. Press MENU, then SCREEN, and OK. Arrow to the
grid pattern and select the GRAY or WHITE grid pattern you want to use (black grids
only work over other sources). Select OK and close the menus. The grid pattern will be
projected onto any surface.
Please note: Remember to turn grids off when finished.
There are Six Choices of Grid Patterns
Arrow down to
COLOR. Choose the grid color that will be most visible over your image,
BLACK, GRAY, or WHITE, and press OK.
Press the
RETURN button on the remote to go back to the main menu.
Select
USB and OK.
Navigate back to your USB image directories. Select your image, or start slide show.
Press
HIDE and the grid lines will appear over your image.
Interior Decorators…
Project the grids to guide layout of tiles,
mosaics, murals, patterns, stencils, or
flooring. Project grids or images to guide
custom paint finishes, stripes and borders.