Installing the door/transom assembly – Anchor EVENT SERIES - PROFILE SIZE: 220MM X 100MM, INSTRUCTION SUPPLEMENT - AMBASSADOOR AND HARDWALL INSTALLATION User Manual
Page 3
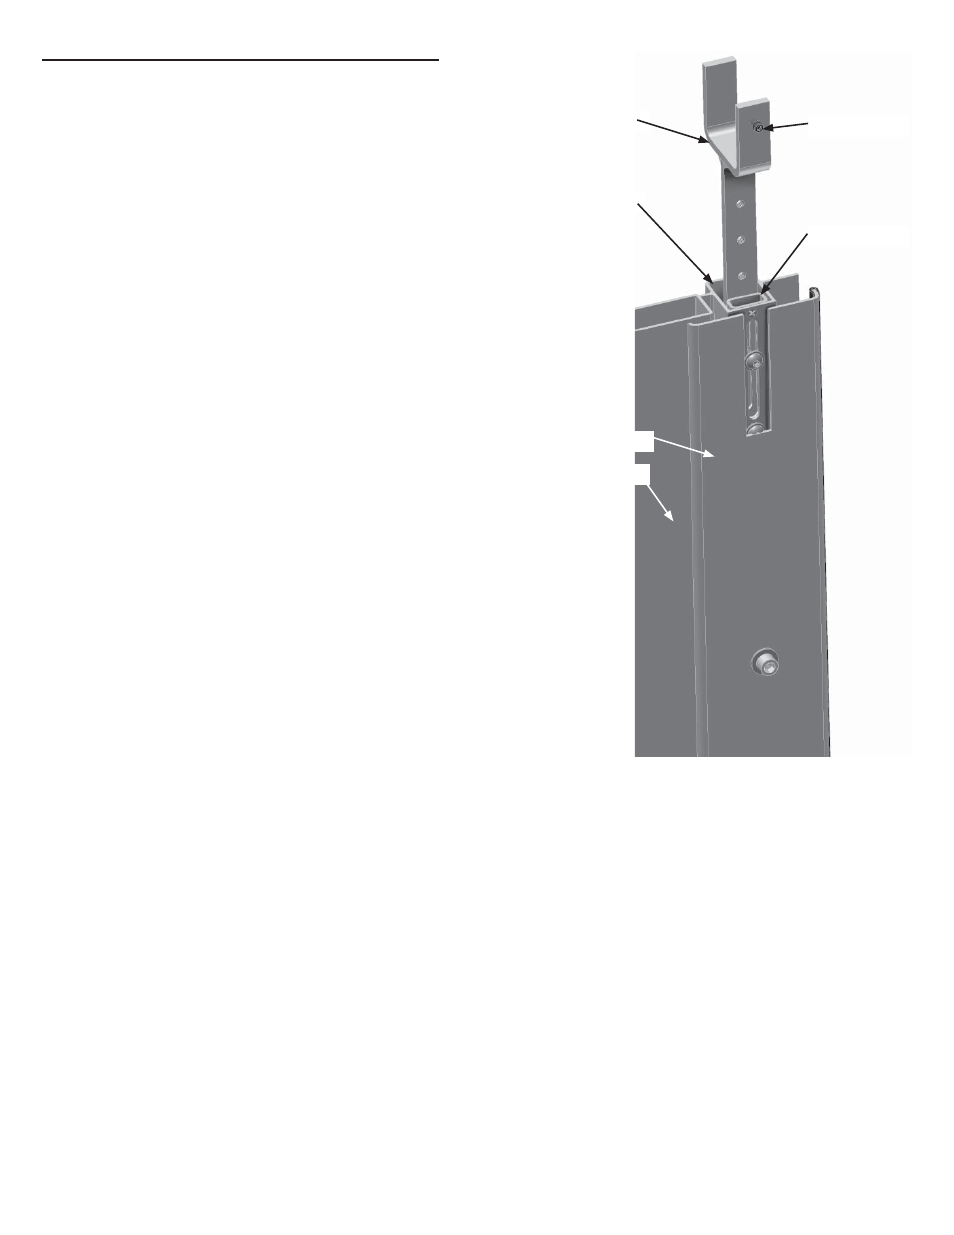
Installing the Door/Transom Assembly
1. Utilizing the nylon lifting straps, position the door/transom
assembly between the sidelight wall bases installed as noted
above. The door/transom assembly should still be placed
face-up and slightly inside the bases as shown in the Figure
A. The door/transom assembly can now be pivoted into the
upright position.
2. The door/transom assembly is positioned correctly when the
side connectors (on both sides of the door frame) engage the
notch in the back lip of the base. The door/transom assembly
may need to be lifted over the back lip of the base when
pivoting into the upright position. Place shims (supplied by
installer) under the bottom of the door frame as necessary to
plumb door. Adjust the threshold inward or outward to plumb
door. Once the door/transom assembly is plumb, install the
pressure plates on the intermediate posts with the bolts and
washers provided. Verify intermediate posts are plumb and
tighten the bolts fastening the fork to the intermediate post.
Tighten set screw in adapter forks to purlin.
3. Screw the threshold to the platform through the four holes in the
threshold. Utilize countersink self-tapping screws. (supplied
by installer.)
4. The door/transom assembly is plumbed correctly when the
bottom of the door leafs alight and both doors swing without
rubbing the threshold.
Pressure plate
Side Connector
Adapter Fork
Post Assembly with Adapter Fork
and Pressure Plate.
Intermediate Post
Set Screw
Spacer Tube
3