7 sharing ndas device – AirLive MU-7000AVs User Manual
Page 22
6. Network Hard Disk (AirLive NDAS Mode)
2. If the Windows Logo Testing message comes up, click Yes or Continue Anyway to finish the
installation.
3. Registration is completed.
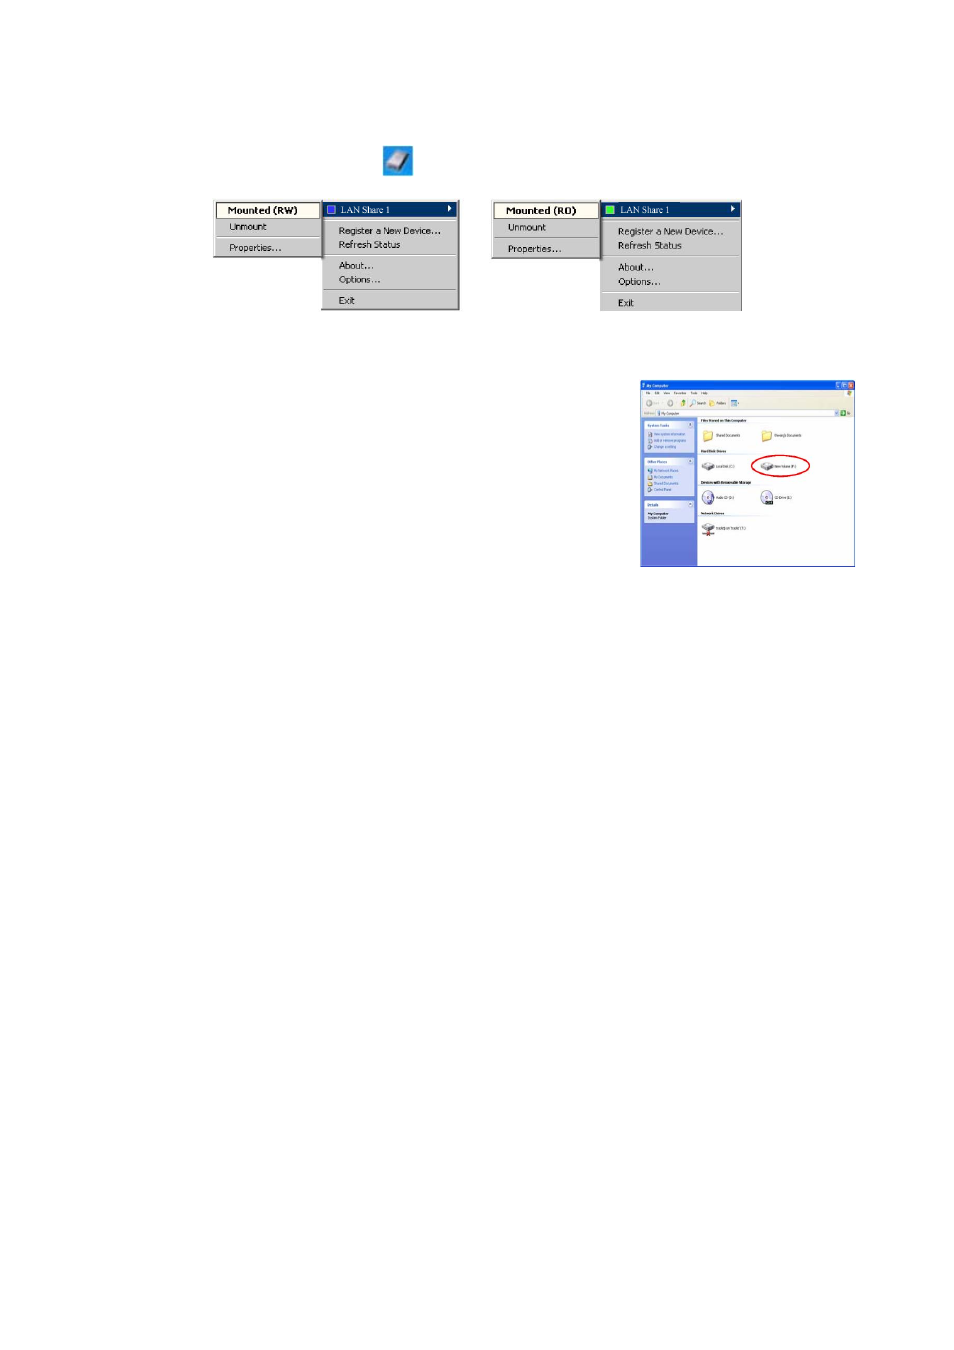
Click NDAS Device Management
to see the registered NDAS Device
Read/Write Mode Read-Only Mode
Note: If you cannot see your NDAS Device, please click Refresh Status and check again.
4. Using NDAS Device
Now that you have successfully installed NDAS Device, it’s time to
familiarize yourself with using the NDAS Device. Your NDAS Device
will show up as a local drive in My Computer. Drive letter and
NDAS Device name may vary between Personal Computers.
You can use NDAS Device like a local drive on your PC.
1. Drag and drop files to NDAS Device.
2. Copy and paste data to NDAS Device.
3. Make and delete folders.
4. Share files and folders.
5. Backup your data
6.1.7 Sharing NDAS Device
NDAS Device is connected to your network, it can be accessed from any computer on your LAN.
To share NDAS Device, the following must occur:
Windows 2000/XP /Server 2003(32bit)Environment:
1. All computers and NDAS device must be on the same LAN.
2. NDAS device must be connected via Ethernet or Wireless Router.
3. To share Read and Write access, all computers on the network using the NDAS device must have
the NDAS driver version 3.1.x installed.
4. NDAS device must be registered onto each computer.
Windows ME//98SE Environment:
1. All computers and NDAS device must be on the same LAN.
2. NDAS device must be connected via Ethernet or Wireless Router.
3. To share Read and Write access, all computers on the network using the NDAS device must have
the NDAS driver version 1.x installed.
4. NDAS Device must be registered onto each computer.
Mixed Environment with Windows and Mac:
1. All computers and NDAS must be on the same LAN.
2. NDAS must be connected via Ethernet or Wireless Access Point.
3. To share NDAS each computer on the network must install the corresponding NDAS Driver.
- On Windows XP/2000, install NDAS driver v2.4 (do not use 3.x.x).
- On Windows 98 SE/ME, install NDAS Driver 1.x
- On Mac OSX, install NDAS driver 1.x
4. NDAS must be registered onto each computer.
5. Write access is assigned to one user at a time and is passed from one user to another.
6. In this mode, if there have a Windows XP or Windows 2000 system already mount NDAS Device under
Read/Write Mode, others Windows XP or Windows 2000 system in the same work group can mount
NDAS Device under Read/Write Mode alone or at the same time, but Windows ME、Windows 98SE and
Mac OS system just can mount NDAS Device under Read only Mode alone or at the same time.
7. At any time, any Windows ME、Windows 98SE and Mac OS system want to mount NDAS Device under
Read/Write Mode, others computers must mount NDAS Device under Read Only Mode, they can’t
mount NDAS Device under Read/Write Mode alone or at the same time.
16
AirLive Mu-7000AV User’s Manual