3 cutting string replacement, 4 drive chain adjustment, 5 transmission adjustment – Echo WT189 Owners Manual User Manual
Page 14: 6 engine maintenance, Warning
WHEELED TRIMMER
10
SERVICE & MAINTENANCE
BEFORE INSPECTING OR SERVICING ANY PART OF THIS MACHINE, SHUT OFF POWER SOURCE,
DISCONNECT SPARK PLUG WIRE FROM SPARK PLUG AND MAKE SURE ALL MOVING PARTS HAVE COME TO A COMPLETE STOP.
WARNING
Cutting string is available in two thicknesses, 130 mil
(standard) and 155 mil (heavy duty). The type of string
selected is dependent on the conditions and material
being cut.
String heavier than 155 mil can be used by making the
holes in the trimmer head larger. The decision to drill the
holes bigger may shorten the life of 130 mil and 155 mil
string if used again.
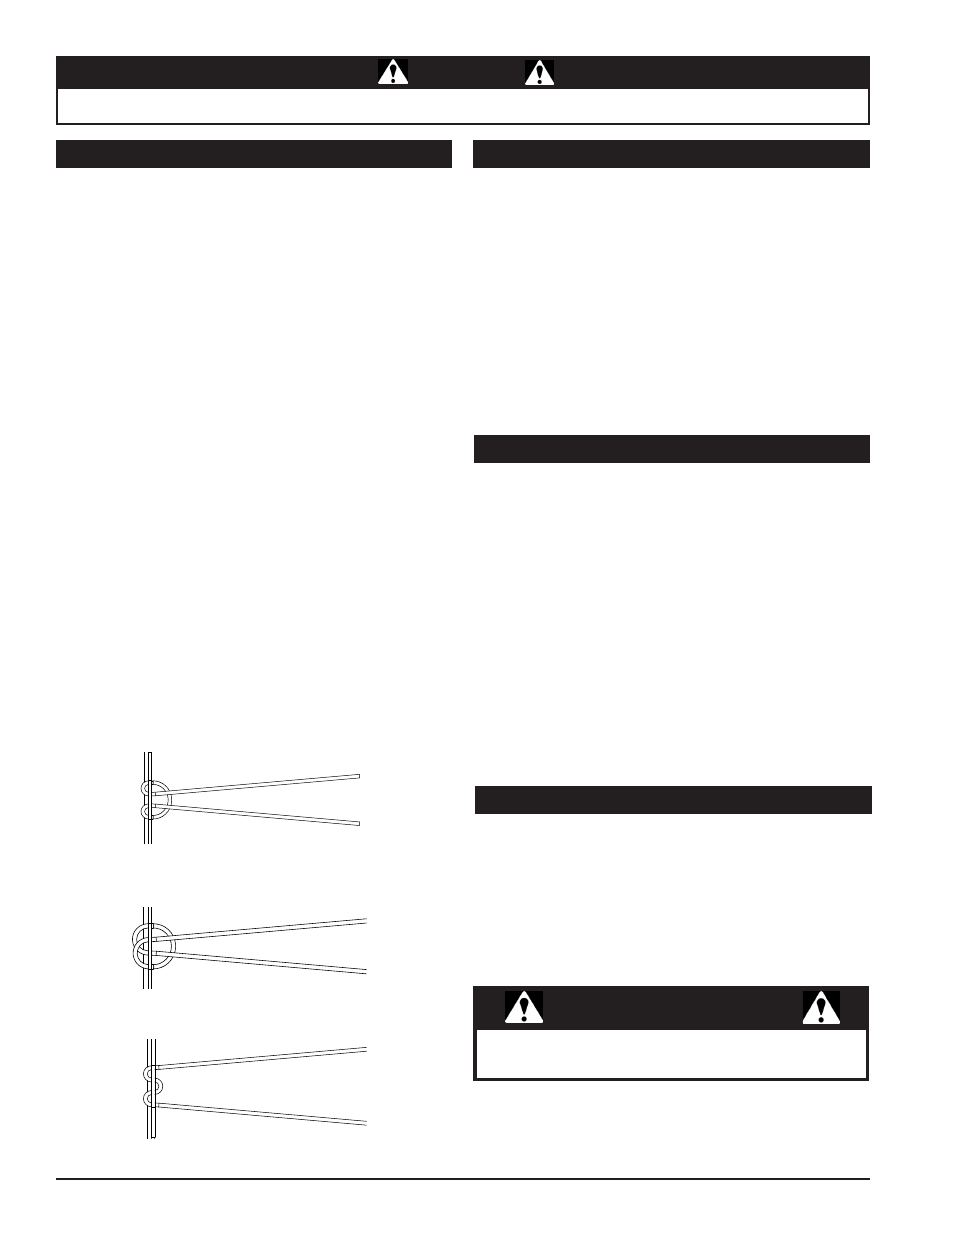
Cutting string can be wrapped in a variety of ways. Refer
to Figures 5.2, 5.3 and 5.4 for examples. The wrapping
method and cutting string thickness chosen is ultimately
based on what is determined the best for the operator.
To wrap the cutting string in the standard configuration,
follow the steps below.
1. Feed the cutting string through the second hole on
either end of the trimmer head leaving approximately
8 inches for the cutting surface. Total recommended
string length is 20-1/2 inches.
2. Continue by weaving the cutting string through the first
hole directly beside the second hole used in Step 1.
Pull the cutting string tight.
3. Loop the cutting string back and feed through the first
hole on the opposite end of the trimmer head.
4. Feed through the remaining second hole and pull the
cutting string tight. The cutting strings in the middle two
holes should be the same length. If the length differs,
cut to an even length.
Maintenance is essential in preserving engine life. Clean
the engine periodically to remove grass and buildup. The
engine owners manual addresses cleaning the air filter
and changing the oil. Service engine according to the
maintenance schedule in your engine owners manual.
Remember to inspect and clean engine cooling fins as
needed.
Models: All self-propelled models
Self-propelled models operate with a drive chain.
Periodically, this chain will need to be adjusted. To
adjust:
1. Loosen the two 5/16” nuts located under the trimmer
axle.
2. Slide the trimmer axle back to tighten the chains. Slide
the trimmer forward to loosen the chains.
3. Retighten the nuts.
4. Tighten the chains until they have 1/4" deflection.
Models: All self-propelled models
Self-propelled models operate with a 3-speed transmission.
Periodically, the shift cable may need to be adjusted to
allow proper function of all three gears.
To adjust:
1. Locate in-line adjustor on the shift cable.
2. Loosen the smaller nut to allow adjustment of the larger
adjustment barrel.
3. Tighten or loosen the adjustment barrel, to lengthen
or shorten as needed, to achieve all three positions of
the transmission.
4. Once proper adjustment is achieved, re-tighten the
smaller nut to secure.
Figure 5.3 Optional Wrapping Method
Figure 5.4 Optional Wrapping Method
5.3 CUTTING STRING REPLACEMENT
5.4 DRIVE CHAIN ADJUSTMENT
5.5 TRANSMISSION ADJUSTMENT
5.6 ENGINE MAINTENANCE
Clean grass and buildup from the engine periodically.
Dusty conditions will require frequent cleaning.
WARNING
Figure 5.2 Wrapping the Cutting String