7 replacing rotor bearings, English, Warning – Echo CH5653 Owners Manual v.1 User Manual
Page 19
5 INCH CHIPPER
15
ENGLISH
SERVICE & MAINTENANCE
WARNING
BEFORE INSPECTING OR SERVICING ANY PART OF THIS MACHINE, SHUT OFF POWER SOURCE AND MAKE SURE
ALL MOVING PARTS HAVE COME TO A COMPLETE STOP.
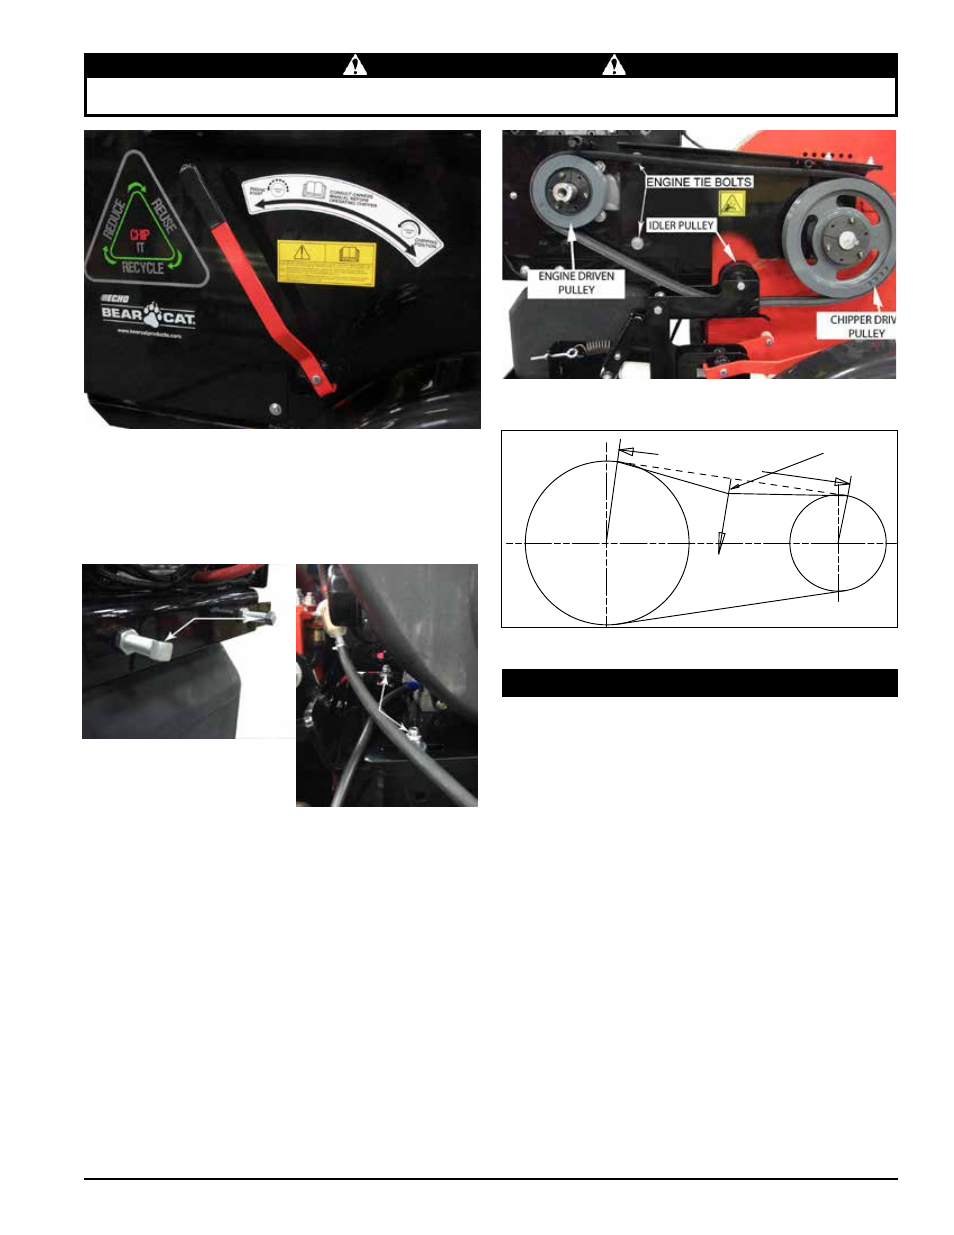
Figure 5.7, Drive belt and pulleys
Figure 5.5, Belt Engagement Lever
Figure 5.6, Engine Plate adjustment bolts
Figure 5.8, Belt tension
SPAN LENGTH
FORCE
20 LBS
7/16" DEFLECTION
5. If more drive belt slack is necessary to remove the belt,
loosen the front and rear bolts located on the engine
mounting plate (see below), along with the two engine
tie bolts located under the belt shield. see Figure 5.5
6. Then remove the drive belt from pulleys.
7. Install the new belt on pulleys. Slide engine back into
place and tighten bolts to proper torque. Install the belt
idler assembly.
8. Check pulley alignment with a straight edge and adjust
if needed.
9. Check belt tension and adjust if needed. The belt
deflection at the center of the belt should be 7/16" when
a 20 lb. load is placed against it (see Figure 5.6).
10. Move the engagement lever to the engaged position and
install the belt guides so you have a 1/8 of clearance.
11. reinstall belt guard.
12. Move the engagement pedal back to the start position,
start engine, engage drive belt slowly, and test unit.
Readjust pulleys if needed.
5.7 replacinG roTor BearinGs
1. Remove the 3/8" retaining bolts holding access cover
to main frame assembly. Tilt access cover over to allow
rotor access.
2. remove the belt guard.
3. remove belt guides on the engine.
4. Take the tension off the drive belt by moving the belt
engagement to the START position, and remove the
belt idler pulley assembly.
5. you may have to do this step to gain more slack in the
belt for removal by loosening the engine plate bolts,
also the bolts just to right of the pulley on the engine tie
will have to be loosened. Then slide the engine toward
the housing by loosening the engine adjustment bolts
just below the starter.
6. Then remove drive belt from pulleys. Remove the
bushing by removing the three capscrews in the
bushing and putting them in the drilled holes. Tighten
the screws evenly and progressively in rotation to
separate the sheave and bushing.
7. remove the set screw on the bushing.
8. Buff the shaft with emery cloth to remove the indent
from the setscrews and any rust on the shaft.