4 attach discharge chute, 5 fill the tank, 6 connect battery – Echo CH611DH Owners Manual v.2 User Manual
Page 11: Warning, English
7
6 INCH CHIPPER
ENGLISH
ASSEMBLY
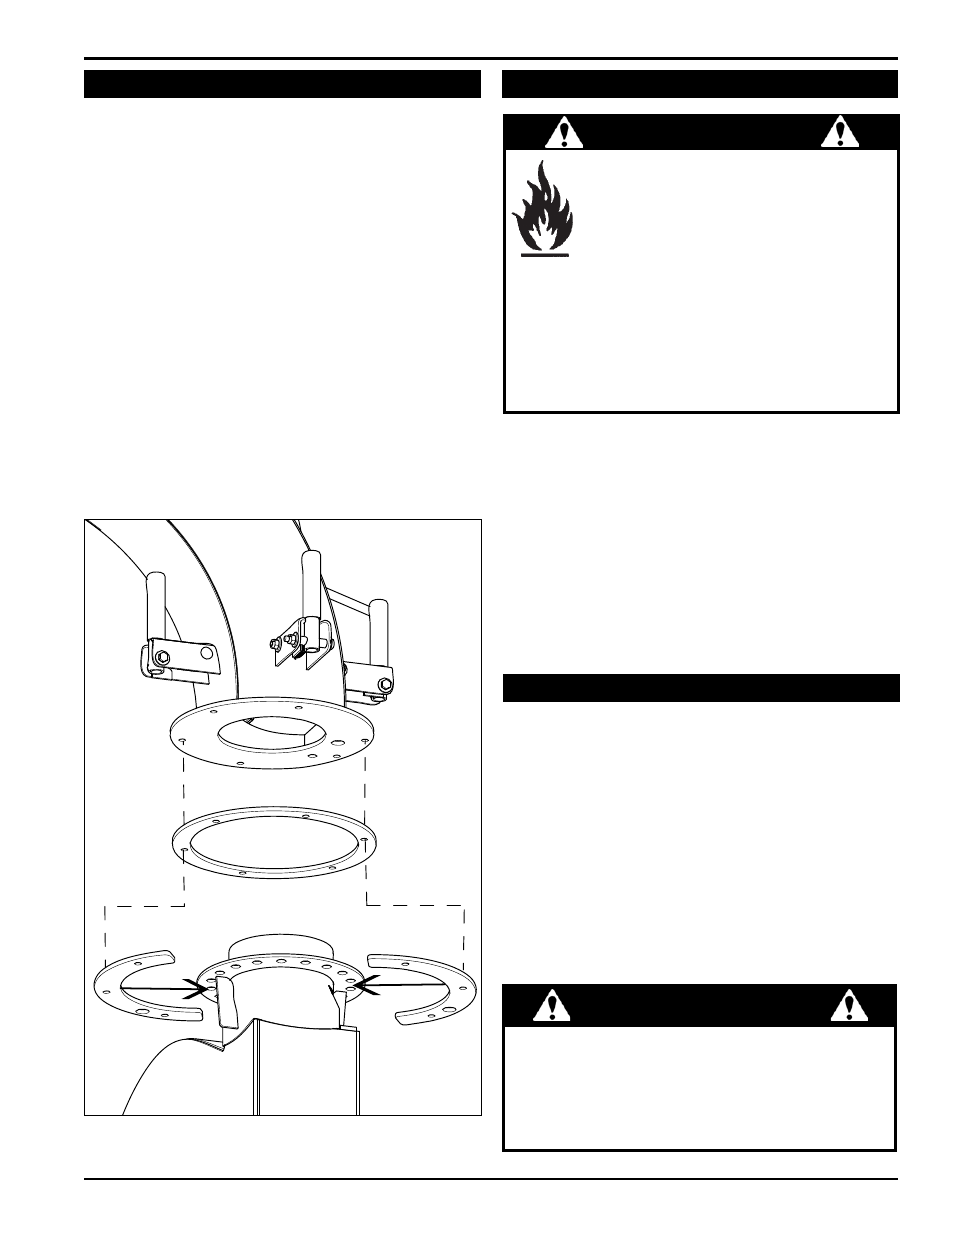
2.4 aTTaCH DISCHaRGE CHuTE
Place the discharge ring around the base of the
1.
mounting flange on the chipper frame (see below).
use a hoist to position the discharge chute directly
2.
above the mounting flange.
Position the discharge ring around the mounting
3.
flange.
Position the two discharge retainers (half circles)
4.
below the mounting flange.
Bolt the chute to the chipper with six (6) 3/8” x 1-1/2”
5.
bolts and nuts from the owner's kit. The bolts should
go through the chute, discharge ring, and discharge
retainer.
Tighten to proper torque.
6.
lubricate the chute by applying grease to the grease
7.
zerk at the base of the chute. Rotate the chute and
apply grease until the chute rotates freely.
use the snap pin from the owner's kit to lock the chute
8.
in position.
2.6 CoNNECT baTTERY
2.5 FILL THE TaNK
WaRNING
gasoline and diesel fuels are highly
flammable and their vapors are explosive.
To prevent personal injury or property
damage:
Store fuel only in approved containers, in
well ventilated, unoccupied buildings, away
from sparks or flames. A container with a capacity of 2
gallons or less with a pouring spout is recommended.
Do not fill the fuel tank while the engine is hot or
running, since spilled fuel could ignite if it comes in
contact with hot parts or sparks from ignition. Do not
start the engine near spilled fuel. Never use fuel as a
cleaning agent. DO NOT MIX OIl WITH FuEl.
use only those types of fuels that are recommended in
your engine owner’s manual.
To add fuel:
Stop engine, wait for all parts to stop moving and
1.
disconnect spark plug wire. Remove key from key
switch. Allow the engine and muffler to cool for at least
three minutes.
Clean area around fuel fill cap and remove cap.
2.
using a clean funnel, fill fuel tank to 1/2” below bottom of
3.
filler neck to provide space for any fuel expansion. Install
fuel fill cap securely and wipe up any spilled gasoline.
To avoid sparks and a possible explosion or fire due
to a short circuit, do not touch the positive (+) battery
terminal and any surrounding metal with tools, jewelry
or other metal objects. When installing battery cables,
connect the positive (+) cable first and the negative (-)
cable last.
WaRNING
Mount the discharge chute on the chipper by using the
discharge ring and two discharge retainers
you will need to purchase a battery. Choose a battery that
meets or exceeds the engine manufacturer’s specifications.
Consult your engine owner’s manual or authorized dealer
for specification details.
To install the battery:
Open the battery box and insert battery into the battery
1.
box.
Attach the positive (red) battery cable from the engine
2.
to the positive (+) battery terminal.
Attach the negative (black) battery cable from the
3.
engine to the negative (-) battery terminal.
Secure the cover on the battery box with the strap.