1 installing discharge tube, 2 mounting the chute, Assembly – Echo CH500H Owners Manual v.1 User Manual
Page 9: 1 installing discharge tube 2.2 mounting the chute, 2assembly, Warning
5" and 8" Skid Steer Chipper
5
Section
2
assemblY
remove the skid steer chipper from the shipping pallet.
1.
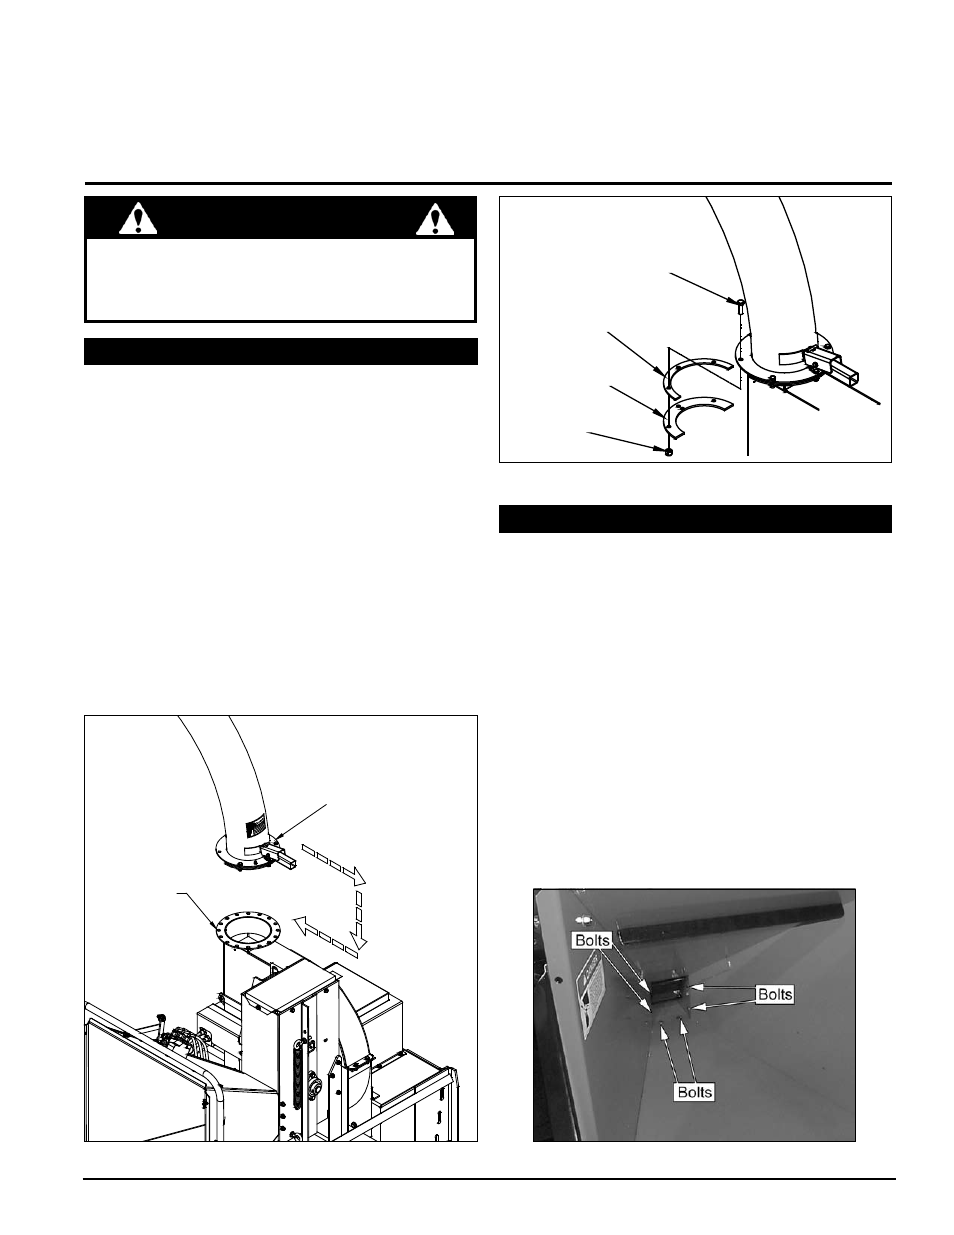
lightly grease the chipper outlet flange.
2.
Position the discharge tube over the chipper outlet
3.
flange and slide on using the tube latch (Figure 2.1).
install the retaining rings with the hardware provided
4.
in the owner's kit (Figure 2.2).
tighten the bolts so the discharge tube does not rock
5.
on the flange. do not over tighten the bolts as the
flange will distort.
lift the latch on the handle of the discharge tube and
6.
position the tube in the desired position.
release the latch making sure it locks in one of the
7.
holes on the chipper flange.
add one shot of grease to the grease zerk on the discharge
8.
flange. rotate the discharge tube to spread grease.
Figure 2.1 - Attaching Discharge Tube
2.2.1 mounTing The chuTe To The roller
suPPorT
the chipper chute must be mounted to the roller support
weldment. On the CH800H the chute is held in place with
8 bolts, on the CH500H the chute is held in place with 6
bolts. Both models use a chute support.
Place the chute on the roller support weldment. Have
1.
someone assist if necessary.
align the chute with the mounting holes.
2.
insert all 6 or 8 (depending on model) 3/8” carriage
3.
bolts into the mounting holes. the CH800H is mounted
with 8 bolts. the CH500H is mounted with 6 bolts. it
may be helpful to align the holes with a punch.
Place washers and nuts on the opposite side of the
4.
bolts and tighten to proper torque.
Figure 2.3 - Mounting the Chute to the Roller Support.
Figure 2.2 - Securing Discharge Tube
3/8" X 1-1/4"
BOLT
CHIPPER
DISCHARGE
SPACER
CHIPPER
DISCHARGE
CLAM
3/8" NYLOCK
NUT
SLIDE DISCHARGE
TUBE ONTO
CHIPPER OUTLET
FLANGE
CHIPPER
OUTLET
FLANGE
Warning
2.1 insTalling discharge Tube
2.2 mounTing The chuTe
if any bolts or nuts are dropped in the machine, be
sure to remove them before starting the machine.
remove items from the shredder area by removing
the discharge screen.