5 attach chute extension tray, 6 attach discharge tube, Englis h – Echo CH8670H Owners Manual v.5 User Manual
Page 11
7
8 INCH TURNTABLE CHIPPER
ENGLIS
h
ASSEMBLY
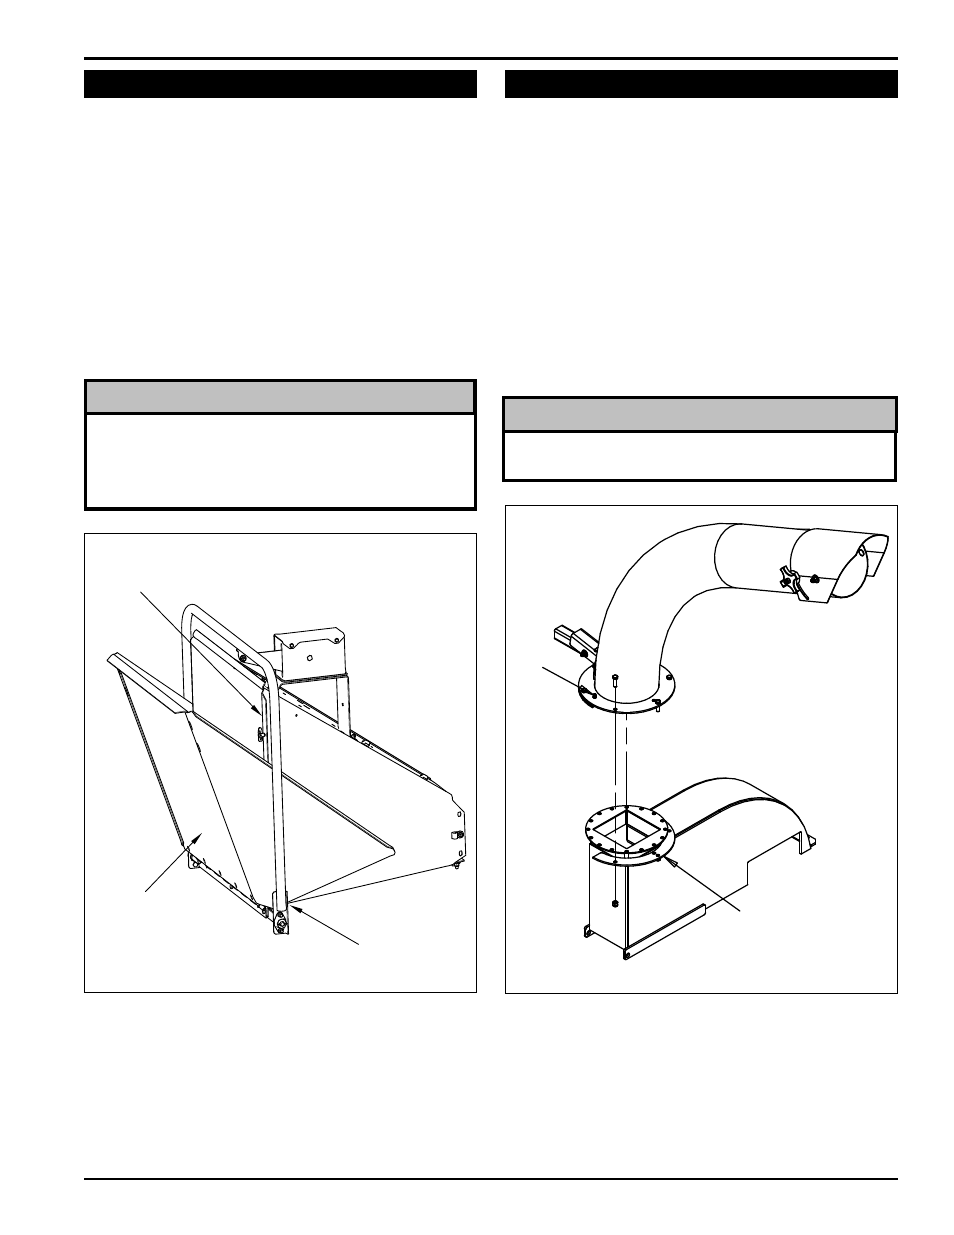
2.6 aTTach dISchaRGE TubE
Attach the discharge tube to the mounting flange
1.
on the chipper frame. Half of the mounting clamp is
already attached to the tube. Slide the tube onto the
flange and tighten the bolts to secure it.
Install the second half of the clamp to the tube and
2.
flange.
grease the zerk and tighten the nuts completely.
3.
loosen each nut one turn and attempt to rotate the
4.
tube. If it does not rotate freely, loosen each nut 1/2
turn until it rotates freely.
rotate the tube 360 degrees and lock it in place with
5.
the handle to make sure it is mounted correctly.
keep nuts as tight as possible while allowing the
discharge tube to freely turn.
NoTE
SECOND
HALF OF CLAMP
ZERK
Figure 2.4 - Discharge tube assembly
2.5 aTTach chuTE EXTENSIoN TRaY
Make sure that you position the lip on the extension
tray behind the lip on the chipper chute. This provides
a flatter surface and prevents obstructions while feed-
ing the machine.
Tilt the extension tray up, so the bottom of the tray is
1.
facing outward (Figure 2.3). Slide the extension tray lips
between the extension hinge and chipper chute lips.
Tilt the extension tray down until the tray rests on the
2.
extension hinge, and the extension tray lips contact
the back of the chipper chute lips.
Insert five 3/8" x 1" carriage bolts (included in owner's
3.
kit) through the extension tray and hinge. Secure the
bolts with washers and nylock nuts from the bottom.
attach the chute support weldment to the middle hole
4.
of the chipper chute by using the existing bolt.
EXTENSION
TRAY LIP
EXTENSION
HINGE
CHIPPER
CHUTE LIP
Figure 2.3, Attaching the extension tray
NoTE