Using the scanner, Preparation and initial setup – I.R.I.S. IRIScan Anywhere 3 User Guide User Manual
Page 13
Using the Scanner
10
Using the Scanner
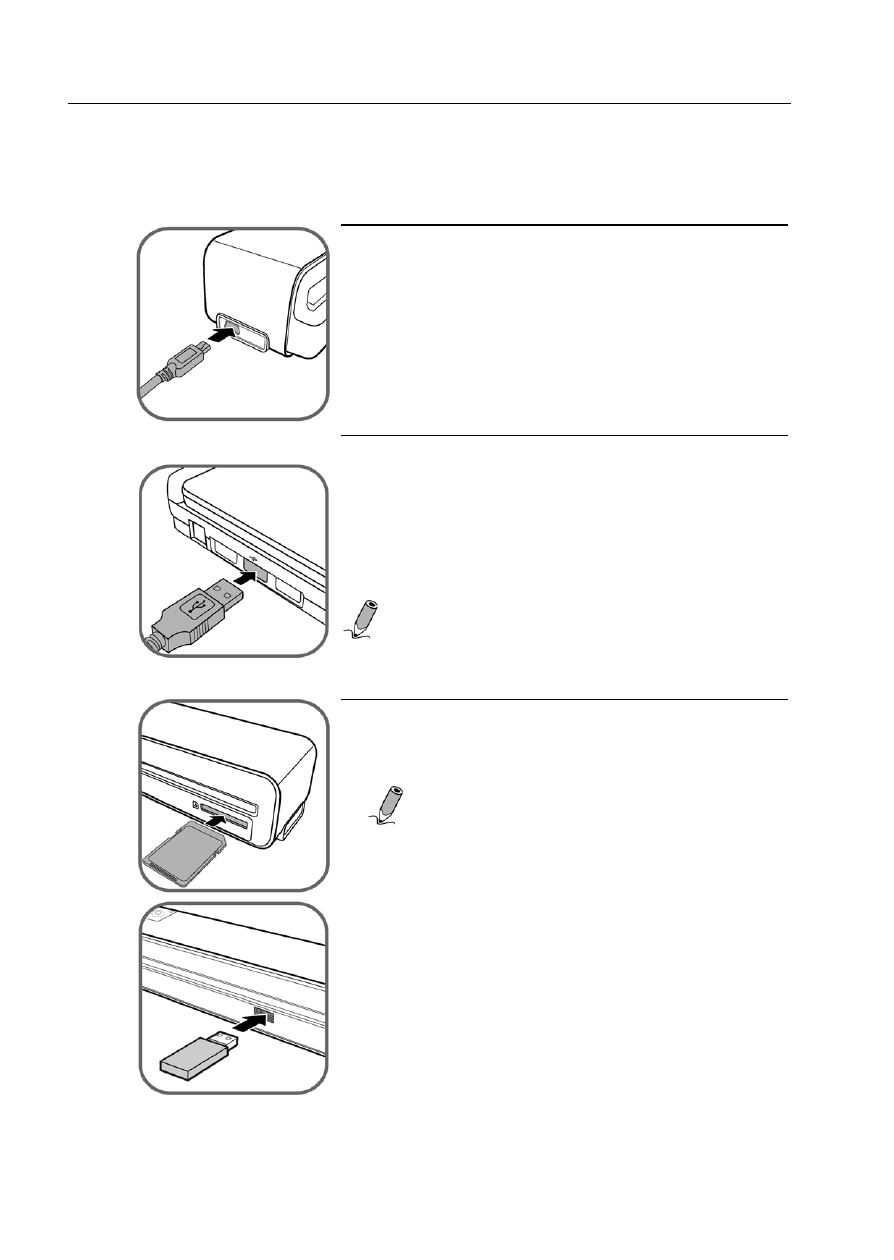
Preparation and Initial Setup
1. Connect the mini end of the USB cable
(included with scanner) to the Mini USB
socket on the scanner.
2. Power on your computer, and then connect
the large end of the USB cable to a USB
port on your computer to start charging the
built-in battery of the scanner.
After the battery is fully charged,
disconnect the scanner from the computer.
NOTE
: It takes approximately 4
hours to fully charge the scanner
battery. See Indicators on page 7 to
identify the charging status.
3. Insert an unlocked (writable) memory card
into the memory card slot, or a USB flash
drive into the USB port on the scanner.
NOTE
:
• You can also use this scanner without a
memory card or USB storage device. The
scanner has a built-in 512MB memory.
• When storing images, the scanner uses
the three possible memory types in the
following priority order:
USB flash drive > Memory card > Built-
in memory
• The scanner only accepts memory cards
in FAT16 or FAT32 format. NTFS and
other file systems are not supported.
• See Supported Memory Card Types on
page 17 for all supported memory card
types.