Aries Automotive 15600WRB User Manual
Page 3
mounting to the factory bumper brackets, as seen in (Fig 8) Snug but do not tighten hardware,
Plug in the road lights with the wire harness and secure harness to bumper.
15. Next select the air pump support bracket and air pump support bracket plate, place the support
bracket in from under & behind the bumper and secure it with the support plate to the bumper
using the 8mm hex bolt & lock washer snug but do not tighten as seen in (Fig 10 & 10A) with the
bracket attached to bumper secure the air pump to the bracket with the 6mm hardware Snug but
do not tighten as seen in (Fig 11)
16. Level and adjust the bumper and tighten all hardware.
17. Do periodic inspections to the installation to make sure that all hardware is secure and tight.
To protect your investment, wax this product after installing. Regular waxing is recommended to
add a protective layer over the finish. Do not use any type of polish or wax that may contain abrasives
that could damage the finish.
Page 3 of 6
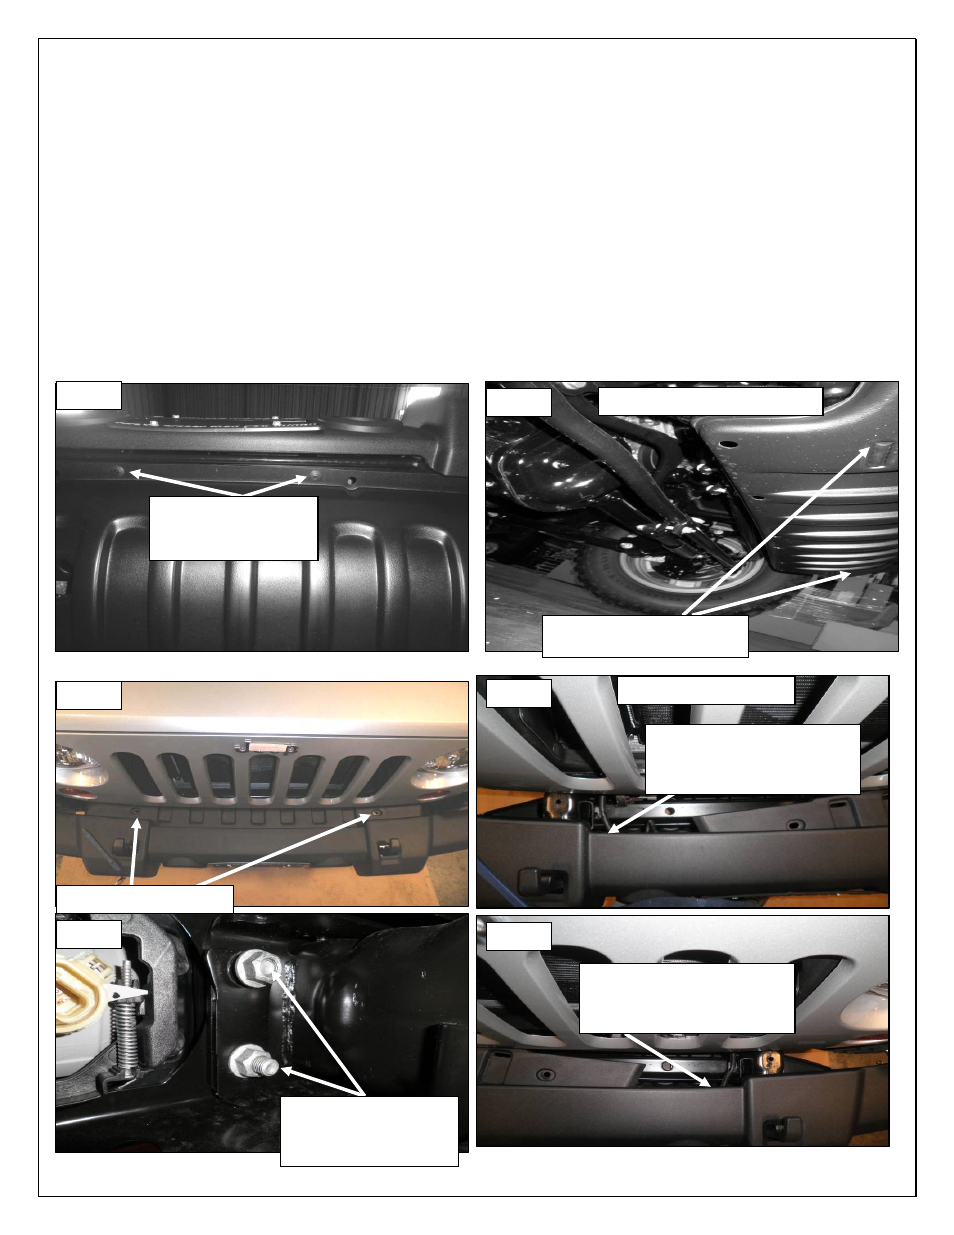
Fig 1
Fig 1A
Fig 3A
Remove push pins
holding plastic skid
shield
Remove plastic insert
Fig 2
Remove push pin holding
plastic skid shield
Passenger/right side shown
Plastic insert removed
Fig 3
Fig 4
Remove 2 factory nuts
holding front bumper
passenger side shown
Location of 2 factory nuts
holding front bumper driver
side shown
Location of 2 factory nuts
holding front bumper
passenger side shown