Front – Aries Automotive 4494 User Manual
Page 2
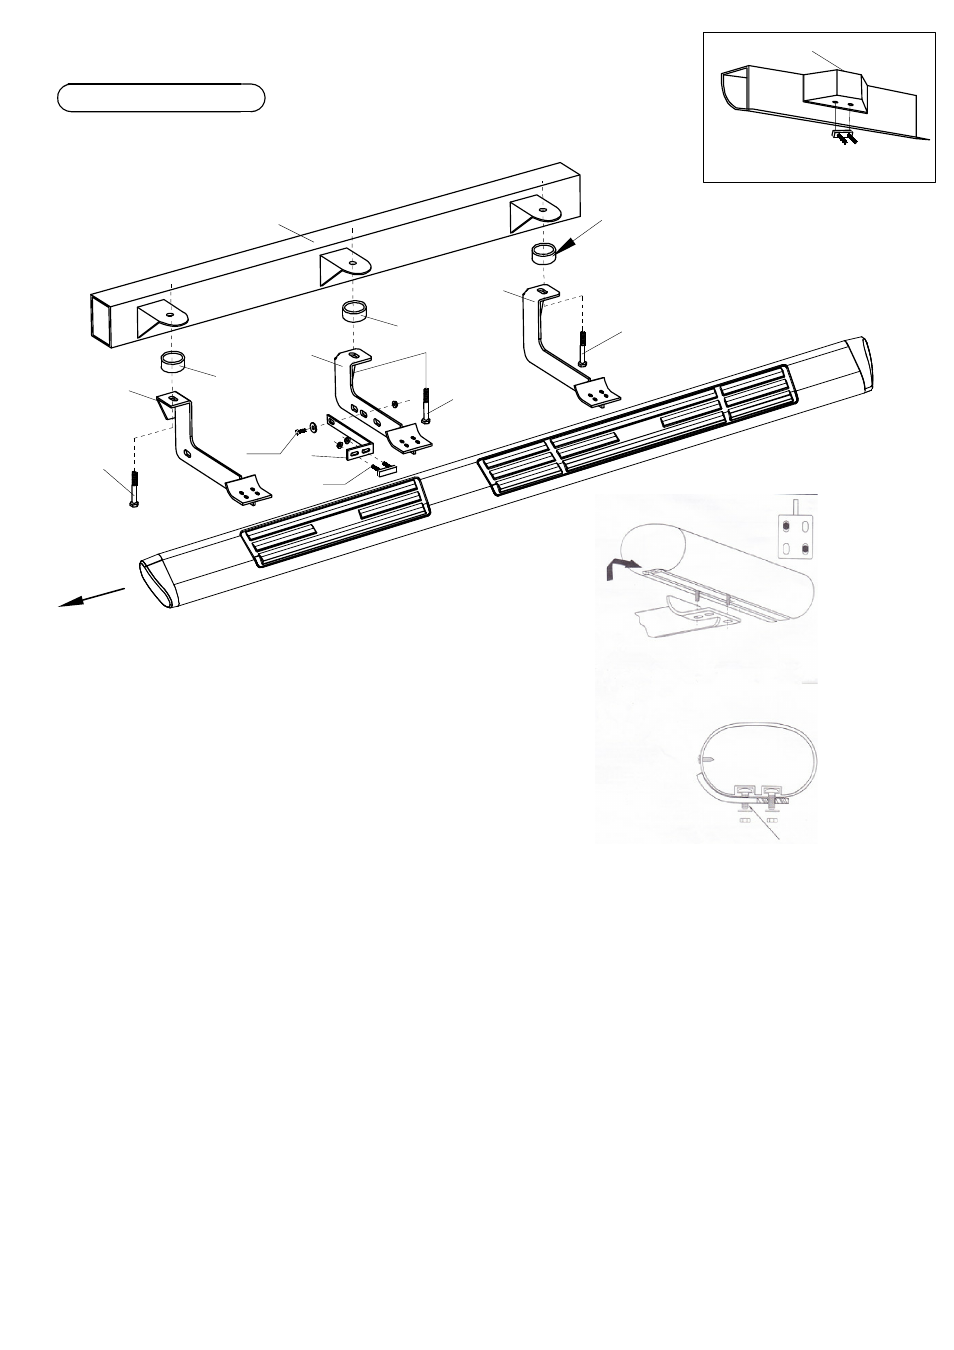
INSTALLATION STEPS
Page 2 of 2
H I G
D
C
B
INSTALLATION STEPS
STEP 1.Remove all contents from the received box and check stainless steel tube for any dent.
Also verify all brackets and bolts against the parts list.
STEP 2.Read installation manual and istallation drawing completely.Understand all brackets and
bolts before installation.
STEP 3.Remove the body mount bolts from the front,the middle and rear body mounts underneath cab
of truck and discard.(Keep the factory bolts and bushings).
STEP 4.Loosely bolt front,mid and rear mounting brackets to front ,mid and rear body mounts using
the farctory bolts as shown Fig.A.(Make sure factory bushing is put on the same way it is
taken off)
STEP 5.Insert T-bolt(F) into mid holes inside support channel as shown Fig.B. Loosely attach
support
brace to bolt plate using flange lock nut (G) as shown Fig.A.Attach support brace to mid
mounting bracket in center hole using hex bolt (H) flat washer(I) and flange lock nut(G) as
shown in Fig.A.
STEP 7.Mount step bar to mounting bracket using T" bolt(J),lock(K)flat(L)washers as shown.
Hand tighten into nutsert on the bottom of the step bar.Adjust position of step bar and
tighten all bolts.
Driver Side
Factory Bushing
Factory Bushing
Fig.A
Factory Bushing
E
F G
Factory Bolt
Factory Bolt
Factory Bolt
inside frame
Inside Channel
Fig.B
J K L
Front
J