Aries Automotive S226010-2 User Manual
Page 2
4
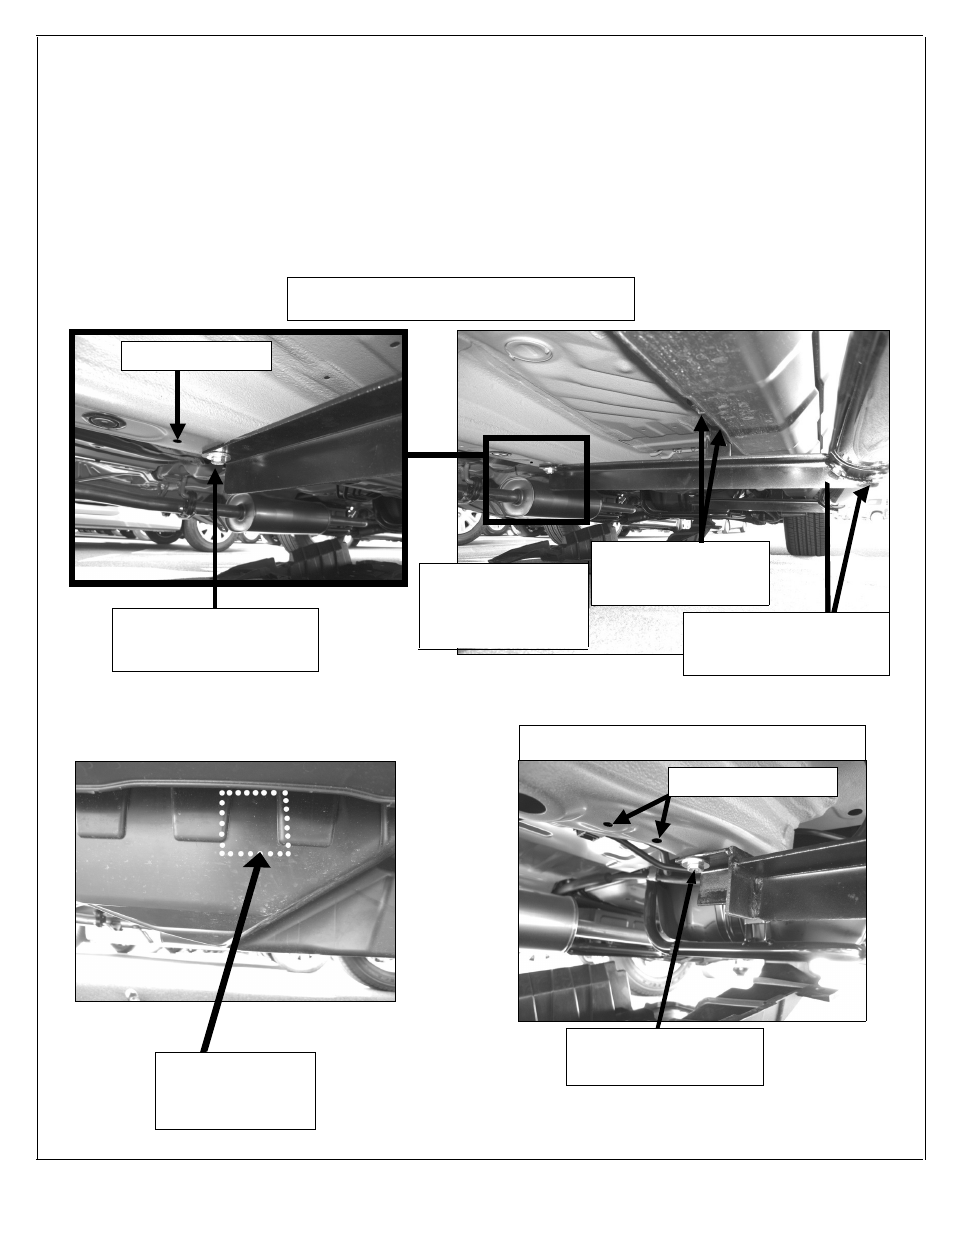
Fig 3
8mm Lock Washer, &
8mm x 30mm Hex Head Bolt,
Fig 2
Fig 1
Front Driver Side Mounting Bracket Shown
Rear Driver Side Mounting Bracket Shown
Page 2 of
Do not use this hole
8mm x 30mm Hex Head Bolt,
8mm Lock Washer, &
8mm Flat Washer
8mm x 30mm Hex Head Bolt,
8mm Lock Washer, &
8mm Flat Washer
Cut out the marked
location on the plastic
cover. See Drawings
below
Do not use these holes
NOTE: This picture is
for reference only. Rock
shield should be
hanging from rear
bracket at this point
10mm Flat Washers &
10mm Lock Washers
10mm x 30mm Hex Bolts
8mm x 30mm Hex Head Bolt,
8mm Lock Washer, &
8mm Flat Washer
12. Level and adjust Side Bar; then tighten all hardware at this time.
13.
Re-install the rest of fastener on the rock shield.
14.
Repeat steps 2-13 for passenger Side Bar.
15. Do periodic inspections to the installation to make sure that all hardware is secure and tight.
(Fig 1)
included (4) 10mm x 30mm Hex Head Bolts, (4) 10mm Lock Washers, and (4) 10mm Flat Washers
10.
Attach the opposite side on the driver rear Mounting Bracket by partially threading (2) 8mm x
30mm Hex Head Bolts, (2) 8mm Lock Washers, and (2) 8mm Flat Washers into factory threaded
holes on the floor panel.
11.
Position Driver Side Bar onto Mounting Brackets. Attach Side Bar to Mounting Brackets using the
. Do not tighten at this time.