Aries Automotive 202016-2 User Manual
Page 2
Page 2 of 3 6/5/08 (AM) Rev B
Driver Side Middle Plastic Rock Guard
PROCEDURE:
1. REMOVE CONTENTS FROM BOX. VERIFY ALL PARTS ARE PRESENT. READ INSTRUCTIONS
CAREFULLY BEFORE STARTING INSTALLATION.
2. NOTE: If equipped, remove factory mud flaps from vehicle. You will not be re-installing mud flaps.
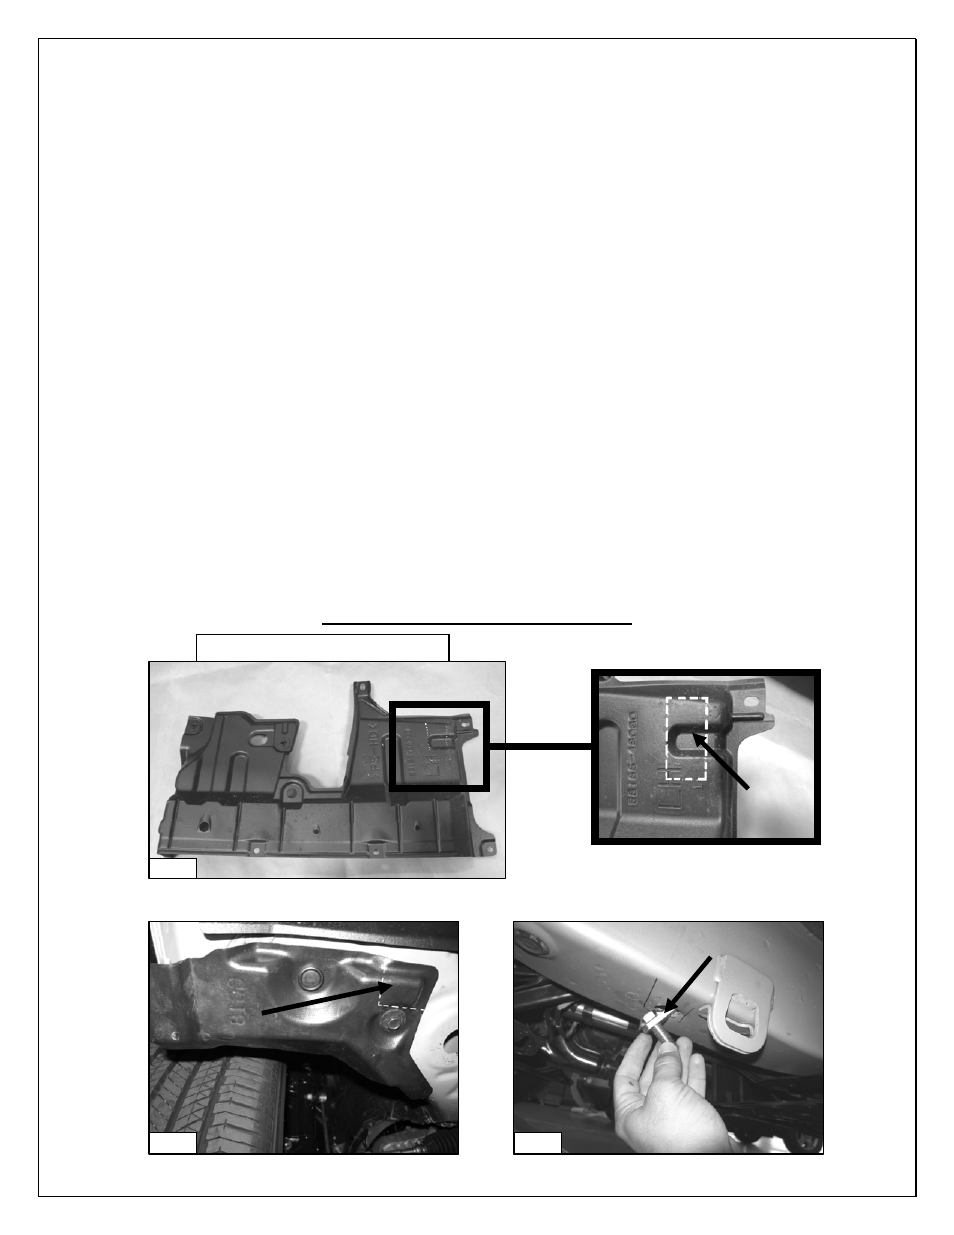
3. From underside of vehicle, remove front and middle section of the driver side plastic rock guard (Figure 1 & 2).
4. Place the plastic rock guard on a clean working area. Use a hack saw to cut out an opening 2” x 31/2” on the
middle rock guard as marked in Figure 1. Cut a 1 ½:” x 1 ½” opening in the front guard as marked in
Figure 1 & 2.
5. Re-position plastic rock guard back to the vehicle and tighten it using the factory fasteners.
6. Insert (1) 12mm x 60mm Bolt Plate into factory hole in the inner frame rail located by the front tie downs
(Figure 3).
7. There are four factory holes in the cross frame rail, two holes front to back and two perpendiculars. Insert (1) 8mm
Nut Plate into the outer perpendicular hole (larger) and orient it to the rear front to back hole (Figure 4).
8. Partially hang driver side front Mounting Bracket to already inserted 12mm Bolt plate and secure it using (1)
12mm Lock Washer, (1) 12mm Flat Washer, and (1) 12mm Hex Nut (Figure 5). Proceed to attach the outer side
of the front Mounting Bracket to already inserted 8mm Nut Plate and secure it using (1) 8mm x 40mm Hex Head
Bolt, (1) 6mm Lock Washer, and (1) 6mm Flat Washer (Figure 5).
9. Remove the rubber grommet located in the rear floor panel. Insert (1) 12mm x 120mm Bolt Plate into existing oval
factory hole (Figure 6). NOTE: Insert Bolt Plate with plate facing the rear of the vehicle. Once inserted push it
towards the front of the vehicle to fully engage.
10. Partially hang driver rear Mounting Bracket to already inserted Bolt Plate. Use the included (1) 12mm Oversize
Hex Nut to attach Mounting Bracket to already inserted Bolt Plate (Figure 7). IMPORTANT! When tightening
the Bolt Plate, make sure that is fully engage at all times.
11. Position driver’s Sidebar onto Mounting Brackets. Use the included (4) 8mm x 25mm Hex Head Bolts, (4) 8mm
Lock Washers, and (4) 8mm Flat Washers to attach Sidebar to Mounting Brackets (Figure 7).
12. Align Sidebar properly, and then tighten all hardware at this time.
13. Repeat steps 2 – 11 for passenger Sidebar. NOTE: On the passenger you would need to remove the entire
plastic rock guard. The cutting location is the same as the driver side.
14. Do periodic inspections to the installation to make sure that all hardware is secure and tight.
(Driver Sidebar Installation Shown)
Cutting
Area
Cutting
Area
12mm x 80mm Bolt Plate
Fig 1
Fig 2
Fig 3