Aries Automotive 203037-2 User Manual
Page 2
2
FINISH PROTECTION- ARIES PRODUCTS HAVE A HIGH FINISH THAT MUST BE MAINTAINED SUCH AS ANY
OTHER HIGH FINISH PRODUCT ON THE VEHICLE. PROTECT THE FINISH WITH A NON-ABRASIVE
AUTOMOTIVE WAX. THE USE OF SOAP, POLISH, OR WAX THAT CONTAINS ABRASIVES IS DETRIMENTAL, AS
THE COMPOUNDS SCRATCH THE FINISH AND OPEN IT TO CORROSION.
DISCLAIMER- BUYER ASSUMES ALL RISK AND LIABILITY WHATSOEVER FROM THE INSTALLATION AND
USE OF ARIES PRODUCTS. ARIES PRODUCTS ARE SOLD AS DECORATIVE ACCESSORIES AND SHOULD NOT BE
RELIED UPON AS PROTECTION FOR THE VEHICLE OR OCCUPANTS IN THE EVENT OF A COLLISION OR ROLL
OVER. ARIES AUTOMOTIVE ASSUMES NO LIABILITY FOR INJURY, LOSS, INCIDENTAL OR CONSEQUENTIAL
DAMAGES IN THE EVENT OF A COLLISION OR ROLLOVER.
Aries Automotive
Accessories, Inc.
P.O. Box 1687
Lomita, CA 90717
Thank you for choosing Aries products
For Customer Service Support please
call: (888) 800-2743
STEP 5:
STEP 6:
STEP 7:
STEP 8:
STEP 9:
STEP 10:
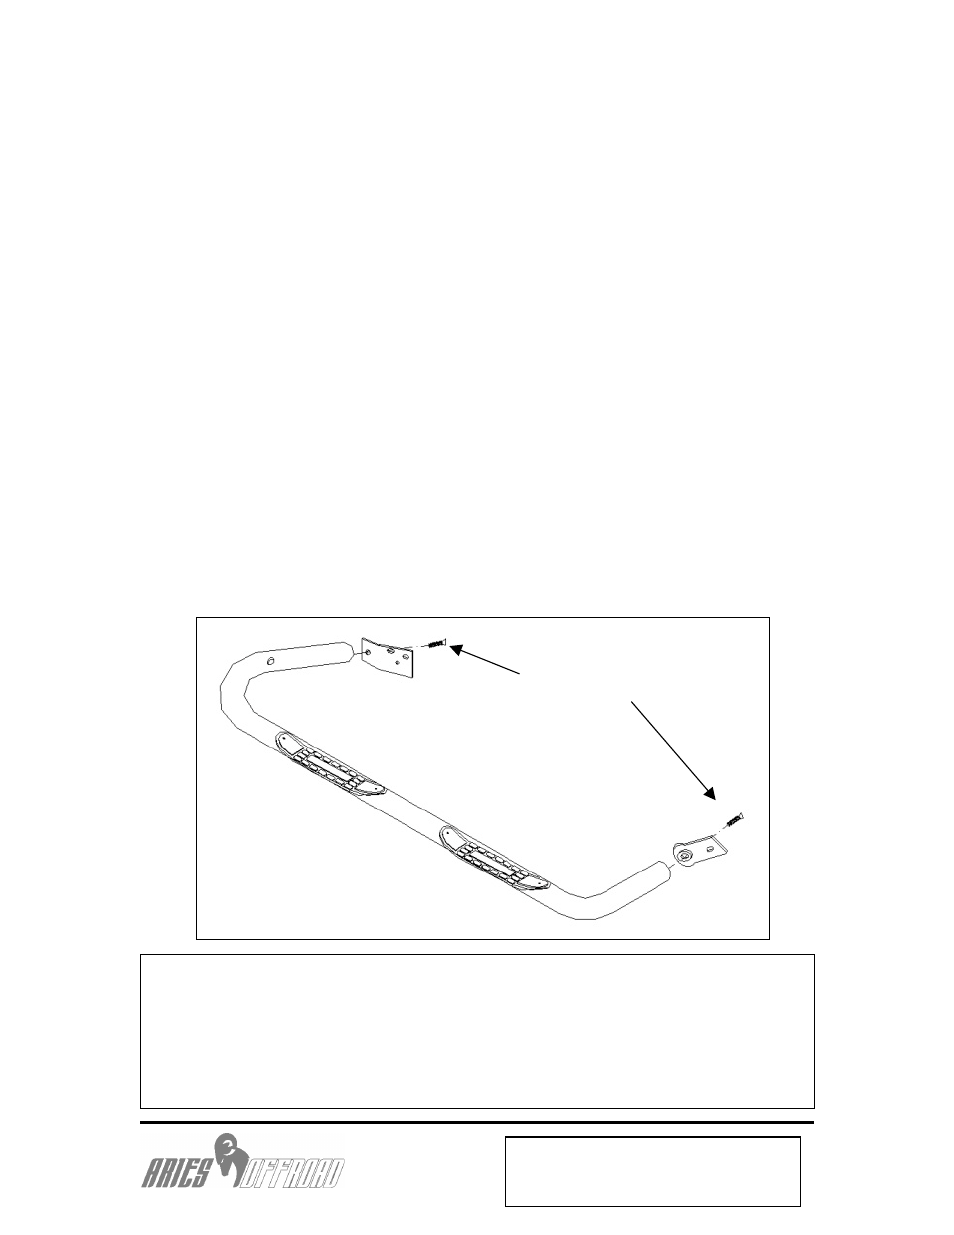
Attach the rear mounting bracket to the leaf spring bracket using a 1/2 x 2”
hex head bolt, 1/2” flat & lock washers and hex nut.
Attach the front mounting bracket to the vehicle frame using 1/2 x 4” hex
head bolts, flat & lock washers and hex nuts. Note: On some
vehicles it will be necessary to loosen one of the wire harness located on
the vehicle frame to allow the front mounting bracket to fit up
to the vehicle frame existing holes correctly. The wire harness can be
relocated to the small hole in the front mounting bracket.
To install front auxiliary mounting bracket, locate the large hole that will be
covered by black tape or a rubber plug and remove it. Attach
the support bracket to the inside of the rocker panel on the vehicle using 1/4
x 1” hex head bolts, flat & lock washers and hex nuts.
Insert the 3/8 x 5 1/2” threaded rod through the hole in the sidebar and the
hole in the rocker panel directly above the sidebar and secure
into place using 3/8” flat & lock washers and lock nuts.
Make any final adjustments to the alignment of the sidebar and tighten all
bolts. Repeat for the opposite side.
You may need to periodically re-tighten the bolts
.
Rear mounting
bracket
Front mounting
bracket
½ x 2” Flat head
bolts