Aries Automotive 4551 User Manual
Page 2
(Fig 12)
(Fig 1
(Fig
(Fig 8)
(Fig
(Fig' s
(Fig
(Fig
(Fig' s
Page 2 of 4
6.
Center and align the Sport Bar. Once absolutely satisfied with the fit and alignment, tighten the 10mm
hardware securing the Frame Mounting Brackets to the radiator brackets. Remove the Sport Bar.
7.
Temporarily reinstall the air dam. Find the center of the spoiler by locating the molding ID mark
on the
back-center
of the spoiler,
6).
Measure outward from the center mark to the inside of the driver
side and passenger side mounting brackets to verify that the Sport Bar is centered on the vehicle,
7
& 8). This measurement will be the centerline of the slots to cut through
the spoiler.
8.
Use a felt marker or paint pen to mark a vertical line representing both mounting bracket locations
onto
the back of the plastic spoiler,
7),
with top and bottom of Bracket indicated. Remove the spoiler
and place it on a clean, stable work surface. Measure from the
center of the spoiler,
(ID mark),
outward
the distance measured in Step 7,
. Use the previously marked line
for a vertical reference
and draw a parallel line
at the measured distance, (Step 9). NOTE:
Check all measurements before
continuing.
9.
Drill a 1/2" hole at the top and the bottom of the measured line,
10). Use a sharp utility knife or
hacksaw to cut a 1/2" wide slot for the Mounting Brackets,
1). NOTE:
Additional trimming for
Sport Bar clearance may be required on Equinox model vehicles. IMPORTANT:
To maintain the
integrity of the spoiler, do not cut completely through the top or bottom edge
of the spoiler.
Only remove
material required to clear the Sport Bar.
10.
Reinstall the spoiler using the factory hardware and clips. Hold the Sport Bar up in position to check for
clearance. Trim
plastic as necessary.
11.
Insert the
Sport Bar through the air dam and bolt it to the Mounting Brackets
with the hardware listed
in
Step 5,
.
12.
Level and adjust Sport Bar properly
and tighten all hardware.
13.
Do periodic inspections to the installation to make sure that all hardware is secure and tight.
To protect your investment, wax this product after installing. Regular waxing is recommended to add a
protective layer over the finish. Do not use any type of polish or wax that may contain abrasives that could
damage the finish.
For stainless steel: Aluminum polish may be used to polish small scratches and scuffs on the finish. Mild
soap may be used
also to clean the Sport Bar.
For gloss black finishes: Mild soap may be used to clean the Sport Bar.
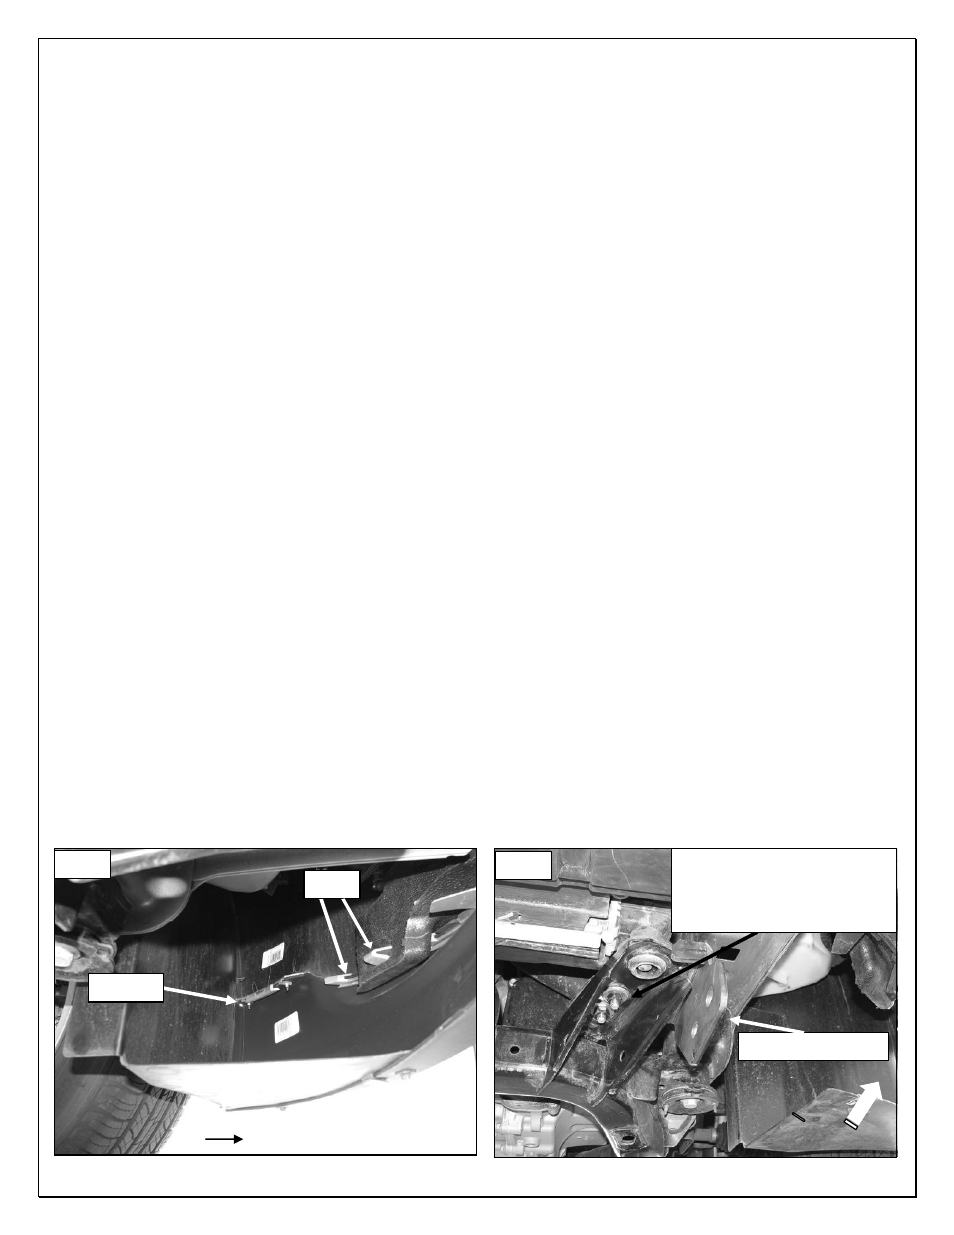
Driver Side Mounting Bracket Installation Pictured
Clips
Screws
Fig 1
Fig 2
Mounting Bracket
(2) 10mm x 35mm Hex Bolts
(4) 10mm Flat Washers
(2) 10mm Lock Washers
(2) 10mm Hex Nuts
Front
Front
5. With assistance, hold the Sport Bar up to the inside of the (2) Mounting Brackets. Line up the mounting
holes and insert the longer (2) 12mm x 40mm Hex Bolts with (2) 12mm Flat Washers through the (2)
rear mounting holes on the Mounting Brackets, the Sport Bar and through the Support Brackets,
4 & 5). Secure the hex bolt with (2) 12mm Flat Washers, (2) 12mm Lock Washers and (2)
12mm Hex Nuts. Use the (2) shorter 12mm x 35mm Hex Bolts, (4) 12mm Flat Washers, (2) 12mm Lock
Washers and (2) 12mm Hex Nuts on the (2) forward mounting holes,
4).