Aries Automotive B35-3009 User Manual
Page 2
2
FINISH PROTECTION- ARIES PRODUCTS HAVE A HIGH FINISH THAT MUST BE MAINTAINED SUCH AS ANY
OTHER HIGH FINISH PRODUCT ON THE VEHICLE. PROTECT THE FINISH WITH A NON-ABRASIVE
AUTOMOTIVE WAX. THE USE OF SOAP, POLISH, OR WAX THAT CONTAINS ABRASIVES IS DETRIMENTAL, AS
THE COMPOUNDS SCRATCH THE FINISH AND OPEN IT TO CORROSION.
DISCLAIMER- BUYER ASSUMES ALL RISK AND LIABILITY WHATSOEVER FROM THE INSTALLATION AND
USE OF ARIES PRODUCTS. ARIES PRODUCTS ARE SOLD AS DECORATIVE ACCESSORIES AND SHOULD NOT BE
RELIED UPON AS PROTECTION FOR THE VEHICLE OR OCCUPANTS IN THE EVENT OF A COLLISION OR ROLL
OVER. ARIES AUTOMOTIVE ASSUMES NO LIABILITY FOR INJURY, LOSS, INCIDENTAL OR CONSEQUENTIAL
DAMAGES IN THE EVENT OF A COLLISION OR ROLLOVER.
Aries Automotive
Accessories, Inc.
P.O. Box 1687
Lomita, CA 90717
Thank you for choosing Aries products
For Customer Service Support please
call: (888) 800-2743
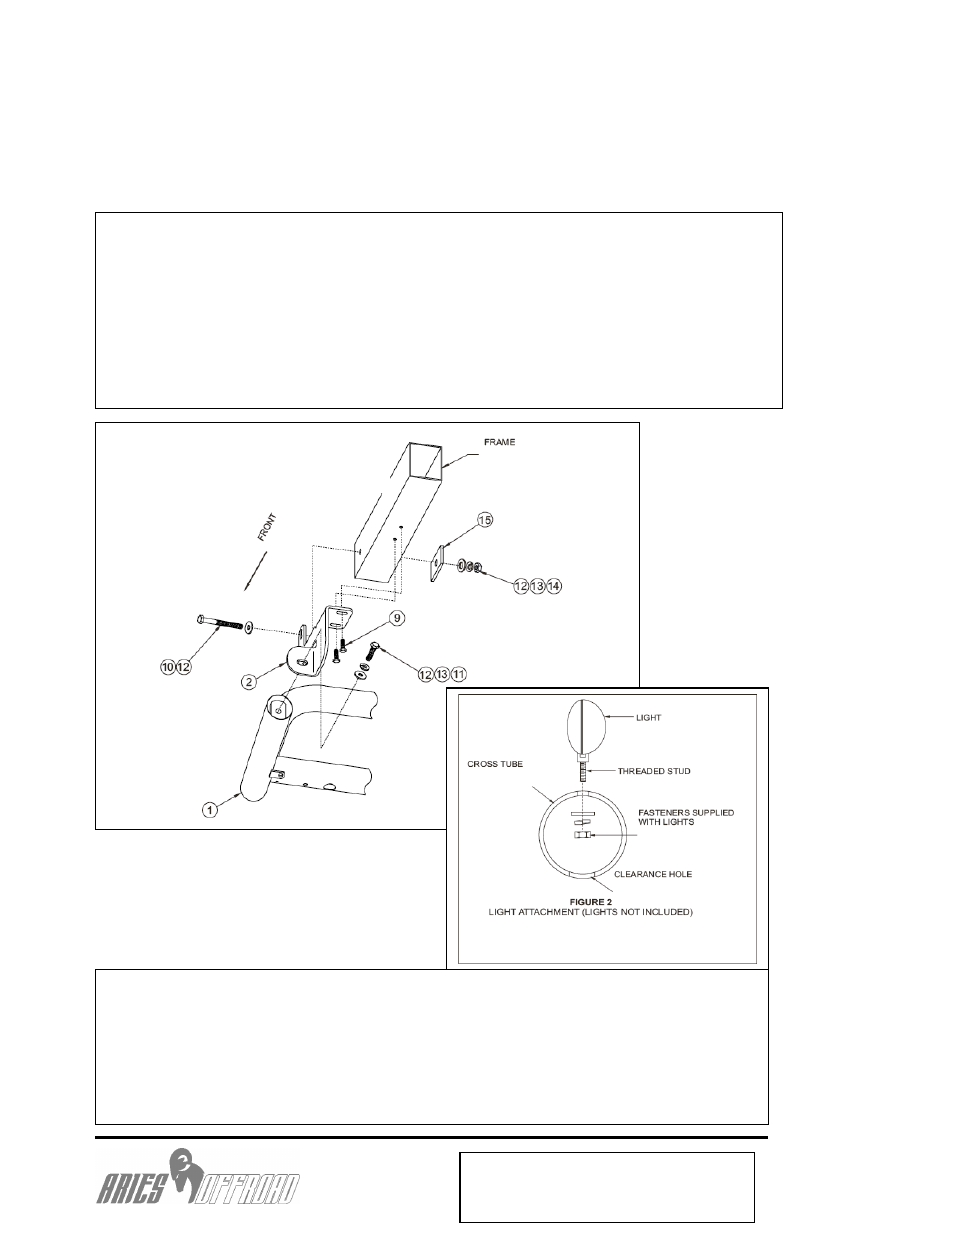
LIGHT INSTALLATION: Insert threaded stud on base of the light through hole in cross tube.
Using a ratchet, extension and socket for correct size of nut supplied, insert through large
clearance hole in bottom of cross tube. Thread nut and washers on stud and tighten. SEE
FIGURE 1. NOTE: A short socket, not a deep well works best to get the nut started. Fits most 5”
round or rectangle lights. Some lights may require replacing included mount/isolator with rubber
bumpers provided. Mounting stud of ½” or less required. Plug mount holes with caps provided if
not installing lights.
FIGURE 1 INSTALLATION VIEW OF DRIVER
SIDE FROM INSIDE BOTTOM; PASSENGER
SIDE OPPOSITE