Warning – Snorkel TB42J User Manual
Page 53
Chapter 9 – Stowing and Transporting
TB42J – 0172310
49
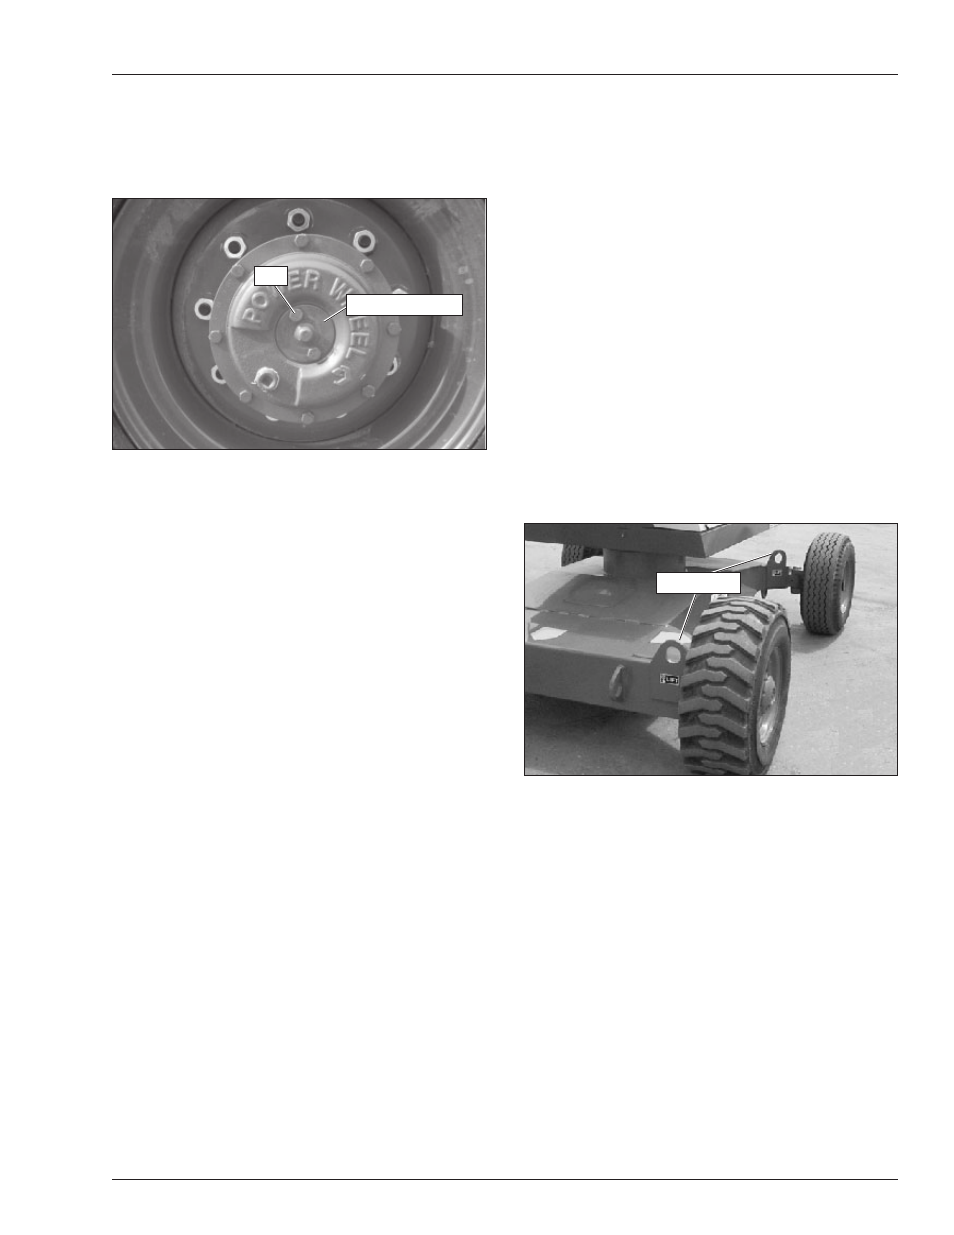
6. At each drive wheel, remove the two bolts from the
disconnect plate (refer to Figure 9.4). Turn the plate
over so the nipple points inward. Reinstall the two
bolts.
Figure 9.4 – Drive Wheel
7. Use the winch to position the aerial platform on the
transport vehicle.
A
Warning
The aerial platform is free to move when the drive
hubs are disabled. Death or serious injury can re-
sult. Re-enable the drive hubs before operating the
aerial platform.
8. At each drive wheel, remove the two bolts and return
the plate to its original position as shown in Figure
9.4.
9. Start the engine and operate the drive control in for-
ward and reverse several times to engage the drive
hubs.
Hoisting
Use a four point sling arrangement attached to the lifting
lugs when hoisting the aerial platform. Machine damage
can occur if the sling is attached to the booms, turntable,
or platform.
A
Warning
The potential for an accident increases when the
aerial platform is lifted using improper equipment
and/or lifting techniques. Death or serious injury can
result from such accidents. Use proper equipment
and lifting techniques when lifting the aerial plat-
form.
Know the weight of the aerial platform and the capacity of
the lifting devices before hoisting. Lifting devices include
the hoist or crane, chains, straps, cables, hooks, sheaves,
shackles, slings, and other hardware used to support the
machine. The gross vehicle weight is stamped on the
serial number placard and is listed in Chapter 2.
The user assumes all responsibility for making sure the
equipment used is capable of supporting the weight of
the aerial platform and that all manufacturer’s instruc-
tions and warnings, regulations and safety rules of their
employer and/or any state or federal law are followed.
Use the following procedure to hoist the aerial platform
onto the transport vehicle.
1. Properly stow the aerial platform.
Note
The lifting lugs at the rear of the chassis are farther apart
than those at the front. Rotating the turntable 180° will
place the counterweight at the rear of the chassis. This
will reduce the number of spreader bars needed by one
and sometimes two.
2. Inspect the lifting lugs (refer to Figure 9.5) to make
sure they are free of cracks, rust, and are in good
condition. Have any damage repaired by a qualified
service technician before attempting to hoist the
machine.
Figure 9.5 – Lifting Lugs
3. Remove all personnel, tools, materials, or other loose
objects from the platform.
4. Connect the chains or straps to the lifting lugs using
bolted shackles. Hooks that fit properly in the lugs
and that have latching mechanisms to prevent them
from falling out under a slack line condition may also
be used.
Do not run the sling cable through the lifting lugs.
Cable damage and/or failure can result from the cable
contacting the sharp corners of the lug. There is no
effective way of putting a corner protector in the hole
of the lifting lug.
5. Use spreader bars of sufficient length to keep the
chains, straps, or cables from contacting the turn-
table or booms. When using cables, use rigid corner
protectors at any point where the cable contacts sharp
Lifting Lugs
Bolt
Disconnect Plate