Step 1, Step 2 – Road Armor 1994-2002 Dodge 2500,3500 Rear Bumper User Manual
Page 2
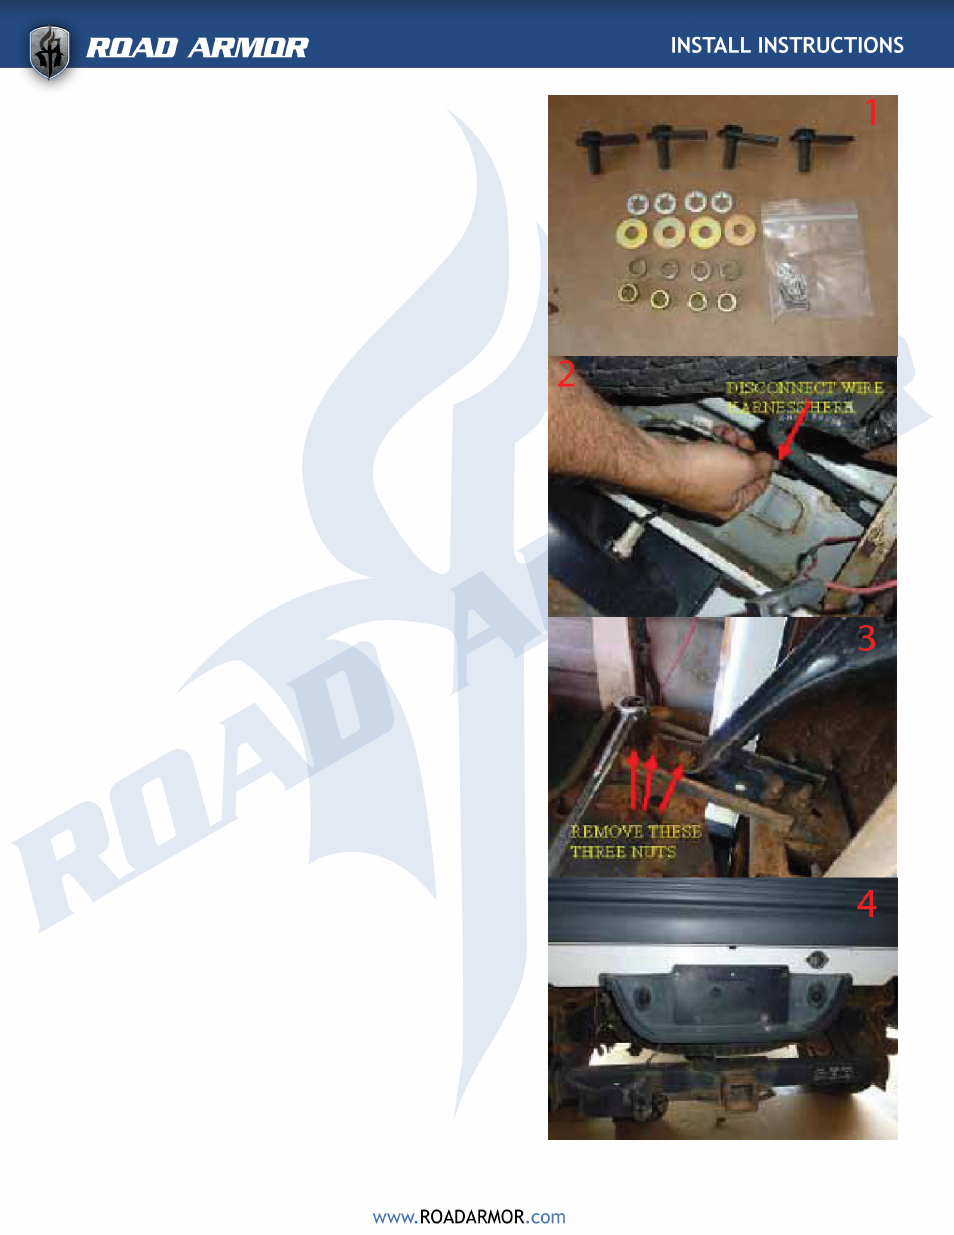
STEP 1:
Make sure you have all necessary tools and
hardware.
(4) Single Bolt Plates
(4) 1/2” Push On Retainers
(4) 1/2” Flat Washers
(4) 1/2” Lock Washers
(4) 1/2”-13 Hex Nut
(1) ROAD ARMOR LOGO (Small)
(4) ALLEN HEAD BOLT& NUT (for logo)
STEP 2:
Uninstall OEM Bumper
• Park on a level surface
• Remove license plate
• Disconnect battery
• Before starting to remove bumper it is smart to
tape off paint around bumper to avoid scratches
during install Disconnect wire harness from license
plate lights. Repeat this step for the other side of
the bumper.
Picture 2
• Using a 18mm socket remove the three nuts on the
bolt plates that hold the bumper mounts to frame.
Do not remove bolt plates until it is time to re-
move bumper from truck.
Picture 3
Repeat step for other side of bumper.
• NOTE: Bumper will be removed during this step.
Be prepared to hold bumper in place and remove
once bolt plates are removed.
Remove the two bolt plates which the nuts were re-
moved from during the last step. Once they are re-
moved the bumper can be removed from truck. Once
bumper is removed truck should look like picture 4.
• Using a Phillips screw driver remove the five
screws in the license plate surround. Once they
are removed the plastic surround will be removed
from the truck.
Picture 5 and 6