Step 4 – Road Armor 2010+ Dodge 2500,3500 Rear Bumper User Manual
Page 3
6
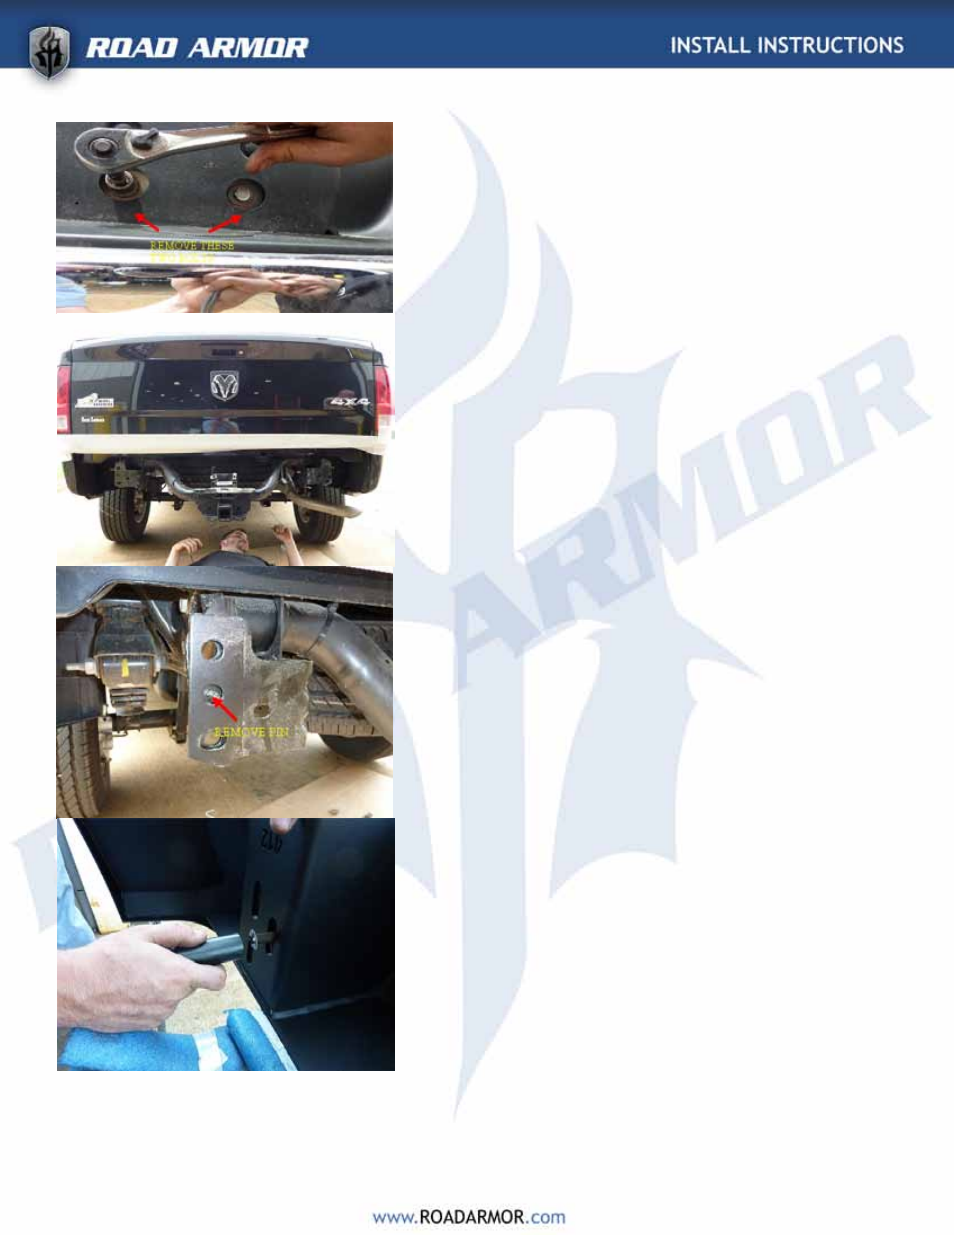
STEP 4:
• Insert one bolt plate into the inner slot on the
bumper weld in brackets. Once bolt plate is
inserted into the inner slot push one ½” push on
retainer to hold bolt plate onto bumper.
NOTE: We recommend only installing one bolt
plate on each side of the bumper to allow for easy
installation. The other plates will be added to
each side once bumper is on truck.
Push retainer clip until it is flush with weld in
bracket.
Repeat this step for the other side of the bumper
assembly
Picture 8
• Due to tight clearance behind bumper the hitch
plug plate and road armor logo should now be
installed on bumper. Use supplied stainless steel
hardware to attach items to bumper. Insert
trailer wiring plug into bumper before tightening
down hardware. The plate is slotted to allow for
adjustment.
Picture 9
• When the bumper is ready to install it should look
like the picture 10.
• It’s time to install your road armor bumper. Using
either a lift or a couple buddies, move the bum-
per into place. The bolt plates that are already
placed into the bumper will line up with the slots
in the frame bracket.
• Lift the bumper and slide the bolt plates into the
slots in the frame brackets. Once bolt plates slide
into to frame bracket slots insert one ½” flat
washer, ½” lock washer, and one ½” nut on each
bolt in each bolt plate. Hand tighten all hard-
ware.
Picture 11
Repeat this step for the other side of the bumper.
Hand tighten all hardware.
5
8
7