Step 1, Step 2, Step 3 – Road Armor 2010+ Dodge 2500,3500 Rear Bumper User Manual
Page 2
STEP 1 :
Make sure you have all necessary tools and hard-
ware.
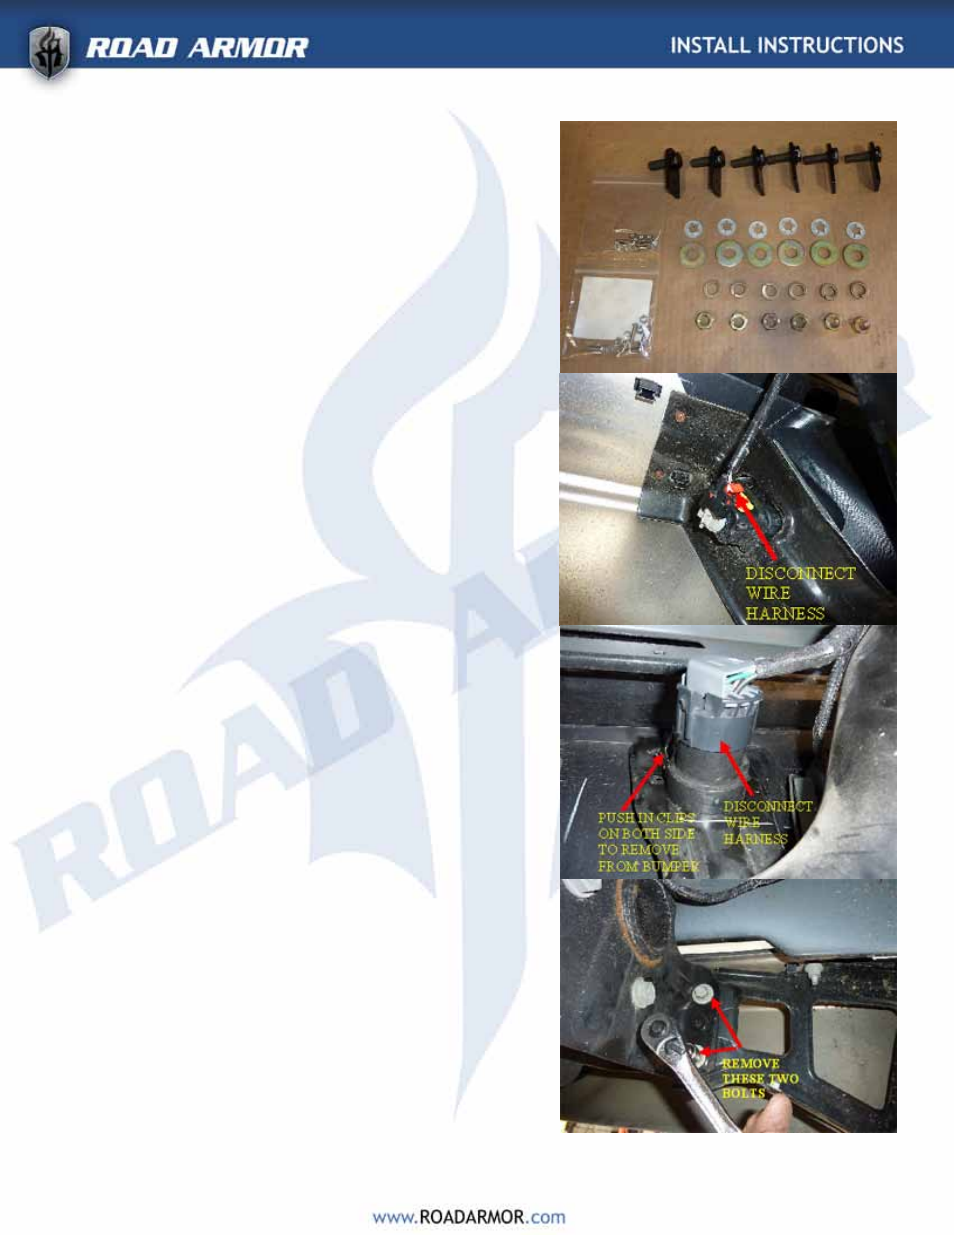
Hardware Kit Includes : ( all Grade 8 )
(6) Single Bolt Plates
(6) ½” Push On Retainers
(6) ½” Flat Washers
(6) ½” Lock Washers
(6) ½”-13 Hex Nut
(1) ROAD ARMOR LOGO (Small)
(8) ALLEN HEAD BOLT & NUT (for logo and hitch plug)
STEP 2:
• Park on a level surface
• Remove license plate
• Disconnect battery
• Disconnect wire harness from license plate lights.
Repeat this step for the other side of the bumper.
Picture 2
• Disconnect wire harness from trailer wire plug.
Once the wire harness is disconnected, push in the
clips on both sides of the plug and remove plug from
bumper.
Picture 3
• Mask the front of the body to avoid scratches or
chips in paint when uninstalling/installing the bum-
pers.
STEP 3:
• Using a 15mm socket remove the two bolts that
hold the bumper mounts to frame.
Repeat step for other side of bumper.
Picture 4
• NOTE: Bumper will be removed during this step. Be
prepared to hold bumper in place and remove once bolt
plates are removed.
Using a 15mm socket remove the two bolts which are lo
cated where the license plate mounts to bumper. Once
they are removed the bumper can be removed from
truck.
Picture 5
Once bumper is removed truck should look like picture .
six
• Using a hammer remove locating pin from stock mount-
ing brackets.
Repeat for other side of bumper.
Picture 7
1
2
3
4