Opening the xserve, Removing the installed fb-dimm – Apple Xserve Intel (Late 2006) DIY Procedure for FB-DIMM Memory User Manual
Page 4
Xserve (Late 2006) FB-DIMM Memory Replacement Instructions
Opening the Xserve
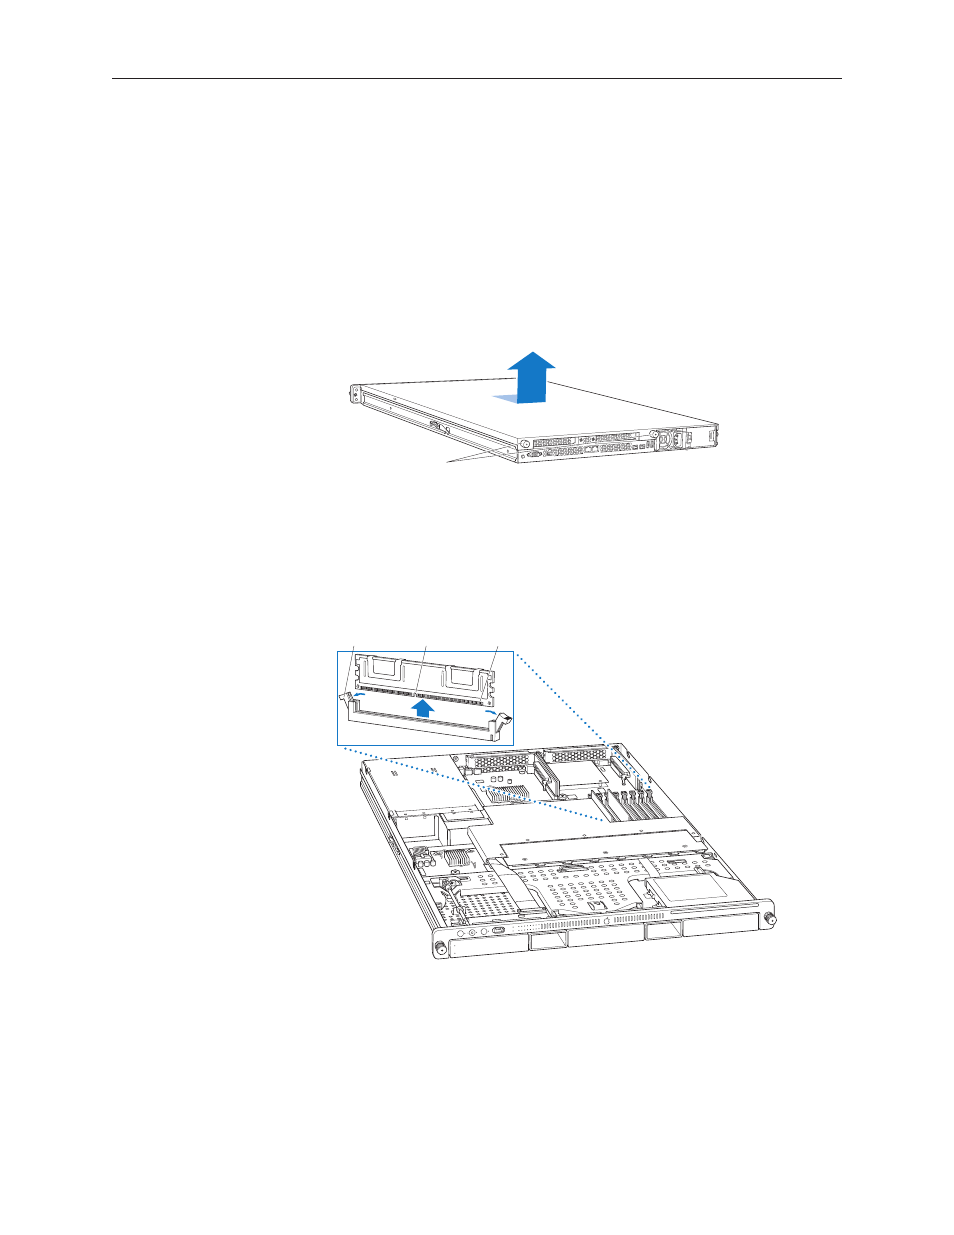
Loosen the thumbscrews at the back of the top cover and slide the cover back and up to remove
it. If you have difficulty removing the cover, check the enclosure lock on the front panel.
Warning: Even after you shut down the Xserve, its internal components can be very hot. Let
it cool before you open it.
Important: To minimize the possibility of damage to Xserve components due to static discharge,
wear an antistatic wrist strap, if possible, while you work inside the Xserve.
Unscrew the two
captive thumbscrews.
Slide the cover back and lift it off.
Removing the Installed FB-DIMM
Push down the ejectors on the FB-DIMM slot.
Holding the FB-DIMM by both top corners, lift it straight up out of the Xserve.
Connectors
Notch
Ejectors
Warning: When removing or installing the DIMM, handle it only by the edges. Do not touch
its connectors. Lift the DIMM straight up from the connector to remove it, and insert it
straight down into the connector to install it. Do not rock the DIMM from side to side.
1.
2.