Removing the installed expansion card riser – Apple Xserve Intel (Late 2006) DIY Procedure for Expansion Card Riser User Manual
Page 4
Xserve (Late 2006) PCI Expansion Card Riser Replacement Instructions
Removing the Installed Expansion Card Riser
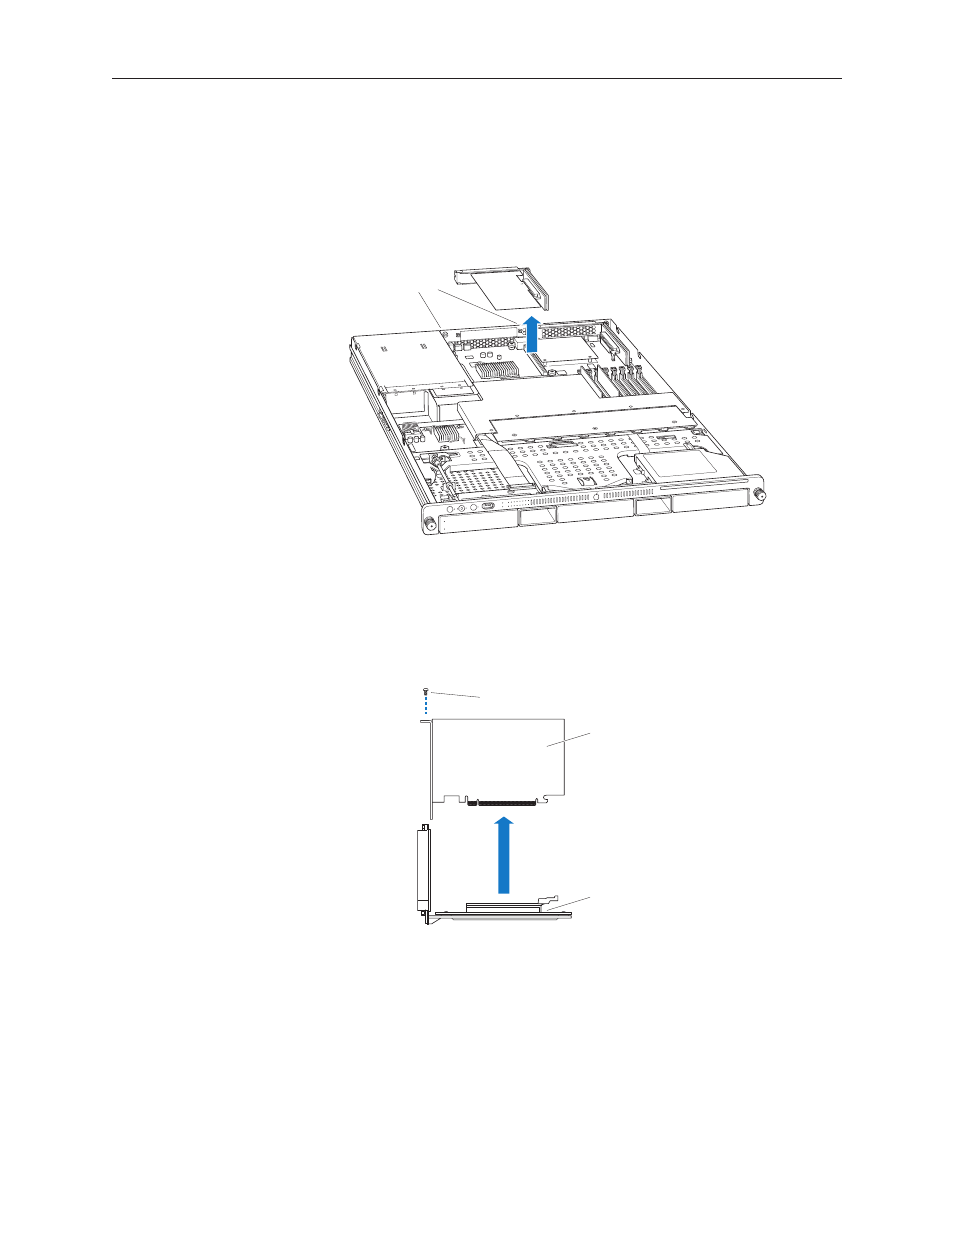
Loosen the two captive screws that secure the riser bracket to the back panel.
Carefully pull up on the bracket and riser, with the expansion card still attached, to
disconnect the riser from the logic board.
Captive screws
Tilt the expansion card up so that its port clears the enclosure, and remove the riser and card
from the Xserve.
Remove the screw that secures the expansion card to the riser, and separate the card and
riser by gently pulling them apart.
Screw
PCI card
PCI riser
Warning: When removing or installing an expansion card, handle it only by the edges. Do
not touch its connectors or any of the components on the card. Lift the card straight out
from the connector to remove it, and insert it straight into the connector to install it. Do not
rock the card from side to side and don’t force the card into the slot. Once the replacement
card is installed, pull on it gently to check that it is properly connected.
1.
2.
3.
4.