Install the ductwork, Exterior or inline blower selection – Best WC26E User Manual
Page 8
- 8 -
INSTALL THE DUCTWORK
NOTE: To reduce the risk of fire, use only metal ductwork.
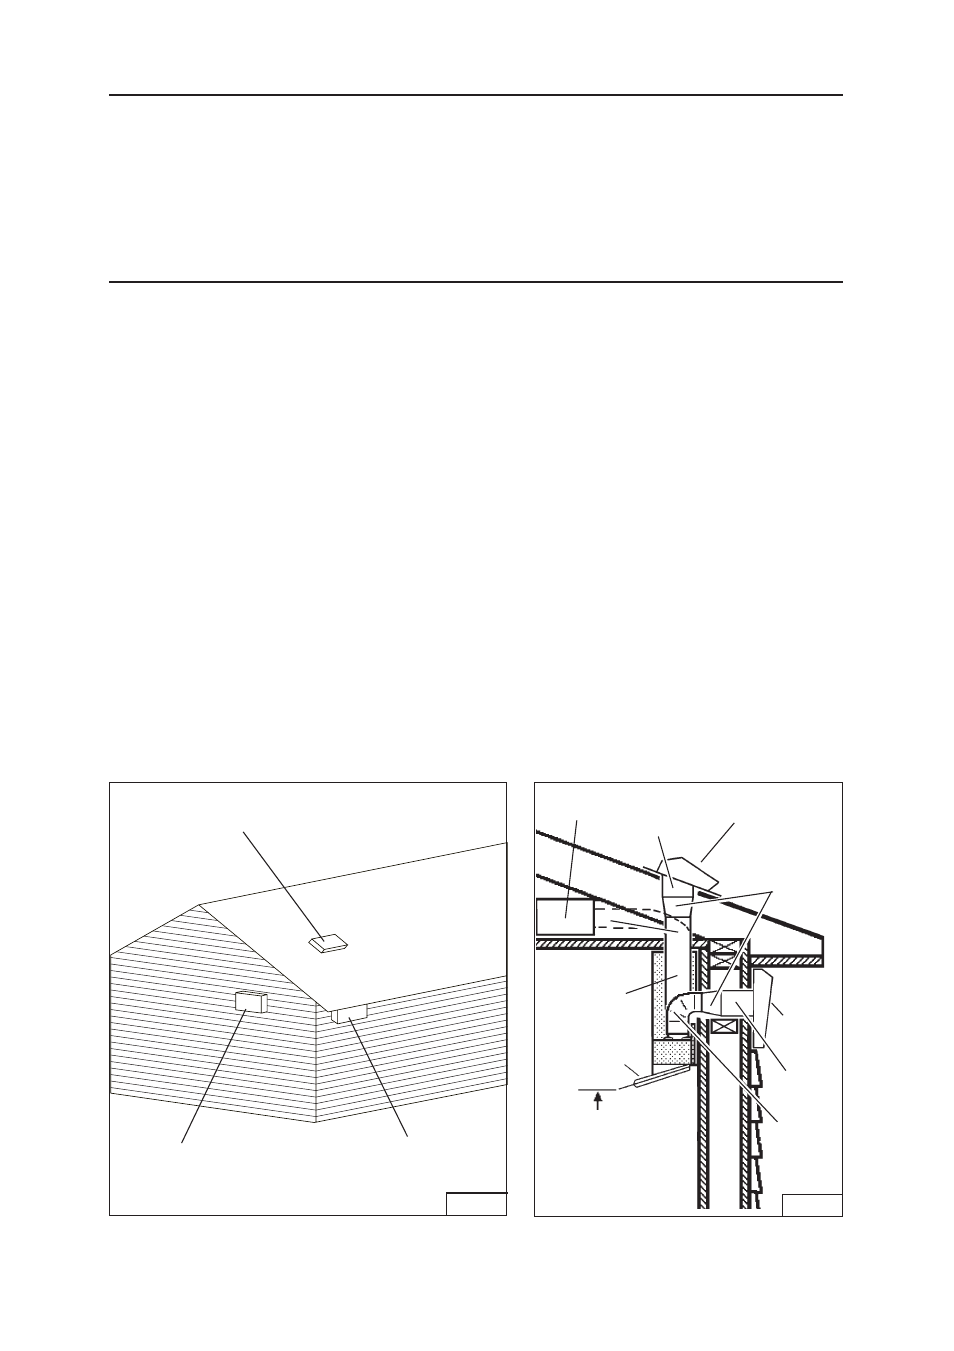
1. Choose the location where the exterior blower will be mounted. See illustra-
tions below for mounting location suggestions and restrictions.
2. A straight, short duct run will allow the hood to perform most efficiently.
3. Long duct runs, elbows and transitions will reduce the performance of the
hood. Use as few of them as possible. Larger ducting may be required for best
performance with long duct runs.
4. After the exterior blower has been installed, connect round metal ductwork and
work back towards the hood location. Use duct tape to seal joints between
ductwork sections.
5. An 8” round to 10” round transition (Model 414) is required for exterior blowers.
For best air performance, install the adapter as close to the range hood as
possible.
6. Check In-Line blower instructions for required duct and transition size.
EXTERIOR
BLOWER
10” ROUND
DUCT
HOOD
EXTERIOR
BLOWER
8” TO 10”
ROUND
ADAPTER
8” ROUND
ELBOW
10”
ROUND
DUCT
8” ROUND
DUCT
OK
OK
CAUTION: MAY NOT
FIT UNDER EAVES
OF SINGLE STORY
HOMES
SUGGESTED MOUNTING LOCATIONS
EXTERIOR OR INLINE BLOWER SELECTION
CAUTION: To reduce the risk of fire and electric shock, install this rangehood only
with EB6, EB9, EB12 or EB15 Exterior Blowers, or In-Line Blower model ILB3, ILB6,
ILB9 or ILB11.
The blower must be UL listed for Canadian and U.S. use, and evaluated for use with
solid state speed control, rated 120V, 60 Hz, 6.0 A max.
FIG. 6
FIG. 5
22” TO 28” ABOVE
COOKING SURFACE
(see “INSTALL
MOUNTING BRACKETS”
section for mounting
restrictions
INLINE
BLOWER