2GIG DW10-345 Thin DW Contact User Manual
Thin door/window contact, Install instructions, Box contents
INSTALL INSTRUCTIONS
The 2GIG‐DW10‐345 is a Thin Door/Window Contact that can be installed on doors, windows, and many other objects that open and close.
The sensor transmits signals to the Control Panel when a magnet mounted near the sensor is moved away from or closer to the sensor. The
sensor has an external input that accepts N/C dry contact devices. The sensor is also equipped with a cover tamper for additional security.
Box Contents
•
D/W Sensor
•
Magnet
•
2 Screws
•
3M Tape
•
12” Wire Lead
Programming
The following steps are for programming (learning) the sensor(2GIG‐DW10‐345) into the 2GIG
Control Panel. Scroll between op ons using the ← and → arrows. Move to the previous or next
prompt by pressing the ↑ and ↓ arrows.
1
Select RF sensor # (01 to 48). Assign the DW10 to a new zone.
2
Select RF sensor type.
(01) Entry/Exit 1
(02) Entry/Exit 2
(03) Perimeter
(23) no response type
3
Select RF equipment type.
(1) contact
4
Select RF sensor equipment code. Enter 0862 for the DW10‐345 2GIG Thin Door/Window Contact.
5
Enter RF sensor serial number (7 digits).
Manual Entry: Type in the last 7 digits of the TX ID that is found outside of the box or on the back of the device.
Auto Entry: With the panel in Learn‐in mode (press Shift then Learn) pull the Battery Pull Tab out. The correct TX ID should appear.
Accept the correct TX ID by pressing ok.
Remember to press the ↓ arrow to con nue going through the 2GIG system configura on prompts.
6
Select RF sensor equipment age (0 to 1).
(0) new (product is new)
(1) existing (product already exists)
7
Select RF sensor 1 loop number (1 to 3).
(1) Uses Loop 1
(2) Uses Wire lead Loop 2
(3) Uses Exterior Switch (magnet only)
8
Select RF sensor 1 dialer delay.
(0) disabled
9
Construct RF sensor voice descriptor. Press Insert then press any number between 002 and 255 to add a word. For example, if you
wanted to name this DW10 as “master window,” press Insert then press 140 for MASTER. Press Insert then press 251 for WINDOW.
10
Select RF sensor reports (0 to 1).
(0) disabled
(1) enabled
11
Select RF sensor supervised (0 to 1).
(0) disabled (sensor does not report loss of supervision or low battery)
(1) enabled (sensor reports loss of supervision)
12
Select RF sensor chime (0 to 13).
(0) disabled (panel will NOT chime when sensor is activated)
(1‐13) enabled (selects a voice and/or chime to sound when sensor is activated)
13
To program another sensor click next.
14
To exit programming, click skip then end and exit. Upon exit, the panel takes a several seconds to reboot.
Testing
•
Open the Door/Window Contact (separate the magnet from the sensor). This action causes the Control Panel to display the open zone
with the assigned descriptor on top of the screen. The Security Button becomes yellow (showing that a zone is open).
Walk Test
1
From the Installer Toolbox, select walk test.
2
Open and close the DW10. This action causes the Control Panel to display the signal strength of the DW10.
3
Exit the Installer Toolbox.
Installing and Mounting
For internal switch usage, do the following:
1
Mount the sensor on the door frame and the magnet on the door. If the sensor is used on double doors, mount the
sensor on the least‐used door and the magnet on the most‐used door.
TIP:
If possible, locate sensors within 100 ft. (30 m) of the Control Panel. While a transmitter may have a range of 350
ft. (106 m) or more out in the open, the environment at the installation site can have a significant effect on
transmitter range. Sometimes a change in sensor orientation can help overcome adverse wireless conditions.
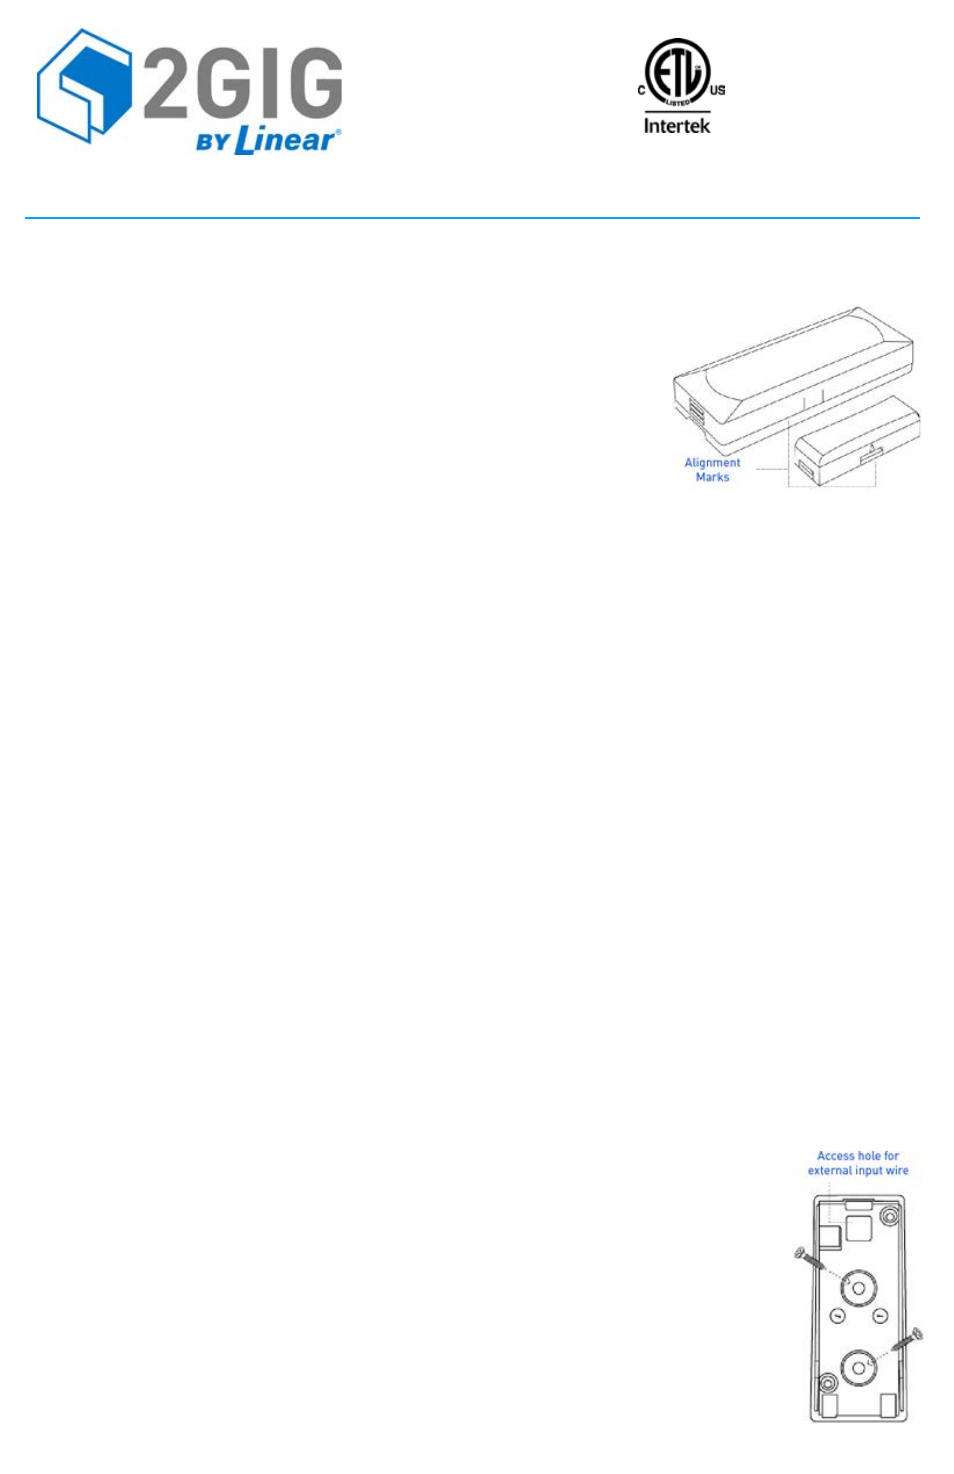
2
Make sure the alignment arrow on the magnet points to the alignment mark on the sensor (see the figure above).
3
Place sensors at least 4.7 in. (12 cm) above the floor to avoid damaging them.
4
Avoid mounting sensors in areas where they will be exposed to moisture or where the sensor operating
temperature range of 32 to 120°F (0 to 49°C) will be exceeded.
5
Use spacers (not included) to keep sensors and magnets away from metal or metallic surfaces such as foil
wallpaper.
FCC ID: WDQ‐DW10345
Industry Canada ID: 7794A‐DW10345
THIN DOOR/WINDOW CONTACT