Introduction, Unpacking your paragon 400 plus, For your records – BT 400 Plus User Manual
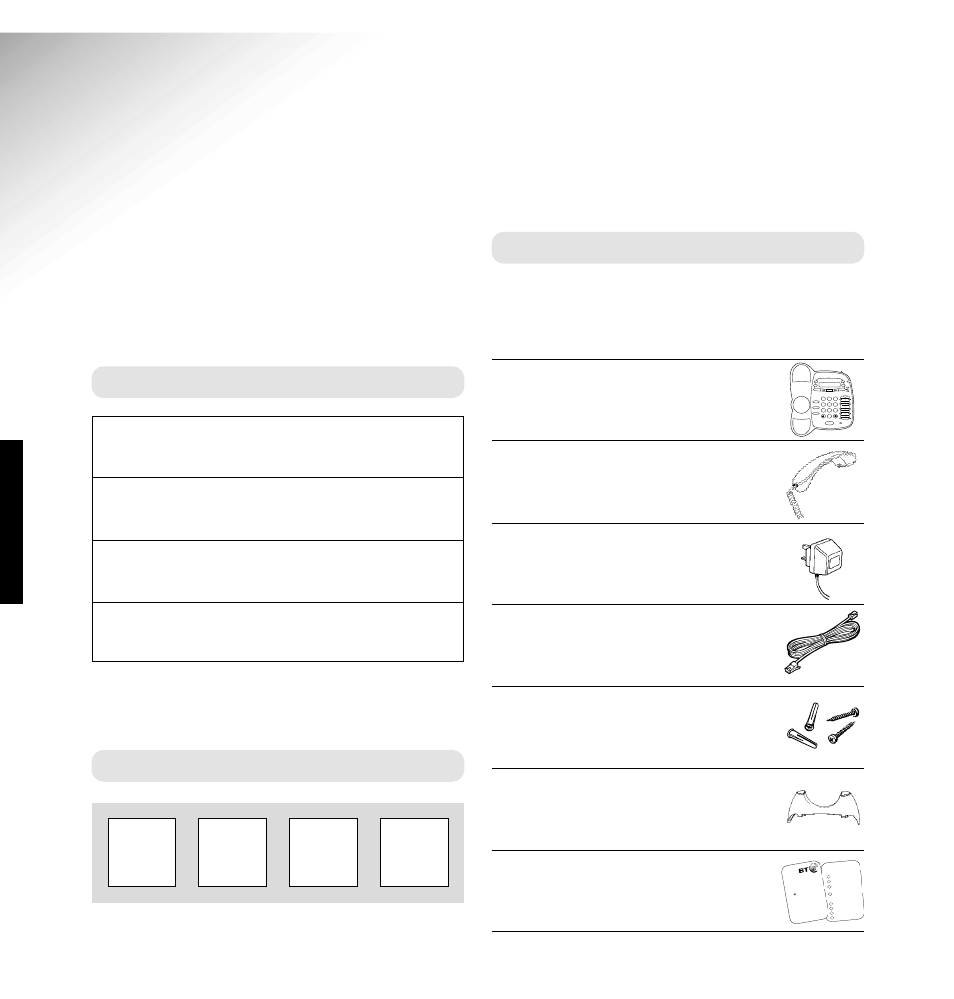
Page 7: Enter your remote access pin here, Paragon 400 plus telephone answering machine, Handset and cord, Plug mounted, 13 amp mains adaptor, Line cord, Wall mounting plugs and screws, Plinth for desk mounting
1
2
3
4
5
6
7
8
9
0
ABC
JKL
MNO
GHI
PQR
S
TUV
WXY
Z
DEF
Monitor
Secrecy
Recall
Redial
NO.
ᮡ
ᮡ
ᮡ
ᮡ
ᮡ
ᮡ
ᮡ
ᮡ
ᮡ
ᮡ
ᮡ
2
3
Vol
Memo
Del
Menu
A n s w e r
o n o f f
P l a y
0 I 7 I I I 0229 3 02
MESSAGES
BT Paragon 400 Plus
D i a l / O K
Mic
Shift
4
Paragon 400 Plus ~ 3rd Edition ~ 5th August ’03 ~ 5290
Introduction
Your Paragon 400 Plus has been designed for ease of use and
made to the high standards set by BT.
Unpacking your Paragon 400 Plus
If anything is missing, please contact your place
of purchase immediately.
●
Paragon 400 Plus telephone
answering machine.
●
Handset and cord.
●
Plug mounted, 13 amp mains
adaptor.
●
Line cord.
●
Wall mounting plugs and screws.
●
Plinth for desk mounting
●
Remote access card.
Spare memory label.
You can expect your Paragon 400 Plus to give
you many years of trouble-free service.
Please read the instructions carefully before use
and keep this User Guide for future reference.
For your records
For guarantee purposes, proof of purchase is
required, so please keep your receipt.
Enter your Remote access PIN here
See page 19 for more information about your PIN.
Date of purchase:
Place of purchase:
Serial number
(on the underside of the telephone base):
Purchase price:
Remote access menu
Press to:
Hear main m
essage.
Play messages.
Repeat message and play
previous message.
Delete the m
essage being
played or delete all m
essages
at the end of playback.
Skip to next m
essage.
Play outgoing
message.
Record outgoing m
essage.
Answer on/off.
1
2
ABC
4
GHI
5
JKL
6
MNO
8
TUV
9
WXY
Z
0
Operating your P
aragon 400
from another telephone
To play back messages:
• Ring your answering machine as normal.
• Press
during the outgoing message.
You hear two beeps.
• Use the keypad to enter your security PIN.
Wait to hear the confirmation beep after
each digit.
• After the last digit, the prompt says:
“You
have X messages”
and begins to play them.
• You can now control your answering
machine by pressing the appropriate button
on the keypad.
(Please see ov
er)
INTR
ODUCTION