Hornady Lock-N-Load Ammo Plant User Manual
Page 8
4
5
6
Determine which shell plate is required
for your application
Refer to Appendix A
to determine the correct shellplate.
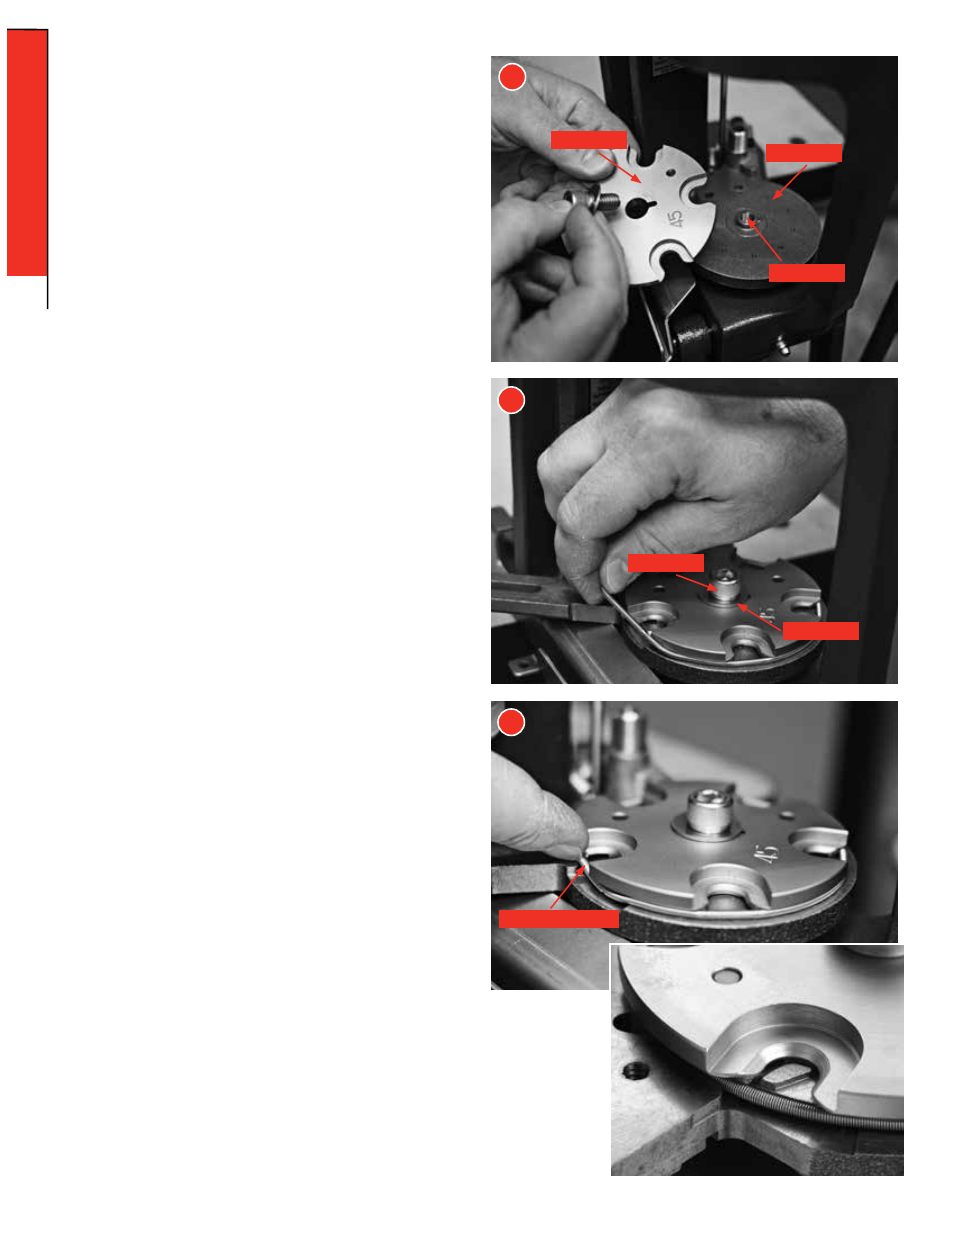
Installing the Shell Plate
Put a small amount of general-purpose grease on the Shell Plate Ball
Detents located on bottom side of Shell Plate, and on the top surface
of the Sub-Plate.
Align the Shell Plate (12) with the keyed Drive Hub.
Place the 3/8" Shell Plate Retainer Bolt (9) thru the 3/8" Flat Washer
(28), (large end up) and thread the bolt into the Drive Hub (29).
Gently tighten the bolt using a 5/16" Allen wrench.
DO NOT over-tighten bolt, as It may damage Drive Hub or Pawls.
Stretch the Case Retainer Spring (17) around the Shell Plate (12).
While cycling the Press, push the Case Retainer Spring into the
relieved area on the Sub-Plate.
You will have to cycle the press a couple of stations to achieve
these results.
Removing the Shell Plate
Use a 5/16" Allen wrench to remove the Bolt and shell plate. If the
bolt is over tightened, use the Hornady Lock-N-Load
®
Deluxe Die
Wrench (Item No. 396495 sold separately) to hold the shell plate
while loosening the Bolt. This will prevent damage to the Drive Hub
and/or Pawls.
4
5
Shell Plate
Retainer Bolt
Sub-Plate
Flat Washer
Drive Hub
Case Retainer Spring
6
- 8 -
ASSEMBLY: AP PRESS
ASSEMBL
Y