Philips PCVC720K99 User Manual
Page 14
6HWWLQJV
The camera properties can be changed from within an application, or independently by clicking the VProperty icon
which can be
found in the right hand part of the Windows taskbar at the bottom of your screen. Most applications can show a ’live preview’ video
image on your monitor. Always use this option to see the effect of changed settings on your screen.
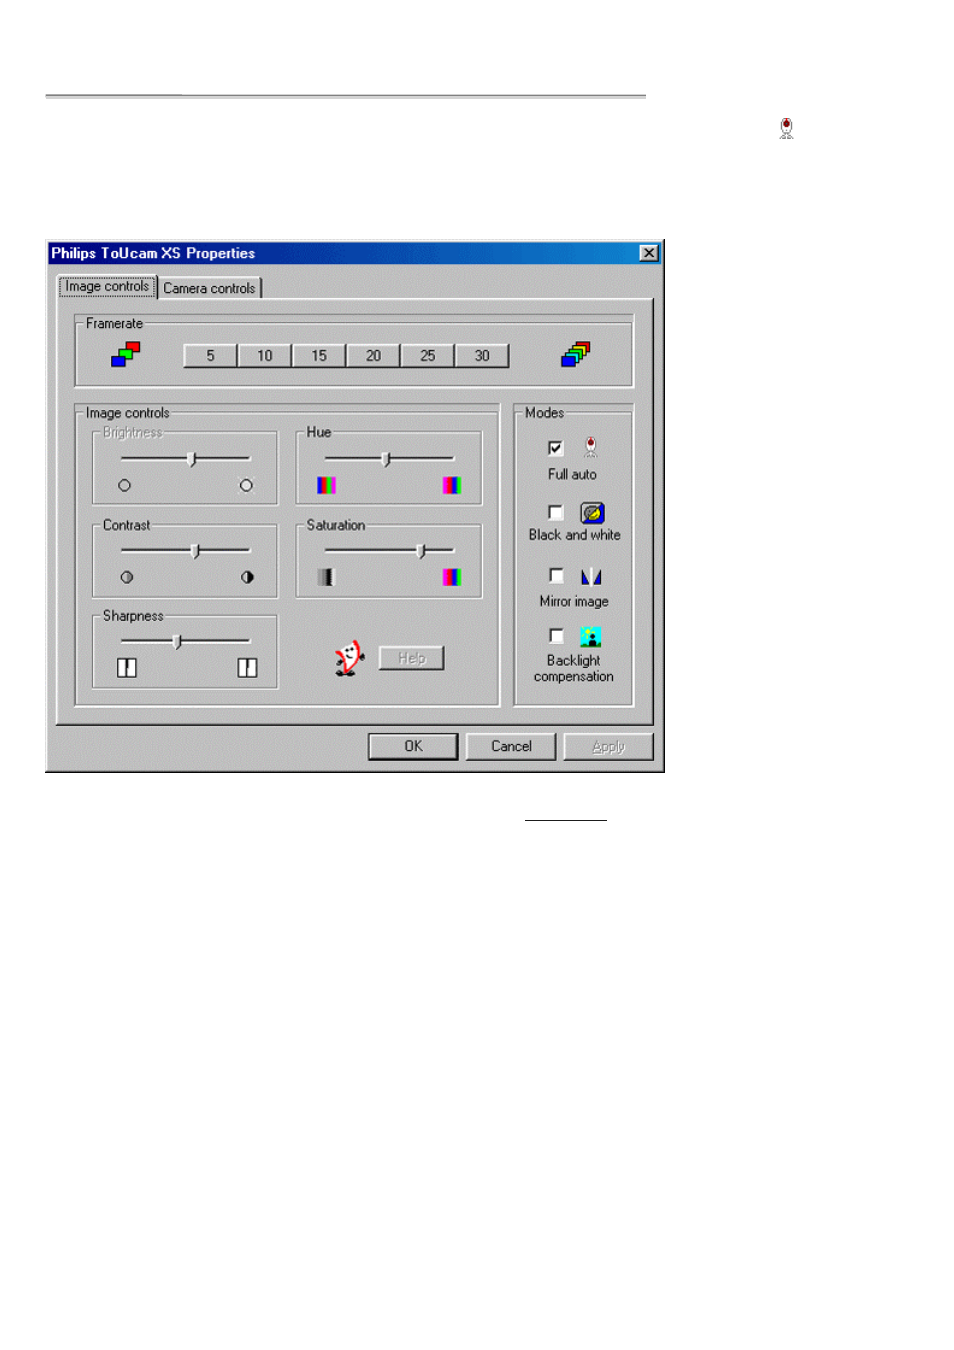
,PDJH &RQWUROV
The first property tab is marked ’Image Controls’.
)UDPH UDWH
The frame rate setting determines the number of images per second in the
video stream
.
The set of frame rates from which the user can choose depends on the currently selected video format (resolution) and the available
bandwidth on the USB bus (the number of devices connected to your USB port and the amount of data they transport). The buttons for
invalid frame rates will be greyed out automatically and cannot be selected. To enable higher frame rates choose a smaller video
image format in your application. Applications will usually offer resolution switching (image format setting) under menu items within the
applications themselves.
,PDJH &RQWUROV
Here you will find the slider controls for brightness, hue, contrast, saturation and sharpness. Note that the Brightness control is not
available when the Full auto setting is enabled. The Hue control is only available when the Full auto setting is enabled or when the Auto
White balance on the Camera controls tab is turned on.
0RGHV
The
)XOO $XWR PRGH
provides a very easy way to get the best out of your camera. Or you can choose to have maximum manual
control over the camera settings by switching the Full Auto mode off. Full Auto ’on’ is the preferred setting for normal use as it provides
automatic exposure control and automatic white balance control, to provide the best video possible.
The checkbox
%ODFN DQG ZKLWH
is used to switch from colour images to black & white and back.
By clicking the checkbox
0LUURU ,PDJH
, the image flips horizontally. This feature can be applied in order to use the camera and
monitor as a mirror, or for taking pictures of mirrored images.
Turn on the
EDFNOLJKW FRPSHQVDWLRQ
to improve the image quality when you have a scene where the background has a high
illumination level (for instance when you are sitting in front of a bright light).
&DPHUD &RQWUROV
The next tab is marked ’Camera Controls’.